Delicious Detour

  • Recipe Index
  • Subscribe
  • About
menu icon
go to homepage
  • Recipe Index
  • Subscribe
  • About
subscribe
search icon
Homepage link
  • Recipe Index
  • Subscribe
  • About
×
Home » Recipe Index

Easy Autumn Apple Crisp

November 3, 2026 by Yao Leave a Comment

a plate of apple crisp with a fork and apples and a skillet near by

There is nothing quite like the smell of warm cinnamon and baked apples filling your kitchen on a fall day. This Easy Autumn Apple Crisp is one of my favorite ways to use freshly picked apples and turn them into a simple, comforting homemade dessert.

I am a sucker for nostalgia. So when my teenagers asked me to go apple picking, I jumped! This year we headed to Kuiper's Family Farm where we harvested a variety of jonagold, snow sweet, empire and golden delicious apples. We only picked four pecks, which didn't seem like much, but it turned out to be more than what we would normally be able to eat. So I reverted to one of my favorite fruit desserts- apple crisp. So versatile and easier to make than pie. Use any variety of apples you have on hand, add a little cinnamon and sugar and a quick crumble topping and you got apple crisp!

Golden crumb topping on apple pie bar with crumb crust.
Savory-sweet apple crisp with crunchy streusel topping from Delicious Detour.

Ingredients

  • 8-10 apples, cored, peeled and sliced. Doesn’t have to be pretty
  • 2 Tablespoons minute tapioca 
  • 3 Tablespoons granulated sugar
  • 1 teaspoon cinnamon

For the crumble topping:

  • 1 cup flour (almond flour, or all purpose flour)
  • 1 cup oats - quick cooking oats or regular oats work
  • ¼ teaspoon salt
  • ½ cup coconut flakes (sweetened)
  • ½  teaspoon ground cinnamon
  • ⅔  cup light brown sugar
  • ½ cup melted butter, vegan butter or coconut oil

Why You'll Love This Recipe

  1. Simple ingredients:  Rustic and nothing fancy or hard to find.
  2. Flexible: Use whatever apples and flour you have available.
  3. Easy to adapt: Swap in almond flour to make it gluten-free.
  4. Easier to make than pie: No rolling out the crust, no fuss.
  5. A great way to use imperfect apples! It doesn't matter if apples are bruised.
Apple crisp on white plate with fork and baking pan nearby.
Delicious Detour apple crisp served on a white plate with apples and a spatula nearby.

How to Make Easy Autumn Apple Crisp

Time needed: 50 minutes

Preheat oven to 350F

  1. For the apples

    Place apple slices, 2 tablespoons of minute tapioca, 3 tablespoons granulated sugar and 1 teaspoon cinnamon in a large mixing bowl and stir until the apples are evenly coated.

  2. Arrange in a skillet or baking dish

    Spray cast iron pan or oven safe baking dish with cooking spray. Spread apples  evenly in the skillet or baking dish.

  3. Make the crumble topping

    Combine oats, cinnamon, coconut flakes, brown sugar, 1 cup flour and salt in a medium bowl. Add melted butter and stir with a fork until coarse crumbs form. Spread the crumb mixture on top of apples.Crisped oat crumble topping in a skillet on a light marble surface.

  4. Bake

    Bake at 350 degrees for 40-45 minutes until golden brown.Golden brown oat crumble topping in a skillet.

Serve it warm, perhaps with a scoop of vanilla ice cream, and you've got a simple homemade fall dessert!

Storage: Apple crisp is best eaten the same day it is made. Leftovers may be stored in the refrigerator for 1 to 2 days. Reheat in the air fryer at 350 degrees for 5 minutes or in the oven for 10 minutes to make it crispy again.

Looking for more easy dessert recipes? You have to check these out:

Gluten Free Peach Crisp

Fresh Blueberry Tart

Caramel Apple Pie Cookies

Apple crisp on white plate with fork and baking pan nearby.

Easy Autumn Apple Crisp

Make this easy autumn apple crisp with fresh apples, cinnamon, sugar, and a simple customizable topping. A cozy homemade fall dessert!
Print Recipe Pin Recipe
Nutrition Facts
Easy Autumn Apple Crisp
Amount per Serving
Calories
424
% Daily Value*
Fat
 
16
g
25
%
Saturated Fat
 
11
g
69
%
Trans Fat
 
0.5
g
Polyunsaturated Fat
 
1
g
Monounsaturated Fat
 
3
g
Cholesterol
 
31
mg
10
%
Sodium
 
174
mg
8
%
Potassium
 
306
mg
9
%
Carbohydrates
 
70
g
23
%
Fiber
 
7
g
29
%
Sugar
 
42
g
47
%
Protein
 
4
g
8
%
Vitamin A
 
454
IU
9
%
Vitamin C
 
8
mg
10
%
Calcium
 
42
mg
4
%
Iron
 
2
mg
11
%
* Percent Daily Values are based on a 2000 calorie diet.
Prep Time 15 minutes mins
Cook Time 40 minutes mins
Total Time 55 minutes mins
Course Baking, Dessert
Cuisine American
Servings 8 servings
Calories 424 kcal

Equipment

  • 1 12 inch cast iron skillet or oven safe baking dish
  • measuring cups
  • measuring spoons
  • wooden spoon or spatula for stirring
  • vegetable peeler
  • pairing knife
  • 1 fork

Ingredients
  

  • 8-10 apples cored, peeled and sliced. Doesn’t have to be pretty
  • 2 Tablespoons minute tapioca
  • 3 Tablespoons granulated sugar
  • 1 teaspoon cinnamon

for the crumble topping

  • 1 cup flour all-purpose flour or almond flour
  • 1 cup quick cooking oats
  • ½ cup coconut flakes sweetened
  • ¼ teaspoon salt
  • ½ teaspoon ground cinnamon
  • ⅔ cup light brown sugar
  • ½ cup melted butter vegan butter or coconut oil

Instructions
 

  • Preheat oven to 350℉
  • Place apple slices, 2 tablespoons of minute tapioca, 3 tablespoons granulated sugar and 1 teaspoon cinnamon in a large mixing bowl and stir until the apples are evenly coated.
  • Spray cast iron pan or oven safe baking dish with cooking spray. Spread apples evenly in the skillet or baking dish.

Make the crumble topping:

  • Combine oats, cinnamon, coconut flakes, brown sugar, 1 cup flour and salt in a medium bowl. Add melted butter and stir with a fork until coarse crumbs form.
  • Spread crumb mixture evenly on top of apples.
  • Bake at 350 degrees for 40-45 minutes until golden brown.

Notes

Substitutions:
This recipe will work for making other fruit crisps. Apples may be replaced with blueberries, or cherries-just omit the cinnamon.
Make it gluten-free: almond flour may be used in place of all purpose flour.

Nutrition

Calories: 424kcalCarbohydrates: 70gProtein: 4gFat: 16gSaturated Fat: 11gPolyunsaturated Fat: 1gMonounsaturated Fat: 3gTrans Fat: 0.5gCholesterol: 31mgSodium: 174mgPotassium: 306mgFiber: 7gSugar: 42gVitamin A: 454IUVitamin C: 8mgCalcium: 42mgIron: 2mg
Keyword apple recipes, apple recipes for autumn, easy fall apple dessert, gluten-free apple crisp, homemade apple crisp
Tried this recipe?Let us know how it was!
Click here to add your own private notes.

ThaI Chicken Khao Soi (Khao Soi Gai)

August 30, 2026 by Yao Leave a Comment

Bowl of Thai chicken coconut curry soup with herbs and lime wedges.
A flavorful bowl of Thai chicken coconut soup garnished with herbs, onions, and lime wedges for added zest.

If you love Thai food, but your experience has mostly been Pad Thai and spring rolls, let me introduce you to one of Northern Thailand’s most delicious dishes: Chicken Khao Soi. Now if you have never heard of it, I wouldn’t be surprised. My own Thai mother recently told me that she did not even know what Khao Soi was until a few years ago because it was not a dish she grew up with in the region where she was from. She had it for the first time at a Thai restaurant in Wisconsin!

What Is Khao Soi?

Pronunciation: kow-soy
Khao Soi is so different from many of the Thai dishes we typically see in American restaurants. It is a dish that is closely associated with Chiang Mai, a city in Northern Thailand. It is a curry noodle soup made with a fragrant coconut curry broth, tender chicken and noodles. What sets it apart is the way the noodles are prepared: some are cooked until soft and tossed into the curry, while others are fried until golden and crispy to create the signature topping.

Delicious Thai chicken curry soup garnished with herbs and crispy onions, served with lime wedges.


There are many versions of Khao Soi, everyone has their own adaptation, using ingredients that are readily available. The original recipe is somewhat of a mystery as this soup is more of an evolution of a curry soup dish originating from China or Burma. My recipe is no exception, I’ve tweaked the recipe, using ingredients that are easier to find at western supermarkets. The result is a bowl that is creamy, savory and slightly spicy coconut curry broth filled with slurpable noodles. Add thinly sliced shallots and a little cilantro and garlic chili crisp and you have a dish with layers of flavor and texture in every bite. Pickled mustard greens are traditionally used for topping but if you can’t find it, you can go without.


I’ve been working on perfecting recipe for Chicken Khao Soi (Khao Soi Gai) for months. This may be the best Khao Soi not served in a restaurant! With a little prep work and planning, it's not that complicated to make. The result is a happy bowl of coconut curry noodle soup with complex flavors made with love. Enjoy!

Ingredients

  • chicken drumsticks or 4 boneless skinless chicken thighs
  • neutral oil for frying
  • peeled ginger root
  • Thai birdseye chili pepper (or omit if you want less spice)
  • ground turmeric
  • ground cardamon
  • red curry paste
  • shrimp paste
  • kaffir lime leaves or zest and juice of 1 lime
  • water
  • small shallots
  • chicken or vegetable broth
  • canned full fat coconut milk
  • fish sauce
  • dark soy sauce
  • brown sugar or palm sugar
  • Chinese egg noodles

Garnishes: Cilantro, sliced shallots, garlic chili crisp, pickled mustard greens (optional), crispy fried noodles, lime wedges.

How to Make Thai Chicken Khao Soi (Khao soi Gai)

Time needed: 1 hour

  1. Khao Soi noodles

    Boil the egg noodles until they are el dente. Drain and set aside. Set aside a handful of cooked noodles to use for the crispy fried noodles for the topping.

    Make crispy fried noodles: Fry a handful of noodles over medium heat for 30 seconds to 1 minute until golden, flipping half way. Drain on paper towels.crispy brown fried egg noodles in a clear container

  2. Make curry paste

    Combine ginger root, turmeric, cardamon, red curry paste, shrimp paste, lime leaves(or zest and juice of 1 lime), water and shallots. Set aside.spices and curry paste in a food processor

  3. Brown

    To a large pot, brown the chicken drumsticks in the oil over medium heat. Rotate the pieces so each side gets brown. You do not need to cook them all the way through. If using boneless skinless chicken thighs, cut the meat into large bite sized pieces and brown.
    Remove the chicken from the pot and set aside.Chicken drumsticks being cooked in a pan for a tasty recipe.

  4. Make the soup

    Add 1 tablespoon of oil and then the curry paste to the pot and stir for a few seconds until fragrant. Add the coconut milk, chicken or vegetable broth and chicken. Stir in the fish sauce, dark soy sauce and sugar. Simmer for 30 minutes.a pot of Thai curry soup with chicken drumsticks

  5. Prep the garnishes

    While the soup is simmering, slice the shallots, wash and trim the cilantro, you can keep the stems or use just leaves, your preference. Cut 1 lime into wedges. Note: If you can find pickled mustard greens, that’s great, but if not, your soup is still going to be delicious.

  6. Serve

    Place a handful of egg noodles into each bowl. Ladle in the soup. Garnish with cilantro, shallots, crispy fried noodles, garlic chili crisp, lime wedges and pickled mustard greens if you like.Thai curry soup with chicken, herbs, and noodles in a white bowl.

Vegetarian Khao Soi

It is easy to adapt this recipe to make it vegetarian. Just swap the chicken for tofu and use vegetable broth instead of chicken broth. Drain 1 block of tofu and cut into bite sized cubes. Toss the cubes with a tablespoon of cornstarch and then brown in a little bit of oil. Next, add it to the coconut curry broth. Reduce the simmer time to 15 minutes.

If you love this recipe, check out my other Thai recipes:
Thai Beef Salad (Yum Nua)
Chicken Larb (Larb Gai)
Thai Chicken and Pumpkin Curry

Thai curry soup with chicken, herbs, and noodles in a white bowl.

Thai Chicken Khao Soi (Khao Soi Gai)

Bring a taste of Chiang Mai home with this easy Chicken Khao Soi recipe, a creamy Northern Thai curry noodle soup topped with crispy noodles
Print Recipe Pin Recipe
Nutrition Facts
Thai Chicken Khao Soi (Khao Soi Gai)
Serving Size
 
1 serving
Amount per Serving
Calories
778
% Daily Value*
Fat
 
64
g
98
%
Saturated Fat
 
28
g
175
%
Trans Fat
 
0.2
g
Polyunsaturated Fat
 
10
g
Monounsaturated Fat
 
21
g
Cholesterol
 
265
mg
88
%
Sodium
 
2214
mg
96
%
Potassium
 
791
mg
23
%
Carbohydrates
 
11
g
4
%
Fiber
 
1
g
4
%
Sugar
 
5
g
6
%
Protein
 
42
g
84
%
Vitamin A
 
1960
IU
39
%
Vitamin C
 
6
mg
7
%
Calcium
 
104
mg
10
%
Iron
 
7
mg
39
%
* Percent Daily Values are based on a 2000 calorie diet.
Prep Time 30 minutes mins
Cook Time 30 minutes mins
Total Time 1 hour hr
Course Main Course
Cuisine Thai
Servings 4 servings
Calories 778 kcal

Equipment

  • 1 food processor
  • 1 large pot or dutch oven
  • 1 zester or fine grater
  • 2 cutting boards one for vegetables and one for chicken
  • 1 ladle
  • 1 wooden spoon
  • 4 serving bowls
  • 1 chef's knife
  • 1 measuring spoons
  • 1 can opener
  • 1 small frying pan

Ingredients
  

  • 5 nests Chinese egg noodles dried or frozen
  • 6 chicken drumsticks or 4 boneless skinless chicken thighs cut into large bite sized pieces
  • 3 Tablespoons neutral oil separate into 2 Tablespoons and 1 Tablespoon
  • 1 inch ginger root peeled
  • 1 Thai birds-eye chili pepper can use 1-2 chilis or omit completely based on spice level preference
  • 2 teaspoons ground tumeric
  • 1 teaspoon ground cardamon
  • 3 Tablespoons red curry paste
  • 2 Tablespoons shrimp paste found at Asian grocery stores or international aisle of some large supermarket chains in U.S.
  • 3 kaffir lime leaves or zest and juice of 1 lime
  • 2 small shallot
  • 1 Tablespoon water
  • 14 ounce full fat coconut milk canned
  • 28 ounces chicken broth or vegetable broth
  • 2 Tablespoons fish sauce
  • 1 Tablespoon dark soy sauce
  • 2 teaspoons brown sugar or palm sugar
  • neutral oil for frying

Garnishes

  • crispy fried egg noodles
  • sliced shallots
  • cilantro
  • garlic chili crisp
  • lime wedges
  • pickled mustard greens (optional) found at Asian grocery stores or international aisle of some large supermarket chains in U.S.

Instructions
 

  • Khao Soi noodles: Boil the egg noodles and cook according to package directions or until they are el dente. Drain and set aside. Reserve a handful of cooked noodles to use for the crispy fried noodles for the topping.
    Make crispy fried noodles: Heat ½ cup vegetable oil in a small frying pan. Fry the handful of noodles over medium heat for 30 seconds to 1 minute until golden, flipping half way. Drain on paper towels.
  • Make the curry paste: Combine ginger root, turmeric, cardamon, red curry paste, shrimp paste, lime leaves(or zest and juice of 1 lime), shallots and water. Set aside.
  • Brown: To a large pot, brown the chicken drumsticks in 2 Tablespoons of oil over medium heat. Rotate the pieces so each side gets brown. You do not need to cook them all the way through. If using boneless skinless chicken thighs, cut the meat into large bite sized pieces and brown.
    Remove the chicken from the pot and set aside.
  • Make the Soup: Add 1 tablespoon of oil and then the curry paste to the pot and stir for a few seconds until fragrant. Add the coconut milk, chicken or vegetable broth and chicken. Stir in the fish sauce, dark soy sauce and sugar. Simmer for 30 minutes if using chicken drumsticks. Simmer for 15-20 minutes if using boneless chicken thighs.
  • Prep the garnishes: While the soup is simmering, wash and prep the garnishes: slice the shallots, wash and trim the cilantro, you can keep the stems or use just leaves, your preference. Note: If you can find pickled mustard greens, that’s great, but if not, your soup is still going to be delicious.
  • Serve: Place a handful of egg noodles into each bowl. Ladle in the soup. Garnish with cilantro, shallots, crispy fried noodles, garlic chili crisp, lime wedges and pickled mustard greens if you like.

Notes

Nutritional information is an estimate not including garnishes.
 

Nutrition

Serving: 1servingCalories: 778kcalCarbohydrates: 11gProtein: 42gFat: 64gSaturated Fat: 28gPolyunsaturated Fat: 10gMonounsaturated Fat: 21gTrans Fat: 0.2gCholesterol: 265mgSodium: 2214mgPotassium: 791mgFiber: 1gSugar: 5gVitamin A: 1960IUVitamin C: 6mgCalcium: 104mgIron: 7mg
Keyword chicken recipes, khao soi, soup recipes, thai food
Tried this recipe?Let us know how it was!
Click here to add your own private notes.

Easy Brazilian Limeade

August 14, 2026 by Yao Leave a Comment

Three glasses of Brazilian limeade garnished with lime slices
A glass of creamy limeade with lime slices on a wooden cutting board

It's been a really, really hot summer around here. I'm talking tropical hot-sticky, humid days when you sweat just standing still and doing absolutely nothing. On days like this, I want a drink that is cold, refreshing, and easy to whip up in a few minutes.

My usual summer drink of choice is store-bought limeade. But recently, I was in the mood to experiment with fresh limes. I started looking for something a little different and discovered Brazilian Limeade. This is the best drink I have come across this year! It's traditionally made with whole limes but I had to put my spin on it to make even better (in my opinion)!

What is Brazilian Limeade?

Despite its name, you may also see Brazilian Limeade called Brazilian Lemonade. The name is a bit of a misnomer because it isn't made with lemons at all. At least not traditionally. The limes provide a bright, tart flavor, while sweetened condensed milk adds just enough sweetness and a creamy texture.

two glasses of Brazilian limeade


I experimented with different ratios of fresh lime juice, whole limes, sugar, and sweetened condensed milk until I finally landed on the combination I liked best. What makes my Brazilian Limeade recipe a little different is that I use only two whole limes and fresh lime juice for the rest. Blending too many whole limes can release more of the white pith, which can make the drink bitter. Using just two whole limes gives you that fresh lime flavor without overpowering the drink with bitterness.


The result? A cold, creamy, perfectly balanced lime drink that comes together in minutes with a blender and a handful of simple ingredients. It’s the perfect drink to quench your thirst on a hot summer day. Enjoy!

Ingredients

  • 6 limes- washed and scrubbed
  • 3.5 cups cold water
  • 3 cups ice
  • 14 ounces sweetened condensed milk
  • ¼ cup sugar

lime wedges and a can of sweetened condensed milk

How to Make Easy Brazilian Limeade

Time needed: 10 minutes

  1. Cut and squeeze

    Cut 4 limes in half. Use a citrus juicer to squeeze the juice of the limes into the pitcher of a high powered blender. Discard the leftover rinds, pulp and pith (the white stuff).

  2. Add 2 whole limes

    Cut the ends off of the two remaining limes just to remove any hard brown areas and then cut the limes into quarters. Add the limes to the pitcher of lime juice. Add 3.5 cups of water and blend on high for 2 minutes.

  3. Strain

    Pour the mixture through a fine mesh strainer with a clean bowl or pitcher underneath to catch the juice. You will discard all the solid lime bits caught in the strainer.lime pulp and ground rinds caught in a strainer

  4. Add sugar and condensed milk

    Rinse out the blender pitcher to remove any lime pieces or pulp. Pour the lime juice mixture back into the pitcher and add the sweetened condensed milk, sugar and ice.

  5. Blend and serve

    Blend on high for 2 minutes. Serve over ice and garnish with lime slices or wedges.glasses of Brazilian limeade on a cutting board with lime slices and a citrus juicer

If you are enjoying my Brazilian Limeade, be sure to check out more recipes made with limes: Coconut Mojito and The Best Coconut Lime Cookies!

If you make this, please let me know how it turns out by leaving a rating and comment.

Three glasses of Brazilian limeade garnished with lime slices

Easy Brazilian Limeade

Got limes? Easy Brazilian Limeade is a creamy, refreshing drink made with fresh limes, sweetened condensed milk, and sugar that’s perfect for hot summer days.
Print Recipe Pin Recipe
Nutrition Facts
Easy Brazilian Limeade
Serving Size
 
1 glass
Amount per Serving
Calories
406
% Daily Value*
Fat
 
9
g
14
%
Saturated Fat
 
5
g
31
%
Polyunsaturated Fat
 
0.4
g
Monounsaturated Fat
 
2
g
Cholesterol
 
34
mg
11
%
Sodium
 
147
mg
6
%
Potassium
 
471
mg
13
%
Carbohydrates
 
79
g
26
%
Fiber
 
3
g
13
%
Sugar
 
70
g
78
%
Protein
 
9
g
18
%
Vitamin A
 
315
IU
6
%
Vitamin C
 
32
mg
39
%
Calcium
 
327
mg
33
%
Iron
 
1
mg
6
%
* Percent Daily Values are based on a 2000 calorie diet.
Prep Time 10 minutes mins
Cook Time 0 minutes mins
Total Time 10 minutes mins
Course Drinks
Cuisine Brazilian
Servings 4 servings
Calories 406 kcal

Equipment

  • 1 citrus juicer
  • 1 high powered blender
  • 1 mesh strainer
  • 1 pitcher
  • 4 drinking glasses 8 ounce
  • 1 can opener

Ingredients
  

  • 6 limes washed and scrubbed
  • 3.5 cups water
  • 3 cups ice
  • 14 ounces sweetened condensed milk
  • ¼ cup sugar

Instructions
 

  • Cut 4 limes in half. Use a citrus juicer to squeeze the juice of the limes into a pitcher of a high powered blender. Discard the leftover rinds, pulp and pith (the white stuff).
  • Cut the ends off of the two remaining limes just enough to remove any hard brown areas and then cut the limes into quarters. Add the limes to the pitcher of lime juice.Then Add 3½ cups of water. Blend on high for 2 minutes.
  • Pour the mixture through a fine mesh strainer with aclean bowl or pitcher underneath to catch the juice. You will discard any solid lime bits caught in the strainer.
  • Rinse out the blender pitcher with water to remove any lime pieces or pulp. Pour the lime juice mixture back into the pitcher and add the sweetened condensed milk, sugar and ice.
  • Blend on high for 2 minutes. Pour into glasses- serve over ice and garnish with limes slices or wedges.

Nutrition

Serving: 1glassCalories: 406kcalCarbohydrates: 79gProtein: 9gFat: 9gSaturated Fat: 5gPolyunsaturated Fat: 0.4gMonounsaturated Fat: 2gCholesterol: 34mgSodium: 147mgPotassium: 471mgFiber: 3gSugar: 70gVitamin A: 315IUVitamin C: 32mgCalcium: 327mgIron: 1mg
Keyword Brazilian, condensed milk, limeade, limes
Tried this recipe?Let us know how it was!
Click here to add your own private notes.

Almond Flour Chocolate Olive Oil Cake

July 19, 2026 by Yao Leave a Comment

Almond flour chocolate olive oil cake topped with raspberries

Rich, Moist Chocolate Olive Oil Cake with a Silky Ganache

I have a confession- I am not a big cake fan.  I don’t like a lot of frosting and I don’t like dry cake. So, when I develop a cake recipe, I make sure that the cake comes out moist, flavorful and well worth the calories. The inspiration for this recipe is simple- I have a lot of birthday celebrations coming up!

Introducing my Chocolate Olive Oil Cake- its moist and chocolatey with just the right amount of sweet. Almond flour and olive oil are key ingredients to creating a moist crumb and just the right amount of Dutch process cocoa powder and sugar creates a sweet but not overly sweet chocolate cake. To top it all off,  a thin layer of silky ganache is my substitute for sugary frosting.

Whether you're celebrating a birthday, hosting friends, or simply craving an afternoon treat with coffee, this is the chocolate cake I keep coming back to.

chocolate cake topped with ganache and raspberries

Why You'll Love This Chocolate Olive Oil Cake

If you're searching for the perfect moist chocolate olive oil cake recipe, here's why this one stands out:

  • Rich chocolate flavor without being overly sweet
  • Almond flour is used so it is naturally gluten-free
  • Olive oil creates an incredibly tender, moist crumb
  • A simple chocolate ganache adds just the right finishing touch
  • Easy enough for a weeknight dessert but elegant enough for celebrations
  • Even people who "aren't cake people" love it
  • Can easily be made dairy free- see frequently asked questions

Why Olive Oil Makes a Better Chocolate Cake

Olive oil is one of my favorite baking ingredients because it creates a cake that stays moist for days. Unlike butter, which firms up as it cools, olive oil keeps the crumb soft and tender while adding subtle richness that pairs beautifully with chocolate.

The result is a cake that's fudgy, light, and never dry.

Ingredients

  • 4 eggs
  • ½ cup olive oil
  • 2 Tablespoons milk
  • 2 cups almond flour
  • 1 teaspoon baking powder
  • ½ teaspoon baking soda
  • ½ teaspoon salt
  • 1 ½ cup sugar
  • ½ cup dutch process coca
  • 1 teaspoon vanilla

Ganache

  • 1 cup semisweet chocolate chips
  • ½ cup cream

How to Make Almond Flour Chocolate Olive Oil Cake

Time needed: 1 hour and 5 minutes

Preheat Oven to 350 degrees

  1. Wet ingredients

    In a large mixing bowl whisk together eggs, olive oil and milk. 

  2. Dry ingredients

    In a medium bowl whisk together almond flour, baking powder, baking soda, and salt. Add the almond flour mixture, sugar, cocoa and vanilla to the large bowl and mix until just combined.brown chocolate cake batter in a blue mixing bowl with spatula

  3. Pour into cake pan

    Line the bottom of an 9 inch round cake pan with parchment paper and spray with cooking spray. Pour in the cake batter.unbaked chocolate cake batter in a round pan

  4. Bake

    Bake at 350 degrees on the center rack for 45 minutes or until a toothpick inserted in the middle comes out clean.

  5. Cool

    Cool for at least 30 minutes before topping with ganache.

  6. For the ganache

    Once the cake cools, make the ganache. Pour chocolate chips and cream in a medium glass bowl. Microwave on high for 30 seconds and stir. Repeat this process 2 or three more times until chocolate is melted and smooth. melted chocolate chips and cream in a glass bowl

  7. Spread

    Spread the ganache on top of the cake. Let it run down the sides.  Let it sit for 30 minutes to firm up.chocolate ganache partly spread on top of chocolate cake

Serving Ideas

This cake is wonderful all on its own, but it's equally delicious served with:

  • Fresh raspberries or strawberries
  • A dollop of lightly whipped cream
  • Vanilla ice cream
  • A hot cup of coffee or espresso

Tips for the Best Chocolate Olive Oil Cake

  • Use good-quality cocoa powder for the richest chocolate flavor.
  • Don't overmix the batter once the dry ingredients are added.
  • Allow the cake to cool before spreading on the ganache for a smooth finish.
  • Store covered at room temperature for several days to keep it perfectly moist.
  • Don't open the oven door while its baking until its time to check for doneness- this will cause the middle to sink.
a forkful of moist chocolate cake

Frequently Asked Questions

Can this be made dairy free?

Of course! Instead of using dairy milk in the cake batter, you can use plant based milk such as soy, oat or coconut. And for the ganache- substitute  semi-sweet chocolate chips for dairy-free chocolate chips and swap olive oil or coconut oil for the heavy cream.

Does olive oil make cake taste like olive oil?

Not at all. A good-quality olive oil adds richness and moisture without overpowering the chocolate. I've used extra virgin olive oil and regular olive oil, they both work.

Can I prepare this cake ahead of time?

Absolutely. In fact, many people find the flavor is even better the next day after the ganache has set.

More Olive Oil Cakes You'll Love

If you love this Chocolate Olive Oil Cake, be sure to try my Lemon and Pistachio Olive Oil Cake. It's bright, citrusy, and just as incredibly moist, making it the perfect spring and summer dessert. Together, these two recipes prove that olive oil belongs in every baker's pantry.

Whether you're someone who loves cake or someone like me who rarely gets excited about it, I hope this recipe changes your mind.

Almond flour chocolate olive oil cake topped with raspberries

Almond Flour Chocolate Olive Oil Cake

This Almond Flour Chocolate Olive Oil Cake is rich, moist and topped with a silky chocolate ganache. An easy chocolate cake that's perfect for any occasion.
Print Recipe Pin Recipe
Nutrition Facts
Almond Flour Chocolate Olive Oil Cake
Serving Size
 
1 slice
Amount per Serving
Calories
450
% Daily Value*
Fat
 
28
g
43
%
Saturated Fat
 
8
g
50
%
Trans Fat
 
0.02
g
Polyunsaturated Fat
 
2
g
Monounsaturated Fat
 
9
g
Cholesterol
 
67
mg
22
%
Sodium
 
211
mg
9
%
Potassium
 
174
mg
5
%
Carbohydrates
 
46
g
15
%
Fiber
 
5
g
21
%
Sugar
 
36
g
40
%
Protein
 
8
g
16
%
Vitamin A
 
237
IU
5
%
Vitamin C
 
0.1
mg
0
%
Calcium
 
91
mg
9
%
Iron
 
2
mg
11
%
* Percent Daily Values are based on a 2000 calorie diet.
Prep Time 20 minutes mins
Cook Time 45 minutes mins
Total Time 1 hour hr 5 minutes mins
Course Baking
Cuisine American
Servings 12 slices
Calories 450 kcal

Equipment

  • 1 large mixing bowl
  • 1 medium mixing bowl
  • 1 medium glass bowl or other medium size microwave safe bowl
  • parchment paper
  • toothpick
  • cooking spray
  • 2 rubber spatulas
  • 1 9 inch round cake pan
  • 1 microwave oven

Ingredients
  

  • 4 eggs
  • ½ cup olive oil extra virgin or regular- your preference
  • 2 Tbs milk dairy, almond, oat or soy
  • 2 cups almond flour
  • 1 teaspoon baking powder
  • ½ teaspoon baking soda
  • ½ teaspoon salt
  • 1½ cups sugar
  • ½ cup dutch processed cocoa
  • 1 teaspoon vanilla extract

For the ganache

  • 1 cup semi-sweet chocolate chips or dairy free chocolate chips
  • ½ cup heavy cream or olive oil or melted coconut oil*

Instructions
 

  • Preheat oven to 350℉
  • In a large mixing bowl whisk together eggs, olive oil and milk.
  • In a medium bowl whisk together almond flour, baking powder, baking soda and salt.
  • Add the almond flour mixture, sugar, cocoa and vanilla to the large bowl and mix until just combined.
  • Line the bottom of an 9 inch round cake pan with parchment paper and spray with cooking spray. Pour in the cake batter.
  • Bake at 350 degrees on the center rack for 45 minutes or until a toothpick inserted in the middle comes out clean. Cool for  at least 30 minutes.

For the Ganache

  • Pour chocolate chips and cream in a medium glass bowl. Microwave on high for 30 seconds and stir. Repeat this process 2 or three more times until chocolate is melted and smooth.
    Spread the ganache on top of the cake. Let it run down the sides. Let it sit for 30 minutes to firm up.

Notes

This Chocolate Olive Oil Cake is naturally gluten free and can easily be made dairy free:
 *Instead of using dairy milk in the cake batter, you can use plant based milk such as soy, oat or coconut. And for the ganache- substitute  semi-sweet chocolate chips for dairy-free chocolate chips and swap olive oil or coconut oil for the heavy cream. Start with adding 2 tablespoons of oil at at time until you get the desired consistency. 

Nutrition

Serving: 1sliceCalories: 450kcalCarbohydrates: 46gProtein: 8gFat: 28gSaturated Fat: 8gPolyunsaturated Fat: 2gMonounsaturated Fat: 9gTrans Fat: 0.02gCholesterol: 67mgSodium: 211mgPotassium: 174mgFiber: 5gSugar: 36gVitamin A: 237IUVitamin C: 0.1mgCalcium: 91mgIron: 2mg
Keyword almond flour, chocolate olive oil cake, gluten free
Tried this recipe?Let us know how it was!
Click here to add your own private notes.

The Big Island of Hawaii: Where to Eat, What to See and Insider Travel Tips

June 8, 2026 by Yao Leave a Comment

Kilauea prior to erupting at Volcanoes National Park
palm trees with the ocean and buildings in the background
A view of palm trees and the Royal Kona Resort in Kona

Aloha!

Are you planning a trip to the Big Island of Hawaii and wondering where to eat between adventures? Having just returned from this incredible island, I'm sharing some favorite stops, local eats, and helpful tips to make the most of your visit.

The Island of Hawaii-better known as the Big Island, is unlike any other Hawaiian island. It's the only island where you can experience active volcanoes, dramatic waterfalls, black and green sand beaches, coffee farms, chocolate tastings, vanilla farms, world-class snorkeling, farmers markets, and incredible local food all in one destination.

Hawaii is also one of the most ethnically diverse states in the U.S., and that diversity is reflected in its food. From Hawaiian and Japanese influences to Portuguese, Filipino, Thai, and Mexican flavors, every meal feels like a delicious adventure. Make sure to check out my recipe for Huli Huli Chicken which was inspired by this trip!

Why We Chose the Big Island

Kilauea prior to erupting at Volcanoes National Park
Volcanoes National Park on Hawaii

The Big Island offers an incredible variety of landscapes and experiences. There is no other place in the States where you can see volcanoes, explore caves, snorkel among manta rays, visit coffee farms, see waterfalls, and, of course, discover great local food along the way. There were so many activities to choose from, we knew we had to prioritize and plan our days strategically. That meant visiting Volcanoes National Park (we were there two days before a big eruption!), ‘Akaka Falls, Mauna Kea Observatory and relaxing at Kamakahonu Beach near our rental. So, if you are planning to go, you will want to make  a must do list and schedule enough down time to relax in between. Sometimes doing less is better than overscheduling on the Big Island. 

Things to Know Before You Go

You Will Need a Car

The Island of Hawaii is called the Big Island for a reason. As the youngest Hawaiian island, it covers roughly the same area as the states of Rhode Island and Delaware combined.

Whether you choose Kona, Hilo, or somewhere in between as your home base, you'll need a car to explore. Expect to drive at least two hours to get from one side of the island to the other, and often an hour or more to reach many attractions.

A Jeep or four-wheel-drive vehicle is highly recommended for navigating the steep roads, especially if you plan to drive up to the Mauna Kea Observatory. 

The Saddle Road

The Saddle Road provides the most direct route between Kona and Hilo. The drive is beautiful, but be aware that significant elevation changes occur along the way. Some travelers may notice pressure changes affecting their ears or feel the effects of the higher elevation. There aren’t many gas stations or restrooms along the way, so be sure to fill up the gas tank and empty your bladder when you can! There is only one rest area that we found, which was Mauna Kea State Recreation Area.

Watch for Wildlife

Wild goats roam freely throughout parts of the island and are often spotted near roadsides. You'll also see signs warning drivers about the endangered nēnē, Hawaii's state bird. Other animals commonly seen include mongoose and, of course, plenty of chickens.

a wild brown goat with big horns lying on a rock
Wild goats roam freely on Hawaii

Pack for Multiple Weather Conditions

One of the most surprising things about the Big Island is how dramatically the weather changes depending on where you are. Your day might start out being 80 degrees and sunny but if you are headed to the rain forest or volcanoes, it is not unusual to experience a flash rainfall or a   20 degree or more drop in temperature. 

Where to Stay on The Big Island

Kailua-Kona was our home base and offered easy access to beaches, snorkeling, and plenty of great restaurants.We chose a bright and modern condo rental within walking distance to Ali’i Drive. Here are some quick points to help you decide where to stay during your vacay:

West Side: Kailua-Kona

  • Sunny and dry
  • Sandy beaches
  • Convenient access to many snorkeling spots
  • Great for vacation rentals to fit your budget
  • Ali’i Drive is the main coastal street where you will find plentiful dining options, historical landmarks, sandy beaches and touristy shops.

Northwest Side: Kohala Coast

  • Sunny and dry but may but windier than 
  • Sandy beaches
  • Luxury resorts and golf courses
  • White sand beaches
  • Convenient snorkeling spots
  • Close to helicopter tours

East Side :Hilo

  • Rainier and more lush
  • Cooler temperatures
  • Closer to Akaka Falls and Hawaii Volcanoes National Park and Kaumana Caves and other lava tubes, zip lining
  • Excellent for nature lovers
  • Nice variety of local shops and restaurants

South Side

  • Home to Green Sand Beach and Punaluʻu Black Sand Beach
  • More remote and less developed
  • Dramatic sea cliffs
  • Warm and breezy with frequent cloud cover 
  • Not many hotels although you will find vacation rentals but plan to bring supplies as not much retail around
Driving along the southeast coast of Hawaii

Where to Eat and What to See on the Big Island

Here is a quick run down of the places we ate and drank and explored.

Best Coffee in Hawaii

Hawaii is a coffee lover’s paradise. Here you will find more than a dozen coffee roasters. We did not have time to sample or tour them all but here are the ones we visited.

Krau Coffee-A fantastic local coffee stop that also offers breakfast  has earned recognition from Starbucks Reserve. Coffee lovers should make this a priority.

Kona Mountain Coffee-A teal colored building on the corner of Queen and drive. They offer coffee samples while you wait in line. They sell coffee, chocolate and other gift items but know that they do not offer breakfast items. 

Kohala Coffee Company-A cozy stop in North Kohala serving quality coffee, bagels and sandwiches and shaken iced teas. 

Where to Eat in Kona

Kona Brewing Company- Go there for pizza and of course beer. Kona Brewing Company is a fun stop for lunch or dinner. Whether you choose one of their specialty pizzas or stick with a classic pepperoni, the crust is excellent and pairs perfectly with a cold local beer. The Kohala and The Captain pizzas were our favorite!

Journey Café Big Island-For some really good vegetarian options and healthy breakfast. Located toward the back of Kona Marketplace on Aliʻi Drive. We ordered the Monster Mash Crepe, Loaded Chili Potato Bowl, BBQ Chicken Wrap and Ube late. Everything we ordered was fresh, flavorful and satisfying. 

Gecko Girlz Shave Ice- One of many great options for our favorite Hawaiian treat. One order is a mountain high portion, enough to feed two people. A perfect stop when you need to cool off after a morning in the sun.

Kona Wave Café-For Acai Bowls. Known for generous portions and a wide variety of açaí bowls, this is a great breakfast or snack stop before heading to the beach.

Arise Bakery-This bakery came highly recommended on several travel sites. Unfortunately, we attempted to visit twice and found it closed both times. If you're luckier than we were, it's a place to check out for breakfast, baked goods and coffee but check their hours before visiting.

Where to Eat Near ‘Akaka Falls

a very steep waterfall with mist on the side of a lush green cliff
'Akaka Falls

A visit to Akaka Falls is one of the highlights of the Hilo side of the island. After walking through the lush rainforest and viewing the spectacular waterfall, you'll likely be ready for a meal.

Ed's Bakery-A local favorite serving baked goods and snacks. Bonus: there is a public restroom available.

Hamakua Toffee Company-If you love toffee, this is the place to stop. Toffee is the only thing they make, but their store also has a a fun diorama of the main street you drive through on your way to the falls.

Aloha General Store-A great casual stop that offers smashburgers, acai bowls and shave ice,

Big Island Birria Tacos-one of our favorite meals near Akaka Falls. The portions are generous, and the birria tacos were fantastic and worth with the mess. Get there before they close at 5:00!

South Side Near Black Sand Beach

Punaluʻu Bake Shop-Located on the southern part of the island, Punaluʻu Bake Shop is well worth a stop for breakfast, lunch, or a sweet treat before continuing on to the park. The bakery is known for its freshly baked Hawaiian sweet bread, sandwiches, and local-style plate lunches.

Whatever you do, don't leave without trying the malasadas! These Portuguese-inspired doughnuts come in a variety of flavors, making it hard to choose just one. We sampled several flavors and can confirm they're worth the stop.

The outdoor seating area and tropical gardens make this a relaxing place to take a break from the drive before heading to one of Hawaii's most iconic national parks.

Captain Cook

black rocky beach with clear blue water
a rocky beach near Captain Cook

Captain Cook offers a mix of history, shopping, farm tours, and excellent food.

You'll find:

  • Vintage shops
  • Farm tours
  • Local theaters
  • Easy access to some of the island's best snorkeling

If you're snorkeling at:

  • Kealakekua Bay
  • Two Step
  • Kealakekua Bay State Historical Park

Be sure to stop for lunch nearby.

Bee's Phuket Thai Kitchen-This food tent served some of the best Thai food we found anywhere on the island. Everything tasted fresh, authentic, and made to order.

Shaka Tacoz-With two locations on the island, Shaka Tacoz became our favorite taco stop. We visited the Captain Cook location. This skater-surfer shack may be low on decor but the tacos are delicious! We tried the pork birria tacos and the Shaka original. 

Honokaʻa

a Westen style boutique storefront painted with colorful hibiscus flowers
Honokaa Market Place

One of the most charming towns we visited, Honokaʻa feels like stepping back in time.You'll also find a historic movie theater and several unique locally owned shops worth browsing.

Spend an afternoon exploring:

  • Western-style storefronts
  • Vintage Hawaiian shirt shops
  • Antique stores
  • Independent bookstores
  • Local art galleries

Honokaʻa Chocolate Company-Don't miss the chocolate tasting experience. It's a wonderful and free opportunity to learn about Hawaii-grown cacao while sampling delicious chocolate.

Waimea

a colorful plate of grilled chicken and purple mashed potatoes
lunch at Jackie Rey's Ohana Grill

Waimea feels completely different from Kona and Hilo. Rolling green hills and ranch country give this town a distinctly different personality.

Parker Square-A great place to browse local shops and pick up gifts.

Waimea General Store-Filled with unique gifts, local products, and souvenirs.

Waimea Coffee Company-Located next door, this café is an excellent lunch stop. Get the grilled cheese sandwich or BLT and some (more) coffee!

Many locals also recommended Merriman's, though it wasn't open during our visit.

Hilo

If Kona feels like a beach town, Hilo feels like a laid-back hippie town surrounded by lush tropical beauty.

Hilo Farmers Market-One of the best places on the island to experience local culture. You'll find tropical fruits, fresh produce, handmade crafts, and local snacks.

brightly colored mangoes, mountain apples and mangosteen exotic fruit
Hilo Farmer's Market

Farmers Market Café-A convenient stop near the market for breakfast or lunch. This is an order at the counter type of place with picnic tables. The different vendors offer a variety of yummy foods such as shave ice, fresh poke bowls, plate lunches and burgers.

Jackie Rey's Ohana Grill-A popular local restaurant serving Hawaiian-inspired dishes in a relaxed atmosphere.

Pineapples and Cafe Pesto were two other restaurant recommendations from locals but we did not have time to check them out. 

Final Thoughts

The Big Island truly has something for everyone. One day you can be snorkeling with tropical fish, the next standing at the edge of a volcanic crater, and later enjoying tacos, Thai food, fresh coffee, or shave ice from a roadside stand.

The island rewards travelers who slow down, embrace the long drives, and leave room for unexpected discoveries. Some of our favorite memories came from the places we stumbled upon between destinations.

If you're planning a trip to the Big Island, don't just focus on the major attractions. Make time for the small towns, local coffee shops, food trucks, bakeries, and family-owned restaurants. Those delicious detours often become the most memorable part of the journey.

Three Days in Venice

June 5, 2026 by Yao Leave a Comment

Rialto Bridge early morning

3 Days in Venice, Italy: The Ultimate Itinerary for Food, Culture and Sightseeing

The grand Canal in Venice

Salve! I’ve been away for a while traveling all over Italy with my family. A highlight of our trip was spending three days in Venice, otherwise known as Venezia!

I originally did not include this city of canals in my original plans, but my husband convinced me that we had to see it before it sinks into the ocean. At first, I thought he was being a little over dramatic, but I take it all back because Venice is a must see destination. It is the most unique city I have ever been to. The canals, bridges and amazing architecture of this floating city might be a once in a lifetime experience for many. So, if you are wondering whether Venice is worth visiting, wonder no further. The answer is YES!

If you are looking for tips on where to eat and what to do in Venice, check out my Three Days in Venice Itinerary below. These suggestions are based on my first hand experience.

How to Travel from Rome to Venice by Train

Our trip to Venice started by taking the high speed Frecchiarossa from Rome to Venice. I purchased the tickets ahead of time on the Trenitalia app. Ticket prices vary depending on the seat class. It was a four hour ride from Roma Termini to Venezia St. Lucia station. From the station it was a short walk to the Vaporetto (water taxi).

We stayed in the San Marco district near the Rialto Bridge for the sake of convenience. Be advised the signage is a little confusing at the water taxi ticket booth. The attendant selling tickets that day was not very helpful but we  managed to figure it out.

It was about a 20 minute water taxi ride down the Grand Canal to the Rialto stop. As we were leaving the dock, I knew right away I was going to fall in love with this city, Venice is truly a magnificent place. I understand why numerous movies have been filmed here. I felt like I was living in a movie.

The scenery is stunning. Walking around exploring and getting lost in the narrow paths was the best part of the trip. Of course, sampling the local cuisine ranked high on the list too! Here are the highlights of what we saw in three days.

Rialto Bridge early morning

Venice Three Day Itinerary

Day 1: Arrive in Venice, take a water taxi ride down the Grand Canal, check into your hotel. Walk to Piazza San Marco and take in the sights of St. Mark’s Basilica and Doge’s palace. Enjoy an Aperol spritz or glass of  wine but maybe not around the square. We discovered it costs 20 euros more for a spritz around the piazza compared to most other places. You pay for the view!

Day 2: Explore the narrow paths and numerous bridges. Take a photo at Rialto Bridge, stroll through the Rialto marker, take a gondola ride and visit the art gallery district in Dorsoduro.

Day 3: I would just recommend spending more time wandering the narrow paths, exploring hidden walkways and eating at a fine dining restaurant on the last day. However if you have a little extra time, you might want to take a boat tour of the islands of Murano and Burano. I honestly have to say I was a bit disappointed with the experience we had. In a nutshell these two islands were just too touristy and gimmicky for me. But, if you are planning to go, here is the low down. 

Murano is known for its glass factories. Most tours of the island include a glass blowing demonstration . Glass blowing is truly an art, and the demonstration was interesting, but we were not impressed by the long wait for the show to start. The demonstration only lasted 10 minutes and we did not have much time to walk around the island before catching another boat to Burano.

Colorful painted houses on the island of Burano

The island of Burano is known for its colorful houses. I wanted to see it because of the photos I saw online, and how it seemed like a quaint fishing village known for lace making. I did see colorful houses and lots of lace, but it was one of the worst tourist traps we encountered in Italy. It was crowded and the stores were filled with tchotchkes that are not unique at all. Unfortunately , it was not as beautiful as the Instagram photos people post.

Venetian Food

What food is Venice known for? Being surrounded by water, it is obvious that Venice has an abundance of seafood. You will find fried fish and seafood everywhere. The most popular fish served on the island is baccala, a type of cod fish that is used as a sandwich filling for Tramezzino (triangular shaped stuffed sandwich) or spread on toasts or cicchetti (Italian tapas).

Venice is expensive, I knew that ahead of time, so I picked these places to dine at based on wanting to eat delicious food without blowing the whole budget.

Places to Eat in Venice

Fried Land- for quick and cheap.We stumbled upon this hole in the wall for food and inexpensive takeout. The specialty here is homemade pasta served in paper containers and fried seafood served in a paper cone. The portions are huge and the food is fresh, you get your money's worth.

fried seafood in a paper cone

Pasticceria Marchini Time- for breakfast pastries and coffee. I highly recommend this budget friendly cafe that has a wide assortment of delicious pastries for about 1.5 euros each and coffee for around 1 euro. It can get rather crowded during peak breakfast time. So, if you are an early riser like me, get there right when they open at 07:30 am to avoid the logical crowd. I grabbed an assortment of cornettos and other baked goods for our breakfast twice during our stay.

Gelato Gallonetto (San Marco). There is a long line outside this gelateria for a reason. I think we waited about 15 minutes which wasn’t too bad. I agree with the online reviewers that this place has some of the best gelato in Venice.

two scoops of gelato in a cone from Gelato Gallonetto

Farini Pizza (San Marco) When you want something simple, predictable and fast, this is the place for good solid pizza. This place serves Roman style pizza sold by the slice. The Zucchini pizza, margarita and Salsiccia all got a thumbs up by me.

Ai Barbacani (SanMarco).For the romantic. If you want a quiet, romantic restaurant along the anal, this is the place! Reserve the table overlooking the water to impress your date. My son actually discovered this place, and we were pleasantly surprised. It is a quiet little place tucked away from the crowds with really good food. This was the best splurge meal we had in Venice. It was also the best pesto pasta I had ever had- I had to steal it from my daughter because it was the dish she ordered!

Ai Barbacani Restaurant

Fluffy Brunch(Rialto)- For Americans missing a taste of home. This place reminded me of Wake ‘N Bacon in Chicago. Wild wallpaper and hydrangeas hanging from the ceiling . This eclectic breakfast and brunch spot serves fluffy pancakes and American style breakfast.

Enoteca Al Volto (San Marco)-When in Venice, you must try Cicchetti. This place was recommended by our hotel and noted to be a favorite among locals for cicchetti. Ciccetti are little bites, what I describe as the Venetian equivalent of tapas Enoteca Al Volto is a cute bar and restaurant located off a small side alley. We tried baccala on toast and an assortment of fish and other seafood on skewers.Yum!

Bar Alla Toletta (Dorsoduro). Our friend Roberto took us here to try Tramezzino. Tramezzino are traditional Venetian sandwiches that are made from white bread with the crusts cut off. They are triangular shaped and stuffed with fish or other meats mixed with mayonnaise. Honestly, I am not a big fan of tramezzino, but when in Venice…eat like a local.

Things to See and Do in Venice

Gondola ride- a must in Venice. Sure, this is the most touristy thing to do, but when will you ever get a chance to do this again? For you wise guys - Vegas is not the same!

Cafe in St.Mark's Square
St. Mark's Square

Doge’s Palace and St. Mark’s Square- the symbol of Venice and the best place for people watching.

Peggy Guggenheim museum and art galleries in Dorsoduro-such a cute neighborhood!

Libreria Aqua Alta- a bookstore filled with new and used books that were kept in bathtubs and gondolas. It has a staircase made from water-damaged books and wandering cats.

Libreria Acqua Alta bookstore in Venice

Rialto Bridge-the most photographed bridge in Venice. I woke up early to snap pictures before the crowds.

Rialto Market-take a stroll through this vibrant market where you will find the catch of the day, spices and colorful fruits and vegetables of the season.

Accademia bridge- where you will get the most iconic view of Venice and the Grand Canal.

Club Delfino- there are not a lot of hotels with fitness centers in Venice. If you are the type that enjoys working out while on vacation (definitely not me), this gym offers day passes. My son spent an afternoon there and said it was modern and the staff speak English.

Venice Souvenirs

The only souvenirs you need are the photos you take,
I did not purchase any souvenirs in Venice, but I have amazing memories and gorgeous photos! If you go to Venice, come back and leave a comment See you on the next detour!

Huli Huli Chicken

June 5, 2026 by Yao 1 Comment

huli huli chicken with pineapple and dipping sauce

Aloha! Can you say Huli Huli Chicken? Not only is Huli Huli fun to say, but it's also one of my favorite Hawaiian dishes. One of the highlights of my trips to Hawaii has been exploring the local food truck scene. Scattered along winding coastal roads, tucked into small towns, and parked near local beaches, these food trucks served some of the most memorable meals I've enjoyed on the islands.

One dish I found myself on the hunt for was Huli Huli Chicken. Chicken slowly cooked over an open flame, brushed with a sweet and savory marinade, and caramelized until perfectly charred. Every food truck seemed to have its own version, but they all shared that irresistible combination of smoky, tangy, and slightly sweet flavors that make Huli Huli chicken such a Hawaiian favorite.

This recipe brings a taste of those island memories home. My version features juicy chicken thighs marinated in a sweet and garlicky mixture of pineapple juice, soy sauce, ketchup (Yes, ketchup!) ginger, and garlic. I also take things one step further by simmering the leftover marinade into a thick, glossy sauce that's perfect for drizzling over the chicken or serving alongside for dipping. While I can't recreate the swaying palm trees, ocean views, or warm Hawaiian breeze, this Huli Huli Chicken captures the flavors that instantly transport me back to those delicious detours I took when I vacationed in  Maui, Kauai,Oahu and the Big Island.

a platter of huli huli chicken sprinkled with chives and a dish of dipping sauce on the side

Why You'll Love This Recipe

What makes this Huli Huli Chicken extra special is that the marinade does double duty. After the chicken has finished marinating, I simmer the reserved marinade until it thickens into a rich, glossy sauce. Think of it as a Hawaiian-inspired barbecue sauce—sweet, savory, garlicky, and perfect for drizzling over the grilled chicken or serving on the side for dipping.

I typically use boneless, skinless chicken thighs because they stay juicy on the grill and soak up all that delicious flavor. They're also quick to cook and easy to serve. That said, bone-in chicken thighs work beautifully too, and drumsticks are another great option if that's what you have on hand. No matter which cut you choose, the combination of pineapple juice, soy sauce, garlic, and ginger creates irresistible caramelized edges and plenty of island-inspired flavor.

Ingredients

  • 1 cup pineapple juice (canned or from concentrate)- do not use fresh
  • ½ cup ketchup
  • ½ cup soy sauce
  • 2 Tablespoons sriracha
  • 1 ½ Tablespoons grated ginger
  • 1 ½ Tablespoons grated garlic
  • ½ cup brown sugar
  • 2 Tablespoons olive oil
  • 2 pounds boneless skinless chicken thighs
  • Chopped chives or green onion for garnish

How to Make Huli Huli Chicken

Time needed: 4 hours and 35 minutes

  1. For the marinade

    In a large bowl -combine pineapple juice, ketchup, soy sauce, sriracha, ginger, garlic, brown sugar and olive oil.marinade made with soy sauce, ketchup, garlic , ginger, brown sugar and oil

  2. Marinate for 4 hours

    Add the chicken to the marinade, cover with plastic wrap or a lid and refrigerate for 4 hours or overnight.chicken thighs in marinade

  3. Cook the chicken

    Remove the chicken from the marinade- set the marinade to the side. Cook the chicken on the grill over medium heat for about 5-8 minutes on each side until the internal temperature reaches 80C or 175F. Chicken should be brown and carmelized. * If using bone-in chicken - this may require cooking longer up to 25-30 minutes.raw chicken thighs on the grill

  4. For the dipping sauce

    Place the leftover marinade in a medium saucepan and bring it to a simmer. Cook until the sauce reduces to half and thickens.a saucepan of marinade simmering on the stovetop

  5. Serve

    Garnish with chopped chives or green onion and serve with rice or your favorite grain, greens or Hawaiian macaroni salad.grilled huli huli chicken thighs with dipping sauce

Cooking Temperature: The minimum safe internal temperature to cook chicken is 74C or 165F. I find that cooking chicken thighs a little longer to 80c/175 F makes them more tender.

Air Fryer Method


If you don’t have a grill you can air fry for 8-10 minutes on each side at 400 degrees until internal temperature reaches 80C/175 F. Bone in thighs for 10-12 minutes on each side until internal temp reaches 80C or 175F.

Whether you're firing up the grill for a summer cookout or simply dreaming of your next Hawaiian getaway, this Huli Huli Chicken is an easy way to bring a taste of the islands to your table. Serve it with rice, grilled pineapple, or a simple macaroni salad for a meal that feels like it came straight from a Hawaiian food truck. One bite of that sweet, smoky, caramelized chicken and you'll understand why Huli Huli Chicken has become one of my favorite reminders of Hawaii's laid-back spirit and incredible food culture.

Looking for more summer chicken recipes? Check these out:

Chili Lime Chicken Skewers

Lemongrass Chicken Thighs

Thai Chicken Tacos

huli huli chicken with pineapple and dipping sauce

Huli Huli Chicken

Bring the flavors of Hawaii home with this easy Huli Huli Chicken recipe. Juicy chicken thighs are marinated in a sweet and garlicky pineapple-soy sauce, then grilled until brown and caramelized. Perfect for summer cookouts, weeknight dinners, or whenever you're craving a taste of the islands.
5 from 1 vote
Print Recipe Pin Recipe
Nutrition Facts
Huli Huli Chicken
Serving Size
 
2 thighs
Amount per Serving
Calories
519
% Daily Value*
Fat
 
15
g
23
%
Saturated Fat
 
3
g
19
%
Trans Fat
 
0.04
g
Polyunsaturated Fat
 
3
g
Monounsaturated Fat
 
7
g
Cholesterol
 
215
mg
72
%
Sodium
 
2280
mg
99
%
Potassium
 
847
mg
24
%
Carbohydrates
 
48
g
16
%
Fiber
 
1
g
4
%
Sugar
 
40
g
44
%
Protein
 
48
g
96
%
Vitamin A
 
222
IU
4
%
Vitamin C
 
13
mg
16
%
Calcium
 
68
mg
7
%
Iron
 
3
mg
17
%
* Percent Daily Values are based on a 2000 calorie diet.
Prep Time 10 minutes mins
Cook Time 25 minutes mins
Refrigerate 4 hours hrs
Total Time 4 hours hrs 35 minutes mins
Course Main Course
Cuisine Hawaiian
Servings 4 servings
Calories 519 kcal

Equipment

  • 1 grill
  • 1 grilling tools
  • 1 large bowl
  • 1 zester or grater
  • 1 medium saucepan

Ingredients
  

  • 2 pounds boneless skinless chicken thighs
  • 1 cup pineapple juice canned or from concentrate not fresh
  • ½ cup ketchup
  • ½ cup soy sauce
  • 1½ Tbs grated ginger
  • 1½ Tbs grated garlic
  • ½ cup brown sugar
  • 2 Tbs olive oil
  • 2 Tbs sriracha

Instructions
 

For the marinade

  • In a large bowl- combine pineapple juice, ketchup, soy sauce, sriracha, ginger, garlic brown sugar, and olive oil.

Marinate the chicken

  • Add chicken thighs to the marinade, toss a few times so that chicken is covered well. Cover with a lid or plastic wrap.Refrigerate for 4 hours or overnight.

Cook the chicken

  • Remove the chicken from the marinade- set the marinade to the side. Cook the chicken on the grill over medium heat for about 5-8 minutes on each side until the internal temperature reaches 80C or 175F. Chicken should be brown and caramelized.If using bone in chicken - this may require cooking longer up to 25-30 minutes.

For the dipping sauce

  • Place the leftover marinade in a medium saucepan and bring it to a simmer. Cook until the sauce reduces to half and thickens.

Serve

  • Garnish with chopped chives and serve with rice or your favorite grain or greens or Hawaiian macaroni salad.

Notes

Note-The minimum safe internal temperature to cook chicken is 74C or 165F. I find that cooking chicken thighs a little longer to 80c/175 F makes them more tender.
 
Can I make this in the airfryer?
Yes, if you don’t have a grill you can air fry for 8-10 minutes on each side at 400 degrees until internal temperature reaches 80C/175 F. Bone in thighs for 10-12 minutes on each side until internal temp reaches 80C or 175F.

Nutrition

Serving: 2 thighsCalories: 519kcalCarbohydrates: 48gProtein: 48gFat: 15gSaturated Fat: 3gPolyunsaturated Fat: 3gMonounsaturated Fat: 7gTrans Fat: 0.04gCholesterol: 215mgSodium: 2280mgPotassium: 847mgFiber: 1gSugar: 40gVitamin A: 222IUVitamin C: 13mgCalcium: 68mgIron: 3mg
Keyword chicken recipes, grilling recipes, summer recipes
Tried this recipe?Let us know how it was!
Click here to add your own private notes.

Lemon and Pistachio Olive Oil Cake

April 26, 2026 by Yao Leave a Comment

Delicious Detour easy lemon and pistachio olive oil cake

This Lemon and Pistachio Olive Oil Cake is inspired by one of my most favorite vacations to Sorrento, Italy where big yellow lemons seem to grow everywhere you look. It’s also where I had the best pistachio gelato of my life! If you are ever in Sorrento, you must stop at Raki gelato shop on Corso Italia!

This easy to make cake brings those two flavors together. This one-bowl recipe is bright, moist, and full of fresh lemon flavor with a nutty pistachio crunch. Made with olive oil and almond flour, it’s naturally gluten-free and dairy-free, perfect for a simple dessert any time of year. 

moist and delicious slice of lemon and pistachio olive oil cake on a plate with a fork

Why I love this cake

This cake is simple, yet elegant. I make it for Mother’s Day, having friends over for coffee or tea or simply just because. I also love it because...

-the ingredients are minimal and easy to find

-its gluten-free and dairy-free friendly

-there is no heavy frosting

-you can make it a day ahead and it stays moist

-its great for easy entertaining

Ingredients

  • 4 eggs
  • 1 cup sugar
  • ½ cup olive oil 
  • zest from two lemons
  • ¾ cup freshly squeezed lemon juice
  • 1 teaspoon vanilla
  • 1 cup crushed pistachios for cake batter
  • ½ cup crushed pistachios for topping
  • 2 cups almond flour
  • 1 teaspoon baking powder
  • ½ teaspoon baking soda
  • ½ teaspoon salt

For the lemon glaze

  • 1 cup powdered sugar
  • 2 Tablespoon lemon juice
  • 2 Tablespoons oat milk, soy milk or almond milk
chopped pistachios on top of golden brown lemon olive oil cake with squeezed lemons on the side

How to Make Lemon and Pistachio Olive Oil Cake

Time needed: 1 hour.

Preheat oven to 350F degrees.

  1. Cake batter

    Beat eggs, olive oil, sugar, lemon juice,  lemon zest and vanilla until smooth. Add almond flour, baking powder, baking soda and salt. Lastly, fold in 1 cup crushed pistachios.

  2. Pour batter into prepared pan

    Line the bottom of an 9 inch round cake pan with parchment and spray with cooking spray. Pour in the batter.pour lemon and olive oil cake batter with chopped pistachios into a cake pan

  3. Bake

    Bake in a preheated oven at 350 degrees for 40- 45 minutes until golden brown and toothpick inserted in the center comes out clean. Let cool for at least 20 minutes.Delicious Detour baked cake until golden brown

  4. For the lemon glaze

    While the cake is cooling, make the lemon glaze- Combine 1 cup powdered sugar with 2 tablespoons of freshly squeezed lemon juice, and 2  tablespoons oat milk, soy milk or almond milk. Whisk until smooth.whisk powdered sugar, lemon juice and milk to make a glaze

  5. Finish with glaze and pistachios

    Pour the glaze over the cake and spread. Finish by sprinkling with crushed pistachios and more lemon zest is desired.

Substitutions

This recipe is flexible and forgiving—here are a few easy swaps:

  • Olive oil: Use a neutral oil (like canola or vegetable oil) if you prefer a milder flavor, or unsalted melted butter if you are not focused on dairy free
  • Lemon juice: Swap with orange juice or lime juice for a different citrus twist
  • Almond extract: Can be added for extra depth, especially if you love that bakery-style flavor
  • Pistachios: Almonds make a great substitute if pistachios aren’t available

Searching for other recipes for easy entertaining? Try these:

Pistachio Crusted Tilapia

Pistachio Dark Chocolate Chip Cookies with Sea Salt

Simple Orange and Fennel Salad

Whipped Feta Dip with Pistachios and Pomegranate

lemon and pistachio cake topped with sugar and lemon glaze and chopped pistachios with fresh lemons on the side

Lemon and Pistachio Olive Oil Cake

Lemon and Pistachio Olive Oil Cake inspired by Sorrento, Italy—this easy, one-bowl recipe is bright, moist, and full of fresh lemon flavor with a nutty pistachio crunch. Made with olive oil and almond flour, it’s naturally gluten-free and dairy-free, perfect for a simple yet elegant dessert any time of year.
Print Recipe Pin Recipe
Nutrition Facts
Lemon and Pistachio Olive Oil Cake
Serving Size
 
1 slice
Amount per Serving
Calories
363
% Daily Value*
Fat
 
26
g
40
%
Saturated Fat
 
3
g
19
%
Trans Fat
 
0.01
g
Polyunsaturated Fat
 
3
g
Monounsaturated Fat
 
10
g
Cholesterol
 
55
mg
18
%
Sodium
 
207
mg
9
%
Potassium
 
198
mg
6
%
Carbohydrates
 
39
g
13
%
Fiber
 
4
g
17
%
Sugar
 
19
g
21
%
Protein
 
9
g
18
%
Vitamin A
 
124
IU
2
%
Vitamin C
 
7
mg
8
%
Calcium
 
88
mg
9
%
Iron
 
2
mg
11
%
* Percent Daily Values are based on a 2000 calorie diet.
Prep Time 15 minutes mins
Cook Time 45 minutes mins
Total Time 1 hour hr
Course Baking, Dessert
Cuisine Italian
Servings 12 slices
Calories 363 kcal

Equipment

  • 1 9 inch round cake pan
  • 1 spatula
  • 1 whisk
  • 1 large mixing bowl
  • 1 small mixing bowl
  • measuring cups
  • measuring spoons
  • parchment paper
  • cooking spray
  • citrus juicer

Ingredients
  

  • 4 eggs
  • ½ cup olive oil I used extra virgin
  • 1 cup granulated sugar
  • ¾ cup lemon juice freshly squeezed
  • zest from 2 lemons
  • 1 teaspoon vanilla
  • 2 cups almond flour
  • 1 teaspoon baking powder
  • ½ teaspoon baking soda
  • ½ teaspoon salt
  • 1 cup crushed pistachios for cake batter
  • ½ cup crushed pistachios for topping

lemon glaze

  • 1 cup powdered sugar
  • 2 Tablespoons lemon juice
  • 2 Tablespoons oat milk, soy milk or almond milk dairy milk also works if you are not making dairy free

Instructions
 

For the cake

  • Beat eggs, sugar, olive oil, lemon juice, lemon zest, and vanilla until smooth. Add almond flour, salt, baking powder and baking soda. Lastly, fold in 1 cup crushed pistachios.
  • Line the bottom of an 9 inch round cake pan with parchment and spray with cooking spray. Pour in the batter.
  • Bake in a preheated oven at 350 degrees for 40- 45 minutes until golden brown toothpick inserted in the center comes out clean. Let cool for at least 20 minutes.

lemon glaze

  • While the cake is cooling, make the lemon glaze- Combine 1 cup powdered sugar with 2 tablespoons of freshly squeezed lemon juice, and 2  tablespoons oat milk, soy milk or almond milk. Whisk until smooth.
  • Pour the glaze over the cake and spread. Finish by sprinkling with crushed pistachios and more lemon zest if desired.

Nutrition

Serving: 1sliceCalories: 363kcalCarbohydrates: 39gProtein: 9gFat: 26gSaturated Fat: 3gPolyunsaturated Fat: 3gMonounsaturated Fat: 10gTrans Fat: 0.01gCholesterol: 55mgSodium: 207mgPotassium: 198mgFiber: 4gSugar: 19gVitamin A: 124IUVitamin C: 7mgCalcium: 88mgIron: 2mg
Keyword dairy-free, gluten free, lemon, olive oil cake, pistachio
Tried this recipe?Let us know how it was!
Click here to add your own private notes.

Soft and Chewy Matcha Green Tea Cookies

March 15, 2026 by Yao Leave a Comment

Soft and Chewy Matcha Green Tea Cookies

These Soft and Chewy Matcha Green Tea Cookies are bright, buttery and packed with green tea flavor you can easily adjust to your liking. They are the perfect treat when you are looking to pair something deliciously different with your favorite coffee or tea.

The inspiration for these cookies comes from my daughter. She's become a bit of a matcha connoisseur and has been schooling me on the different kinds of matcha and the proper way to prepare it. I've been watching her carefully whisk the bright green powder into frothy tea. When I told her I was going to make a matcha cookie, she quickly told me not to touch her stash and get my own! I was put on notice- this stuff is expensive. The price of premium drinking matcha is not cheap and besides, culinary grade matcha is what you use to bake with. I did a little investigating and found some affordable options online that will last me a while. 

culinary grade matcha tea powder in a canister

So when I started experimenting with baking with matcha, she was the obvious choice for my expert taste tester. Thankfully, I got the thumbs up!

What Do Matcha Cookies Taste Like?

If a sugar cookie and a cup of matcha tea had a baby, it would look and taste something like this cookie.

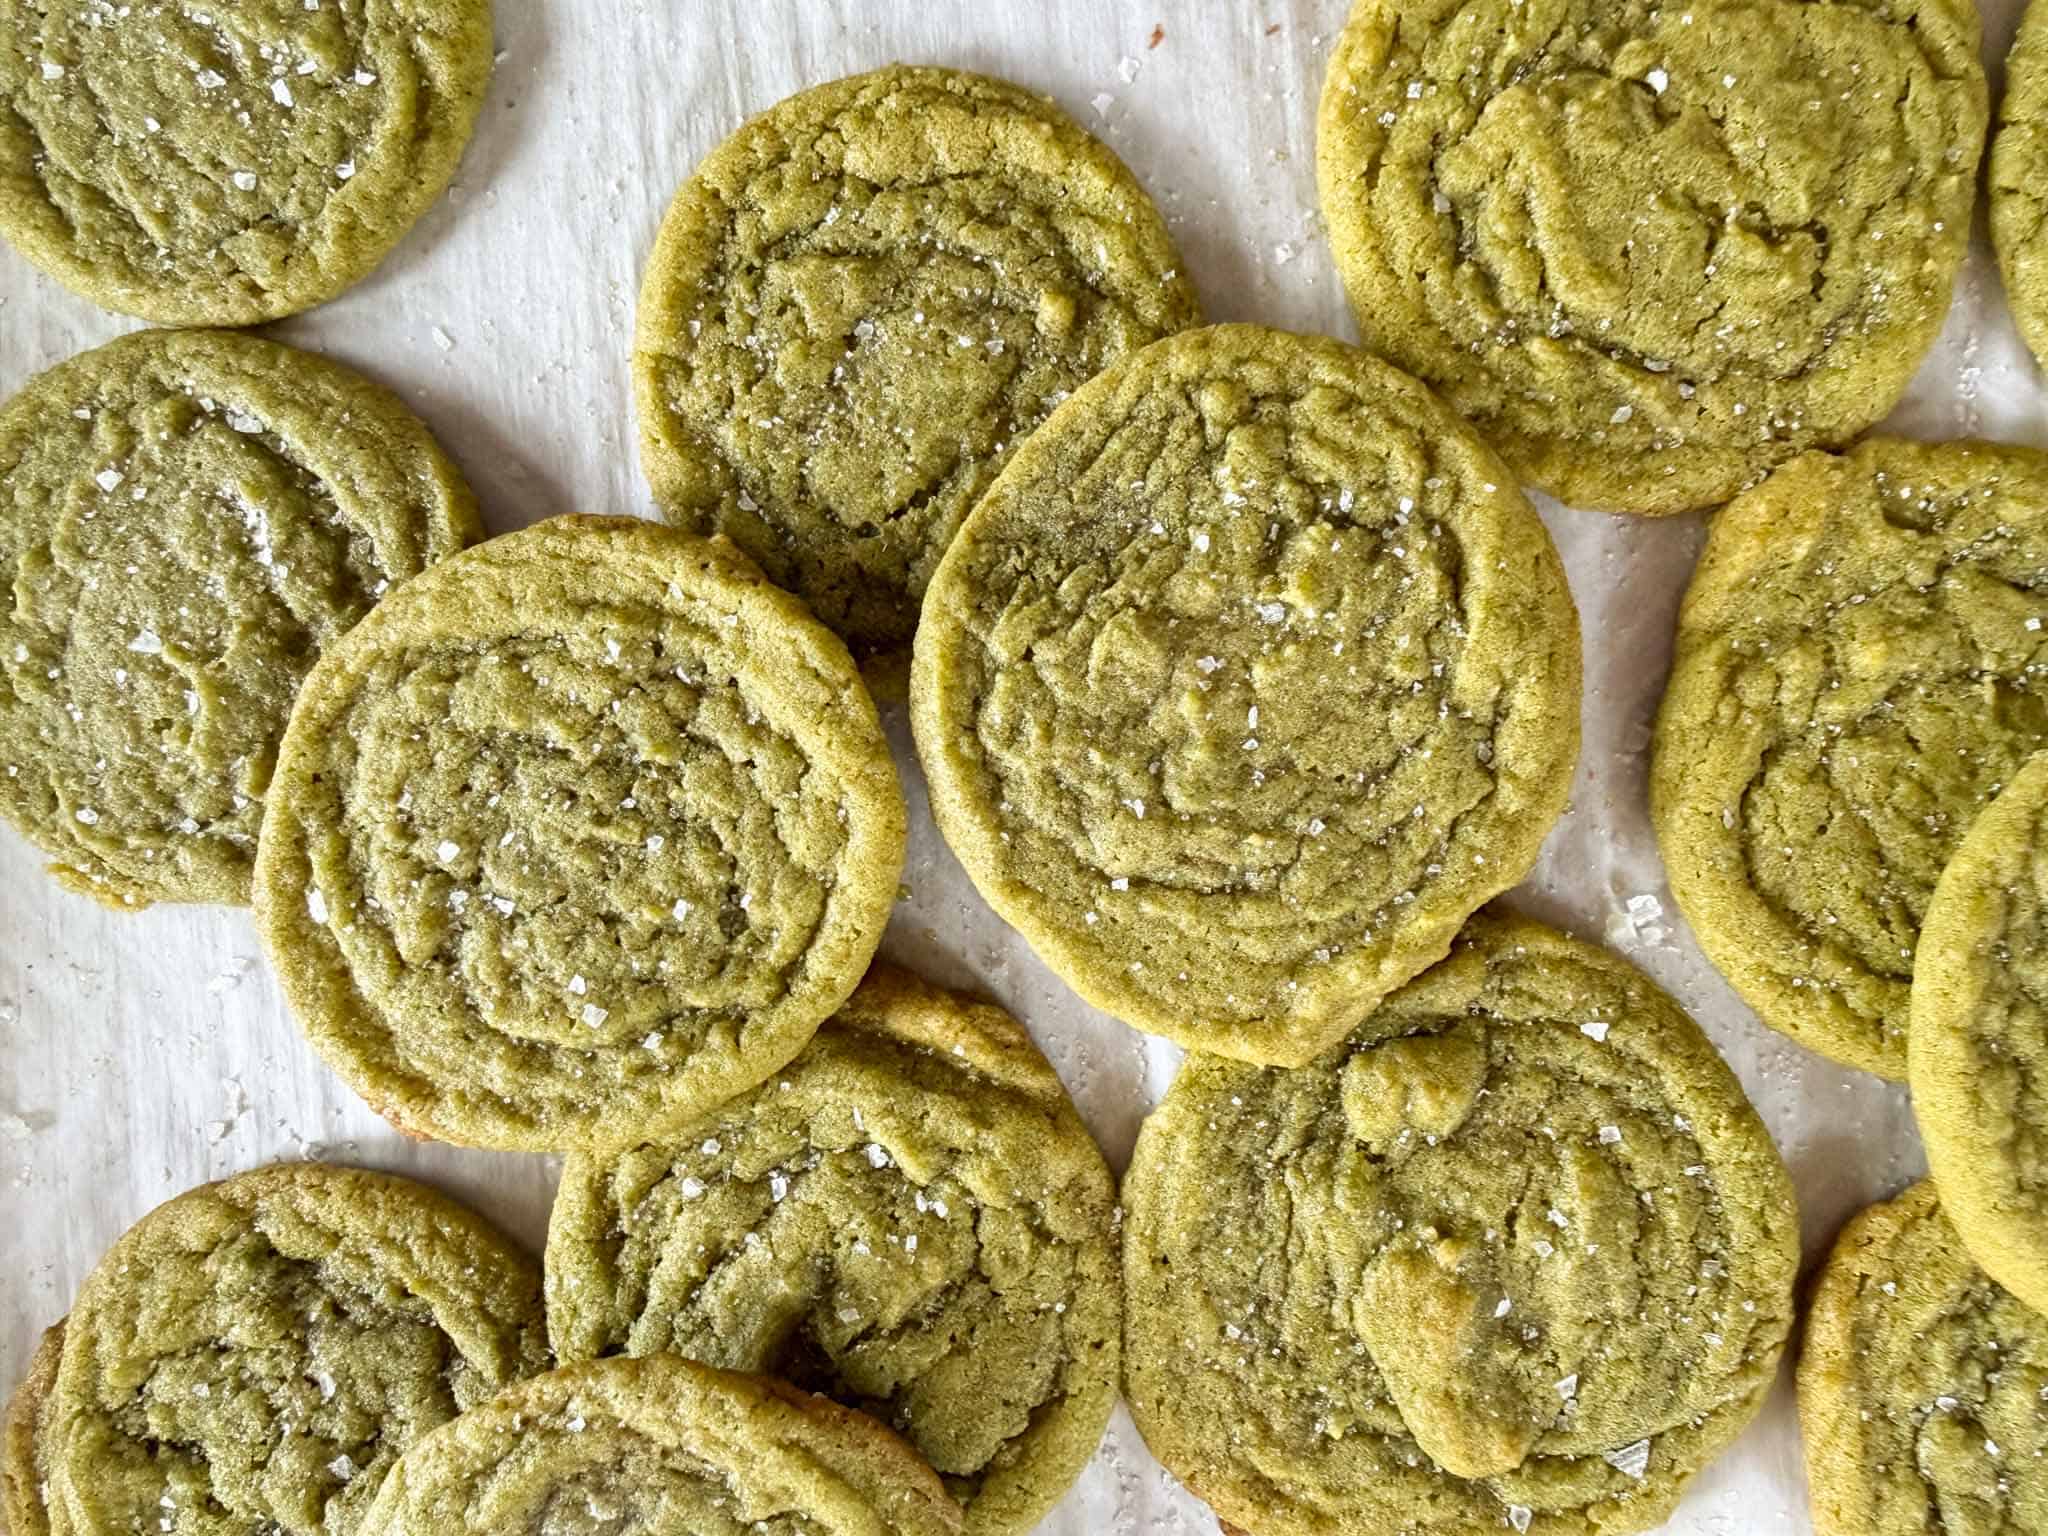
These cookies are soft, chewy and a little bit earthy (in the best possible way). They are sweet but not too sweet. I discovered the perfect combination of sugars to create the perfect sweetness level and texture. The centers stay soft and chewy while the edges bake up lightly crisp. The finishing sprinkle of sugar and flaky sea salt adds just the right contrast and a little sparkle on top.

How Much Matcha Should You Use?

One of the things I discovered while developing this recipe is that matcha intensity really comes down to personal preference.

I experimented with 1 Tablespoon and 2 Tablespoons of matcha powder in the dough. Both versions work!

  • 1 Tablespoon gives a lighter, more mute flavor
  • 2 Tablespoons creates a deeper vibrant green color and stronger taste

Personally, I like both versions , it simply depends on how bold you want the matcha flavor to be.

Matcha Green Tea Cookies made with 2 Tablespoons of matcha powder
Matcha cookies made with using 2 Tablespoons matcha powder

The Secret Ingredient: Maple Syrup

After about a dozen test batches (the perks of recipe testing!), I experimented with different combinations of sugars to find the perfect balance-sweet but not too sweet.

The ingredient that made the biggest difference was maple syrup. Adding maple syrup gives the cookies a gentle sweetness while also helping create that perfectly soft and chewy texture. It helps bind the matcha and keeps the cookies moist in the center.

Ingredients

  • 1 ¾ cup flour
  • 1 teaspoon baking soda
  • ¼ teaspoon baking powder
  • ½ teaspoon salt
  • ¾ cup softened 
  • 1 cup sugar
  • ½ cup light brown sugar
  • 1-2 Tablespoons culinary grade matcha
  • ¼ cup maple syrup
  • 1 egg
  • 1 teaspoon vanilla
  • granulated sugar and flaky sea salt for finishing

Ingredient Notes for Matcha Cookies

A few key ingredients help give these cookies their signature flavor and chewy texture.

Matcha Powder
This is the star ingredient. Use a good-quality culinary-grade matcha for baking. I add it to the wet ingredients to make sure it gets mixed uniformly through the dough. Don’t waste your money on premium grade matcha for drinking. Your wallet will thank you!

Light Brown Sugar
Light brown sugar adds moisture and helps create the chewy texture that makes these cookies so satisfying.

Maple Syrup
Maple syrup adds just a touch of natural sweetness and helps create a soft, chewy center. After testing several versions of this recipe, this ingredient made a big difference in the final texture.

Butter
Softened butter provides richness and helps balance the slightly grassy notes of the matcha.

Sugar and Sea Salt Topping
A light sprinkle of sugar and flaky sea salt after baking adds a little sparkle and enhances the sweet and savory contrast.

How to Make Soft and Chewy Matcha Green Tea Cookies

Time needed: 20 minutes

Preheat oven to 350F

  1. Cream the butter and sugars

    In a large mixing bowl, beat the butter, sugar, light brown sugar and maple syrup.

  2. Add the eggs and matcha

    Mix in the egg, matcha and vanilla.a blue mixing bowl containing wet ingredients for matcha cookie dough

  3. Combine the dry ingredients

    In a separate bowl, whisk together flour, baking soda, baking powder and salt.

  4. Mix the dough

    Gradually add the dry ingredients to the wet mixture until just combined.blue mixing bowl containing wet and dry ingredients for matcha cookie dough

  5. Scoop the dough

    Scoop tablespoon -sized balls of dough onto a parchment lined baking sheet, spacing evenly apart about 1 inch.scoops of green matcha cookie dough on parchment lined cookie sheet

  6. Bake

    Bake for about 9-11 minutes until edges are set and centers look slightly underbaked.baked matcha cookies on a parchment lined baking sheet

  7. Cool and finish

    Let the cookies cool for 10 minutes and then sprinkle with flaky sea salt and granulated sugar.soft and chewy matcha tea cookies on a cooling rack and measuring spoons

Tips for Perfect Matcha Cookies

Use good quality matcha
Culinary-grade matcha works best for baking. Save the premium matcha for drinking.

Don’t overbake
Pull the cookies when the centers still look slightly underdone. They'll continue to set as they cool.

Storage

At Room Temperature
Store the cookies in an airtight container at room temperature for up to 4 days. They will stay soft and chewy.

Freezing the Cookies
Matcha cookies freeze very well. Place them in a freezer-safe container or bag and freeze for up to 2 months. Simply let them thaw at room temperature before serving.

Looking for more unique and decadent cookies? You’ll love these:

The Best Coconut Lime Cookies

Chocolate Chip Potato Pretzel Cookies

Pistachio Dark Chocolate Cookies with Sea Salt

Soft and Chewy Matcha Green Tea Cookies

Soft and Chewy Matcha Green Tea Cookies

Soft and Chewy Matcha Green Tea Cookies inspired by creamy green tea latte drinks. These cookies are easy to make and can be customized for intensity of matcha flavor.
Print Recipe Pin Recipe
Nutrition Facts
Soft and Chewy Matcha Green Tea Cookies
Serving Size
 
1 cookie
Amount per Serving
Calories
201
% Daily Value*
Fat
 
8
g
12
%
Saturated Fat
 
5
g
31
%
Trans Fat
 
0.3
g
Polyunsaturated Fat
 
0.3
g
Monounsaturated Fat
 
2
g
Cholesterol
 
20
mg
7
%
Sodium
 
195
mg
8
%
Potassium
 
34
mg
1
%
Carbohydrates
 
31
g
10
%
Fiber
 
0.3
g
1
%
Sugar
 
22
g
24
%
Protein
 
2
g
4
%
Vitamin A
 
278
IU
6
%
Vitamin C
 
0.001
mg
0
%
Calcium
 
18
mg
2
%
Iron
 
1
mg
6
%
* Percent Daily Values are based on a 2000 calorie diet.
Prep Time 10 minutes mins
Cook Time 10 minutes mins
Total Time 20 minutes mins
Course Baking
Cuisine American
Servings 18 cookies
Calories 201 kcal

Equipment

  • 1 large mixing bowl
  • 1 medium mixing bowl
  • measuring cups
  • measuring spoons
  • 1 whisk
  • 1 spatula or wooden spoon for mixing
  • 2 cookie sheets
  • parchment paper
  • 1 small cookie scoop

Ingredients
  

  • 1¾ cup flour
  • 1 teaspoon baking soda
  • ¼ teaspoon baking powder
  • ½ teaspoon salt
  • ¾ cup butter softened
  • 1 cup sugar
  • ½ cup light brown sugar
  • ¼ cup maple syrup
  • 1 Tablespoon matcha powder* 1-2 Tablespoons -adjust to your preference
  • 1 egg
  • 1 teaspoon vanilla
  • flaky sea salt and granulated sugar for sprinkling

Instructions
 

  • Preheat oven to 350℉

Cream the butter and sugars

  • In a large bowl, beat the butter, granulated sugar, brown sugar and maple syrup until well combined

Add the eggs and matcha

  •  Mix in the egg, vanilla and matcha powder

Combine the dry ingredients

  •  In a medium bowl, whisk together flour, baking powder, baking soda, and salt

Mix the dough

  • Gradually add the dry ingredients to the wet mixture until just combined

Scoop the dough

  •  Scoop tablespoon-sized balls of dough onto a parchment lined baking sheet, spacing evenly apart about 1 inch

Bake

  • Bake for 9–11 minutes, until the edges are set but the centers look slightly underbaked

Cool and finish

  •  Let the cookies cool for 10 minutes and then sprinkle with flaky sea salt and granulated sugar

Notes

**Nutrition information based on ingredients without finishing sea salt and sugar
Use good quality matcha
Culinary-grade matcha works best for baking.
Don’t overbake
Pull the cookies when the centers still look slightly underdone. They'll continue to set as they cool.

Nutrition

Serving: 1cookieCalories: 201kcalCarbohydrates: 31gProtein: 2gFat: 8gSaturated Fat: 5gPolyunsaturated Fat: 0.3gMonounsaturated Fat: 2gTrans Fat: 0.3gCholesterol: 20mgSodium: 195mgPotassium: 34mgFiber: 0.3gSugar: 22gVitamin A: 278IUVitamin C: 0.001mgCalcium: 18mgIron: 1mg
Keyword green tea, matcha cookies, matcha latte inspired
Tried this recipe?Let us know how it was!
Click here to add your own private notes.

Simple Orange and Fennel Salad

March 4, 2026 by Yao 1 Comment

Simple Orange and Fennel Salad

Cara Cara oranges are my favorite type of oranges and they are in season! Instead of eating another bag all by myself, I decided to create a beautiful salad for Sunday brunch. This Simple Orange and Fennel Salad has a mix of flavors and textures that elevates an average salad to an extraordinary dish. It not only looks amazing but tastes amazing too! It’s sweet, crispy, citrusy and savory all in one bite.

A mixture of Cara Cara oranges and navel oranges are the highlight of this salad. Slivers of fennel and pistachios balance out the tang and fleshy texture of the oranges.  This is what I reach for when I’m craving something healthy and fresh during these long winter months. It’s  proof that seasonal winter produce isn’t all potatoes and beans. 

Ingredients

  • 5-6 oranges (Cara Cara, navel, blood oranges, sumos or a combination)
  • Half of a  fennel bulb with stalks and fronds
  • 2 Tablespoons crushed roasted pistachios (salted or unsalted) or  toasted pinenuts
Simple Orange and Fennel Salad with fennel fronds and pistachios

Why I Love This Salad

Peak- season flavor: Cara Cara oranges are sweetest from December through April. If you can’t find Cara Cara oranges, use whatever you have on hand- blood oranges, sumo citrus, navel oranges or a combination of two or more.

Fresh and light: Crisp shaved fennel balances the citrus beautifully. Otherwise known as anise, fennel bulbs can be found in the produce aisle, near the celery. Choose a small to medium bub with stalks and fronds.

Naturally gluten-free and vegetarian: you'll be getting your Vitamin C and then some!

Perfect for brunch, holiday tables, or a light lunch: the colors and textures are beautiful to look at and even better to eat! This is a perfect side dish for a baby shower or bridal shower.

The dressing is made from the juice: vinaigrette is made from the juice of the freshly squeezed oranges and extra virgin olive oil.

Simple Orange and Fennel Salad with Pistachios and orange juice vinaigrette

How to Make Simple Orange and Fennel Salad

Time needed: 15 minutes

  1. Prepare the oranges

    Use a sharp knife to slice off the top and bottom of each orange so it sits flat and doesn’t roll around.  Set one of the oranges aside for later use. Next stand the orange upright on the cutting board. Starting at the top, run the knife downward along the curve of the orange, cutting off the peel and the white pith. Rotate the orange and repeat the last step until all of the rind is removed. Next position the orange on its side. Slice it crosswise into thin rounds, about ¼ inch thick.
    oranges peeled and sliced crosswise for salad

  2. Slice the fennel

    Wash and dry the fennel. Use a clean towel to dab off any moisture. Trim the stalks and chop  the fronds- set aside for later use. Then cut the fennel bulb in half  and then thinly slice.
    a fennel bulb sliced in half and thin slices of fennel and fronds

  3. Make the orange vinaigrette

    Squeeze the juice out of the remaining orange. Measure out ¼ cup orange juice. Use a whisk to combine orange juice with ¼ cup extra virgin olive oil, salt and pepper. Add 1 tablespoon dijon mustard (optional) pinch of salt and freshly cracked pepper.
    whisking together extra virgin olive oil and orange juice in a bowl

  4. Assemble and dress

    Arrange orange slices and fennel  slices in a bowl. Add fennel fronds. Drizzle with vinaigrette and sprinkle with crushed pistachios. If desired, add more cracked black pepper and salt to taste.
    a close up of juicy orange and fennel salad

What to Serve with Simple Orange and Fennel Salad

Serve along side grilled fish or chicken, or add grilled shrimp to the salad for a heartier dish. This would also go great with Ginger Soy Salmon, Pistachio Crusted Tilapia or Lemon Browned Butter Fish in Foil,

Variations

Add arugula or baby bib lettuce

Substitute pistachios for pinenuts

Add matchstick slices of jicama

Add crumbled goat cheese

Toss in thinly sliced fresh beets or roasted beets.

Simple Orange and Fennel Salad

Simple Orange and Fennel Salad

This Simple Orange and Fennel Salad features sweet Cara Cara oranges, shaved fennel, pistachios, and a fresh orange vinaigrette. A vibrant, healthy winter recipe.
5 from 1 vote
Print Recipe Pin Recipe
Nutrition Facts
Simple Orange and Fennel Salad
Amount per Serving
Calories
270
% Daily Value*
Fat
 
15
g
23
%
Saturated Fat
 
2
g
13
%
Polyunsaturated Fat
 
3
g
Monounsaturated Fat
 
10
g
Sodium
 
75
mg
3
%
Potassium
 
588
mg
17
%
Carbohydrates
 
32
g
11
%
Fiber
 
7
g
29
%
Sugar
 
21
g
23
%
Protein
 
4
g
8
%
Vitamin A
 
534
IU
11
%
Vitamin C
 
116
mg
141
%
Calcium
 
105
mg
11
%
Iron
 
1
mg
6
%
* Percent Daily Values are based on a 2000 calorie diet.
Prep Time 15 minutes mins
Cook Time 0 minutes mins
Course Salad
Cuisine American
Servings 4 servings
Calories 270 kcal

Equipment

  • 1 salad bowl
  • 1 small mixing bowl
  • 1 whisk
  • 1 sharp knife
  • 1 cutting board

Ingredients
  

  • 6 oranges Cara Cara, navel, sumo citrus, blood orange or a combination of any
  • ½ fennel bulb with fronds also known as anise
  • 2 Tablespoons crushed pistachios or pine nuts

For the Vinaigrette

  • ¼ cup orange juice freshly squeezed
  • ¼ cup olive oil extra virgin
  • 1 Tablespoon dijon mustard optional
  • 1 pinch salt
  • pepper to taste

Instructions
 

Prepare the oranges

  • Use a sharp knife to slice the top and bottom of each orange so it sits flat and does not roll around. Set one of the oranges aside for later use. Next stand the orange upright on the cutting board. Start at the top, run the knife downward along the curve of the orange, cutting off the peel and white pith. Rotate the orange and repeat the last step until the rind is removed from all sides. Next Position the orange on its side . Slice it crosswise into thin rounds, about ¼ inch think.

Slice the fennel

  • Wash and dry the fennel. Use a clean towel to dob off any moisture. Trim the stalks and chop the fronds. Set fronds aside for later use. Then cut the bulb in half and then thinly slice one of the halves. Save the other half for other use.

Make the orange vinaigrette

  • Squeeze the juice out of the remaining orange. Measure out ¼ cup of juice. Use a whisk to combine orange juice with ¼ cup olive oil. Stir in dijan mustard if using. Add a pinch of salt and a few dashes of pepper and whisk again.

Assemble and dress

  • Arrange orange slices and fennel slices in a bowl. Add fennel fronds. Drizzle with vinaigrette and sprinkle with crushed pistachios. If desired, add mor cracked black pepper and salt to taste.

Notes

Prevent fennel from turning brown: If you are prepping the fennel ahead of time, place cut fennel in a bowl of cold water with a tablespoon of white vinegar.
Variations
  • add arugula or baby bib lettuce
  • substitute pistachios for toasted pine nuts
  • add matchstick sliced jicama
  • add crumbled goat cheese
  • toss in thinly sliced fresh beets or roasted beets

Nutrition

Calories: 270kcalCarbohydrates: 32gProtein: 4gFat: 15gSaturated Fat: 2gPolyunsaturated Fat: 3gMonounsaturated Fat: 10gSodium: 75mgPotassium: 588mgFiber: 7gSugar: 21gVitamin A: 534IUVitamin C: 116mgCalcium: 105mgIron: 1mg
Keyword cara cara oranges, fennel, orange, quick and easy recipes, salad recipe, vegetarian, winter recipes
Tried this recipe?Let us know how it was!
Click here to add your own private notes.

Viral Japanese "Cheesecake" with Pistachio Cream

March 1, 2026 by Yao Leave a Comment

A bowl of Greek yogurt topped with Biscoff cookies, pistachio cream and crushed pistachios after refrigeration

Japanese "Cheesecake" with Pistachio Cream is my 4-ingredient adaptation of the viral 2-ingredient Japanese Cheescake floating around social media.

If you live with a teenager, you know that they “know everything.” From the latest fashion trends to the new meanings of old words I thought I knew-to the newest trending recipes lighting up their feeds. I was proud to know that I tried something new before my teen did. The latest recipe to spark my curiosity is the 2-ingredient Japanese Cheesecake. 

I quickly learned it is not a cheesecake at all. Not even a no-bake cheesecake. It’s more of a snack.

And maybe that’s exactly why it works. I tested it myself and here is the result.

What is the Viral 2-Ingredient Japanese Cheescake?

Japanese "cheesecake" made with Greek yogurt, whipped cream cheese and Biscoff cookies

The internet famous version is typically made with just Greek yogurt and Biscoff cookies, basically sticking a few Biscoff Cookies in a tub  of Greek yogurt and refrigerating it overnight.  After several hours, the result is a fusion of the two ingredients mimicking the flavor of cheesecake. But calling it cheesecake is a bit of a stretch. Calling it an easy, lightly sweet treat is more like it. 

As someone who loves layering flavors and textures, I couldn’t resist giving it a little upgrade.

Upgraded Version: The 4-ingredient Japanese "Cheesecake" with Pistachio Cream

The 2-ingredient version needed more ingredients.The base is lovely in its simplicity, but it practically begs for contrast. So I dressed mine up with:

  • A couple spoonfuls of whipped cream cheese
  • A generous dollop of pistachio cream
  • A scattering of crushed pistachios

The pistachio adds depth and nuttiness that balances the sweetness of the cookies and the tanginess of the yogurt. The addition of the whipped cream cheese gives it more structure and enhances the flavor to be more like cheesecake. 

After chilling, the cookies meld into the yogurt, softening just enough to simulate the crust of a cheesecake. Getting the Greek yogurt and cookies in one spoonful mimics the flavor you get from real cheesecake -creamy filling balanced with a soft and crumbly crust.

It’s not traditional.

It’s not a classic Japanese cheesecake.

But it does give you that familiar cheesecake flavor in an easy to make treat.

Ingredients

  • 1 ½ cups Greek Yogurt- the thicker the better with higher fat content- I use Cabot’s Triple Cream Vanilla Bean Greek Yogurt
  • 1 teaspoon pistachio cream
  • 2 Tablespoon whipped cream cheese- the kind you find in the tub
  • 6 Biscoff Cookies
  • crushed Pistachios (optional)
a package of Biscoff cookies, a bowl of Greek yogurt and pistachio cream

How to Make Japanese "Cheesecake" with Pistachio Cream

Time needed: 6 hours and 5 minutes

  1. The base

    Mix Greek yogurt and whipped cream cheese in a small bowl. Spoon in pistachio cream and use a toothpick or skewer to swirl it ina bowl of Greek yogurt with pistachio cream swirled in

  2. Add cookies

    Insert Biscoff cookies-spacing them evenly aparta bowl of Greek yogurt with pistachio cream and Biscoff cookies before refrigeration

  3. Refrigerate

    Cover the bowl with an air-tight lid or place the bowl into a larger plastic container and cover with an air-tight lid. Chill for 6-8 hours or overnight.a bowl of greek yogurt and Biscoff cookies placed and inside a covered plastic container

  4. Serve

    Sprinkle with crushed pistachios if using right before serving4 ingredient viral Japanese Cheesecake with Pistachio Cream

Variations

If you don’t have pistachio cream in your pantry, here are some other variations to try:

  • Swirl in some Nutella and sprinkle with peanuts or hazelnuts
  • Add your favorite jam, like raspberry or strawberry and top with mini chocolate chips
  • Mix in fresh fruit and top with coconut flakes

Texture and Flavor Notes

If you’re expecting the richness of a true cheesecake, this viral version is NOT it. But if you want an easy to make treat that has cheesecake-like flavors, this is it.

It’s an easy and sweet but not-too-sweet treat. Whip it up when you want something homemade without pulling out half the pantry.

Now, if you are not sold on this faux cheesecake recipe and want really good REAL baked cheesecake, you will want to try my Pumpkin Cheesecake with sour cream caramel topping.Trust me, it's not just for fall baking.

A bowl of Greek yogurt topped with Biscoff cookies, pistachio cream and crushed pistachios after refrigeration

Japanese "Cheesecake" with Pistachio Cream

A 4-ingredient version of the Viral 2-ingredient Japanese cheesecake recipe made with the addition of whipped cream cheese, pistachio cream and Biscoff cookies.
Print Recipe Pin Recipe
Prep Time 5 minutes mins
Referigerate 6 hours hrs
Course Dessert
Cuisine American, Japanese
Servings 2 servings

Equipment

  • 1 small bowl
  • 1 plastic container with cover that is larger than the small bowl
  • 1 spoon for mixing
  • toothpick or bamboo skewer

Ingredients
  

  • 1½ cups Greek yogurt the thicker the better with high fat content-I sued Cabot's Triple Cream Vanilla Bean
  • 1 teaspoon pistachio cream
  • 2 Tablespoons whipped cream cheese the kind you find in a tub
  • 6 Biscoff cookies
  • crushed pistachios optional for serving

Instructions
 

  • Mix Greek yogurt and whipped cream cheese in a small bowl
  • Spoon in the pistachio cream and use a toothpick or skewer to swirl it in
  • Insert the Biscoff cookies-spacing them evenly apart
  • Cover the bowl with an airtight lid or place the bowl into a larger plastic container and cover with an airtight lid
  • Refrigerate 6-8 hours or overnight
  • Top with crushed pistachios before serving

Notes

If you’re expecting the richness of a true cheesecake, this viral version is NOT it. But if you want an easy to make treat that has cheesecake-like flavors, this is it!
Variations: If you don't have pistachio cream in your pantry, try these substitutions
  • swirl in Nutella and sprinkle with crushed peanuts or hazelnuts
  • Add your favorite jam like raspberry or strawberry and top with mini chocolate chips
  • Mix in fresh fruit and top with coconut flakes
 
Keyword 2-ingredient, 4-ingredient dessert, biscoff cookies, pistachio cream, viral Japanese cheesecake
Tried this recipe?Let us know how it was!
Click here to add your own private notes.

The Perfect Dairy Free Chocolate Chip Cookies

February 8, 2026 by Yao 4 Comments

a plate of perfect diary free chocolate chip cookies on a red and white cloth

I developed this cookie recipe for a friend who can’t tolerate dairy-not even butter (So sad!)- and somehow it became the best chocolate chip cookie I’ve ever made. After testing and retesting and tasting and retasting, I am finally ready to share my recipe for The Perfect Dairy Free Chocolate Cookies. 

WAIT! Don’t dismiss this if you were looking for a classic cookie recipe and thought that this couldn’t be as good as the real butter version. I challenge you to make this one time, one bite will change your mind!

These cookies have crispy edges, chewy centers, and melty pools of rich chocolate. They are So Good, you would never guess that they are dairy free. I even have a vegan version of this recipe that you won't believe is vegan! The egg substitute is not what you think! Scroll down to questions.

perfect baked diary free chocolate chip cookies with sea salt on parchment paper
Add As a Trusted Google Source

These cookies have crispy edges, chewy centers, and melty pools of rich chocolate. They are So Good, you would never guess that they are dairy free. 

Follow the rules for making the best cookies

When making these cookies you MUST follow the rules:

Country Crock Homestyle dairy free butter
  1. Use only Country Crock Homestyle Dairy Free Butter- no substitutions 
  2. You must make big cookies- use a medium cookie scoop or 2-2.5 tablespoons of dough per cookie
  3. You must follow the bake-deflate, bake-deflate technique described in this recipe- a lot of noise and a lot of love is put into making these cookies!
  4. Check your oven temperature and make sure you have it preheated at 375F, NOT 350F. Baking larger cookies at a higher temperature for a shorter amount of time creates crispy edges and softer centers.

Any variations to ingredients or methods will result in a different cookie than intended. You’ll end up with a cookie, just not this one.

Ingredients

  • 1 ¾ cup flour
  • 1 teaspoon baking soda
  • ½teaspoon baking powder
  • ½ teaspoon salt
  • 1 egg
  • ¾ cup melted Country Crock Homestyle Dairy Free Butter
  • ¾ cup granulated sugar
  • ¾ cup light brown sugar
  • 1 teaspoon vanilla
  • 1½ cup dairy-free semi-sweet chocolate chips or mix of semi-sweet and dark
  • flaky sea salt (optional but highly recommended)
delicious warm baked cookies with pools of melted chocolate

How to Make The Perfect Dairy Free Chocolate Chip Cookies

Time needed: 32 minutes

Preheat oven to 375F

  1. Dry ingredients

    In a medium bowl whisk together  flour, baking soda, baking powder and salt.

  2. Wet ingredients

    In a large bowl: beat 1 egg and then mix in sugar, light brown sugar, melted butter and vanilla.

  3. Combine wet and dry ingredients

     Add the dry ingredients to the wet ingredients and stir a few times. Then add the chocolate chips and mix until dough forms and you no longer see any white flour. Do not overmix. 

  4. Form cookies

    Use a medium cookie scoop to portion the dough onto a parchment-lined baking sheet, spacing cookies evenly and baking only 6 per sheet.

  5. Bake, deflate and repeat

    Bake in a preheated oven at 375 degrees for 5 minutes. Then remove the sheet of cookies from the oven and tap the sheet onto a hard, heat proof surface 5-10 times until cookies deflate and thin out. The flatter the better. Place cookies back in the oven and bake another 4-5 minutes until slightly brown on the edges. Do not overbake. Remove sheet of cookies from the oven and tap several times again until cookies deflate. The thinner the better. You should see the melted chocolate chips oozing.  
    sheet pan of partially baked cookie dough that is deflated after being being dropped several times on a hard surface

  6. Cool

    Cool for 5 minutes then sprinkle with flaky sea salt if using.
    Allow cookies to cool for another 15 minutes (if you can wait that long!) before removing from the baking sheet.

.

And now, here are some questions I am anticipating you guys might have...

What brands make dairy free chocolate chips?

Thanks to modern food science, you can now find a variety of dairy free chocolate chip options. Two brands I have used that taste like the real thing are Guittard dairy-free semi-sweet chocolate chips and Ghirardelli non-dairy dark chocolate chips.a bag of Guittard dairy free semi sweet chocolate chips

Why did my cookies turn out cakey?

You did't follow the bake, deflate and repeat method! After baking the first 5 minutes, you must take them out the oven and tap the baking sheet several times on a heat proof surface to get all the air out. Then bake it another 4-5 minutes and deflate again. My method is hold the baking sheet 5 inches above a hard wood , heat proof surface and drop it, repeating 10-15 times.

Why aren't my cookies chewy?

Did you overbake? Cookies should be slightly brown on the edges. Baking 375F is key but oven temperatures vary so be attentive and adjust baking times. Cookies will look underbaked but will firm up once cooled. Also remember to only use Country Crock Dairy Free Homestyle Butter. I am not sponsored by them (at least not yet!), but it is a key ingredient for creating a crispy and chewy texture.

Can these cookies be made vegan?

Yes, substitute the egg for three tablespoons aquafaba. Whisk the aquafaba (the liquid from canned chickpeas/garbanzobeans) until frothy before adding to wet ingredients. frothy aquafaba

If you make these cookies, please remember to leave a rating and comment. Your feedback is important and helps make this blog better!

Looking for more amazingly delicious cookie recipes? Check these out:

Bakery Style Chocolate Chip Cookies

Pistachio Dark Chocolate Cookies with Sea Salt

The Best Coconut Lime Cookies

a plate of perfect diary free chocolate chip cookies on a red and white cloth

The Perfect Dairy Free Chocolate Chip Cookies

The Perfect Dairy-Free Chocolate Chip Cookies with crispy edges, chewy centers, and melty rich chocolate flavor-no butter, no dairy, no compromise.
5 from 1 vote
Print Recipe Pin Recipe
Nutrition Facts
The Perfect Dairy Free Chocolate Chip Cookies
Serving Size
 
1 cookie
Amount per Serving
Calories
301
% Daily Value*
Fat
 
15
g
23
%
Saturated Fat
 
5
g
31
%
Trans Fat
 
2
g
Polyunsaturated Fat
 
3
g
Monounsaturated Fat
 
4
g
Cholesterol
 
0.04
mg
0
%
Sodium
 
237
mg
10
%
Potassium
 
33
mg
1
%
Carbohydrates
 
43
g
14
%
Fiber
 
2
g
8
%
Sugar
 
29
g
32
%
Protein
 
3
g
6
%
Vitamin A
 
0.4
IU
0
%
Vitamin C
 
0.001
mg
0
%
Calcium
 
43
mg
4
%
Iron
 
2
mg
11
%
* Percent Daily Values are based on a 2000 calorie diet.
Prep Time 12 minutes mins
Cook Time 10 minutes mins
Cooling time 20 minutes mins
Total Time 32 minutes mins
Course Baking, Dessert
Cuisine American
Servings 15 cookies
Calories 301 kcal

Equipment

  • 1 large mixing bowl
  • 1 medium mixing bowl
  • 1 small bowl
  • measuring cups
  • measuring spoons
  • whisk or hand-held frother
  • spatula
  • medium size cookie scoop #20 size, or about 2-2.5 tablespoons
  • 2 baking sheets
  • parchment paper

Ingredients
  

  • 1¾ cup all purpose flour
  • 1 teaspoon baking soda
  • ½ teaspoon baking powder
  • ½ teaspoon salt
  • 1 egg
  • ¾ cup Country Crock Homestyle Dairy-Free Butter, melted **Do Not Substitute any other brand***
  • ¾ cup granulated sugar
  • ¾ cup light brown sugar
  • 1 teaspoon vanilla extract
  • 1½ cup dairy-free chocolate chips semi-sweet or mix of semi-sweet and dark
  • *flaky sea salt optional but highly recommended

Instructions
 

Dry ingredients

  • In a medium bowl whisk together  flour, baking soda, baking powder and salt.

Wet ingredients

  • In a large bowl: beat 1 egg and then mix in sugar, light brown sugar, melted butter and vanilla.

Combine wet and dry ingredients

  • Add the dry ingredients to the wet ingredients and stir a few times with spatula or wooden spoon. Then add the chocolate chips and mix until dough forms and you no longer see any white flour. Do not overmix.

Form cookies

  • Use a medium cookie scoop or to portion the dough onto a parchment-lined baking sheet, spacing cookies evenly and baking only 6 per sheet.

Bake, deflate and repeat

  • Bake in a preheated oven at 375℉ for 5 minutes. Then remove the sheet of cookies from the oven and tap the sheet onto a hard, heat proof surface 5-10 times until cookies deflate and thin out. The flatter the better. Place cookies back in the oven and bake another 4-5 minutes until slightly brown on the edges. Do not overbake. Remove sheet of cookies from the oven and tap several times again until cookies deflate. The thinner the better. You should see the melted chocolate chips oozing. Pro tip: hold the baking sheet 5 inches above a wooden, heat-proof surface and drop it, repeat 10-15 times.

Cool

  • Cool for 5 minutes, then sprinkle with flaky sea salt if using. Allow to cool another 15 minutes before removing from baking sheet.

Notes

*nutrition values calculated without flaky sea salt
**This recipe calls for specific ingredients and following the bake-deflate-bake-deflate technique written in this recipe. You must use Country Crock Homestyle Dairy Free Butter. Substitutions will result in a totally different cookie than intended.


Nutrition

Serving: 1cookieCalories: 301kcalCarbohydrates: 43gProtein: 3gFat: 15gSaturated Fat: 5gPolyunsaturated Fat: 3gMonounsaturated Fat: 4gTrans Fat: 2gCholesterol: 0.04mgSodium: 237mgPotassium: 33mgFiber: 2gSugar: 29gVitamin A: 0.4IUVitamin C: 0.001mgCalcium: 43mgIron: 2mg
Keyword chocolate chips, dairy-free, perfect chocolate chip cookie recipe
Tried this recipe?Let us know how it was!
Click here to add your own private notes.

Apricot Cream Cheese Cookies (Apricot Angels)

December 28, 2025 by Yao Leave a Comment

Apricot Cream Cheese Cookies also called Apricot Angels piled on a baking sheet.

There are a handful of cookies I only make around the holidays because they’re that special — and these Apricot Cream Cheese Cookies, also known as Apricot Angels, are one of them. My dearest friend Katie shared this recipe with me years ago, and it’s been a holiday favorite ever since. The original recipe was submitted by Sandy Starr to Good Housekeeping magazine sometime back in the mid-1990s.

Dried apricot pieces and white chocolate chips are baked into a rich, buttery cream cheese dough that’s simply decadent! If you make these cookies once, you will be hooked just like me and want to make them year after year.

Here is what you are going to need...

Equipment

  • Stand mixer or hand mixer
  • Baking sheets
  • Parchment paper
  • Spatula
  • Cookie scoop or tablespoon
  • Knife & cutting board

Ingredients

  • 1 cup butter, softened (salted or unsalted)
  • 8 ounces cream cheese, softened
  • 1¾ cups granulated sugar
  • ½ teaspoon almond extract
  • 2 cups all-purpose flour
  • ½ teaspoon baking soda
  • 1 cup chopped dried apricots
  • 1 cup white chocolate chips
  • ½ cup slivered or sliced almonds (optional)

How to Make Apricot Cream Cheese Cookies

Time needed: 1 hour

  1. Whisk dry ingredients

    Whisk flour and baking soda together in a medium bowl. Set aside.

  2. Cream cheese mixture

    n a large bowl or stand mixer fitted with a paddle attachment, cream together the butter, cream cheese, granulated sugar, and almond extract until smooth.

  3. Combine all

    Slowly add the flour mixture until just combined. Fold in the chopped apricots, white chocolate chips, and almonds (if using).cream cheese and apricot mixture

  4. Refrigerate

    Chill the dough for at least 30 minutes.

  5. Place on baking sheet

    Drop dough by tablespoonfuls onto parchment-lined baking sheets.scoops of apricot cream cheese cookie dough on parchment paper on a baking sheet

  6. Bake

    Bake at 325°F for 12–15 minutes, until the edges are lightly golden.

  7. Cool

    Cool on the baking sheet for at least 10 minutes before transferring.

Looking for more holiday baking ideas or do you just a sweet treat for no reason? Check out a few of my personal favorites:

Pistachio Dark Chocolate Cookies with Sea Salt

Toffee Topped Shortbread

The Best Coconut Lime Cookies

Apricot Cream Cheese Cookies also called Apricot Angels piled on a baking sheet.

Apricot Cream Cheese Cookies

These apricot cream cheese cookies are soft, buttery, and perfectly balanced with bits of dried apricot .An easy, elegant cookie that’s ideal for holidays, cookie exchanges, or everyday baking.
Print Recipe Pin Recipe
Nutrition Facts
Apricot Cream Cheese Cookies
Amount per Serving
Calories
262
% Daily Value*
Fat
 
15
g
23
%
Saturated Fat
 
8
g
50
%
Trans Fat
 
0.3
g
Polyunsaturated Fat
 
1
g
Monounsaturated Fat
 
4
g
Cholesterol
 
31
mg
10
%
Sodium
 
121
mg
5
%
Potassium
 
127
mg
4
%
Carbohydrates
 
31
g
10
%
Fiber
 
1
g
4
%
Sugar
 
22
g
24
%
Protein
 
3
g
6
%
Vitamin A
 
561
IU
11
%
Vitamin C
 
0.1
mg
0
%
Calcium
 
37
mg
4
%
Iron
 
1
mg
6
%
* Percent Daily Values are based on a 2000 calorie diet.
Prep Time 15 minutes mins
Cook Time 15 minutes mins
Refrigerate 30 minutes mins
Total Time 1 hour hr
Course Baking, Dessert
Cuisine American
Servings 24 cookies
Calories 262 kcal

Equipment

  • 1 stand mixer
  • 2 baking sheets or hand mixer
  • 1 parchment paper
  • 1 rubber spatula
  • 1 small cookie scoop
  • 1 cutting board
  • 1 sharp knife

Ingredients
  

  • 1 cup butter softened, salted or unsalted
  • 8 ounces cream cheese softened
  • 1¾ cup granulated sugar
  • ½ teaspoon almond extract
  • 2 cups flour
  • ½ teaspoon baking soda
  • 1 cup chopped dried apricots
  • 1 cup white chocolate chips
  • ½ cup slivered or sliced almonds optional

Instructions
 

Dry ingredients

  • Whisk flour and baking soda together in a medium bowl. Set aside.

Cream cheese mixture

  • In a large bowl or stand mixer fitted with a paddle attachment, cream together the butter, cream cheese, granulated sugar, and almond extract until smooth.

Combine all

  • Slowly add the flour mixture until just combined. Fold in the chopped apricots, white chocolate chips, and almonds (if using).

Refrigerate

  • Chill the dough for at least 30 minutes.

Place on baking sheet

  • Drop dough by tablespoonfuls onto parchment-lined baking sheets.

Bake

  • Bake at 325°F for 12–15 minutes, until the edges are lightly golden.

Cool

  • Cool on the baking sheet for at least 10 minutes before transferring.

Nutrition

Calories: 262kcalCarbohydrates: 31gProtein: 3gFat: 15gSaturated Fat: 8gPolyunsaturated Fat: 1gMonounsaturated Fat: 4gTrans Fat: 0.3gCholesterol: 31mgSodium: 121mgPotassium: 127mgFiber: 1gSugar: 22gVitamin A: 561IUVitamin C: 0.1mgCalcium: 37mgIron: 1mg
Keyword Christmas cookies, cream cheese, dried apricots
Tried this recipe?Let us know how it was!
Click here to add your own private notes.

Savory Cheddar Cornbread

September 30, 2025 by Yao Leave a Comment

Golden brown cornbread with moist and tender crumbs

If you’ve been on the hunt for the best super moist cornbread, this is the one you’ll keep coming back to. I’ve got a simple hack for upgrading Jiffy corn muffin mix into the best Savory Cheddar Cornbread that tastes like it came straight out of a southern kitchen. My secret ingredient isn’t sour cream or buttermilk—it’s mayonnaise! I love using mayo in cornbread because it transforms the texture into buttery, tender crumbs with perfectly golden brown edges. In fact, I often swap mayonnaise for sour cream in baking recipes to guarantee a rich, moist result—just like in my Zucchini Chocolate Chip Muffins. But for now, let’s get back to cornbread.

Golden cornbread with a moist, tender crumb served on a white plate.

Why you'll love this cornbread

  • One-bowl recipe - minimal dishes and easy clean up
  • Budget friendly - with just 2 boxes of Jiffy corn muffin mix
  • Customizable to your cravings- try different add ins to make it more savory or transform it to something sweet
Golden brown baked cornbread in a glass dish with a serving spatula on white marble background.
Delicious homemade cornbread perfect for comfort food dinners.

Whether you bake it up in a cast iron skillet to get those super golden edges or a square baking dish lined with parchment paper for neat, picture-perfect slices, this recipe is as versatile as it is delicious. Trust me, once you try it, you won’t want to make cornbread any other way again.

Ingredients

  • ½ cup melted butter-unsalted
  • ¾ cup milk
  • 1 cup mayonnaise
  • 2 eggs
  • 1 cup corn kernels (frozen, fresh or canned)
  • 1 ½ cups shredded cheddar cheese (mild, sharp , white- any kind you like)
  • 2 boxes Jiffy corn muffin mix
  • ¼ teaspoon salt
Savory Cheddar Cornbread ingredients on a marble countertop with eggs, milk, corn, shredded cheese, butter, sour cream and Jiffy corn muffin mix.

How to Make Savory Cheddar Cornbread

Time needed: 1 hour and 5 minutes

Preheat oven to 350F

  1. Combine melted butter, milk, mayonnaise, eggs, cheese and corn kernels in a  large bowl.

    Wet ingredients for cornbread batter in a green mixing bowl.

  2. Slowly stir in Jiffy corn muffin mix one box at a time until there are no more dry lumps in the batter.

    Savory Cheddar Cornbread batter in a green mixing bowl with spatula

  3. Line a 8x8 baking dish with parchment paper and spray with cooking spray.

    Parchment lined square glass baking dish.

  4. Pour in the batter.

    Cheddar cornbread batter in a glass baking dish.

  5. Bake in a preheated oven at 350F for 50-55 minutes until golden brown around the edges and toothpick inserted in the center comes out clean.

    Golden brown savory cheddar cornbread in a square glass baking dish

Variations

Sweet cornbread- add ¼ cup granulated sugar to the batter

Cheddar Jalapeno cornbread- add ¼ cup seeded and chopped jalapenos

Try other savory add ins: ¼ cup crumbled crispy bacon, 2 Tablespoons chopped chives

Serve with honey butter: mix ¾ cup softened butter with ¼ cup honey.

Storage

Wrap with plastic wrap and keep at room temperature for up to 2 days. Keep longer in the refrigerator for up to 4 days.

If you make this recipe, please don't forget to leave a recipe rating!

Looking for more simple but next level quick bread recipes ? Give these a try:

Buttermilk Pumpkin Bread

Beer Bread with Honey Butter

Banana Chocolate Chip Muffins

Golden brown cornbread with moist and tender crumbs

Savory Cheddar Cornbread

This easy hack for transforming Jiffy cornbread mix into Savory Cheddar Cornbread results in the best super moist, buttery cornbread with golden brown edges.
Print Recipe Pin Recipe
Nutrition Facts
Savory Cheddar Cornbread
Amount per Serving
Calories
439
% Daily Value*
Fat
 
32
g
49
%
Saturated Fat
 
11
g
69
%
Trans Fat
 
0.3
g
Polyunsaturated Fat
 
10
g
Monounsaturated Fat
 
9
g
Cholesterol
 
45
mg
15
%
Sodium
 
682
mg
30
%
Potassium
 
103
mg
3
%
Carbohydrates
 
31
g
10
%
Fiber
 
3
g
13
%
Sugar
 
10
g
11
%
Protein
 
7
g
14
%
Vitamin A
 
467
IU
9
%
Vitamin C
 
0.3
mg
0
%
Calcium
 
146
mg
15
%
Iron
 
1
mg
6
%
* Percent Daily Values are based on a 2000 calorie diet.
Prep Time 10 minutes mins
Cook Time 55 minutes mins
Total Time 1 hour hr 5 minutes mins
Course Baking
Cuisine American
Servings 12 servings
Calories 439 kcal

Equipment

  • 1 large mixing bowl
  • 1 spatula
  • 1 8x8 baking dish
  • 1 parchment paper
  • cooking spray

Ingredients
  

  • ½ cup melted butter unsalted
  • ¾ cup milk any kind
  • 1 cup mayonnaise the real kind, not sandwich spread
  • 1 cup corn kernels fresh, frozen or canned
  • 1½ cups shredded cheddar cheese
  • 2 boxes Jiffy corn muffin mix
  • ¼ teaspoon salt

Instructions
 

  • Combine melted butter, milk, mayonnaise, eggs, cheese and corn kernels in a large mixing bowl.
  • Slowly stir in Jiffy corn muffin mix, one box at a time until there are no dry lumps in the batter.
  • Line a 8x8 inch baking dish with parchment paper and spray with cooking spray.
  • Pour in the batter.
  • Bake in a preheated oven at 350℉ for 50-55 minutes until golden brown around the edges and toothpick inserted in the center comes out clean.
  • Allow to cool for 20 minutes before cutting.

Notes

Variations:
For a sweeter cornbread add ¼ cup granulated sugar.
Try add-ins like ¼ cup seeded and chopped jalapenos, ¼ cup crumbled  crispy bacon, or 2 Tablespoons chopped fresh chives.
Serve with warm honey butter: mix ¾ cup of softened butter with ¼ cup of honey.
 

Nutrition

Calories: 439kcalCarbohydrates: 31gProtein: 7gFat: 32gSaturated Fat: 11gPolyunsaturated Fat: 10gMonounsaturated Fat: 9gTrans Fat: 0.3gCholesterol: 45mgSodium: 682mgPotassium: 103mgFiber: 3gSugar: 10gVitamin A: 467IUVitamin C: 0.3mgCalcium: 146mgIron: 1mg
Keyword best cornbread, cheddar, Jiffy cornbread mix, savory
Tried this recipe?Let us know how it was!
Click here to add your own private notes.

White Peach and Burrata Salad

September 8, 2025 by Yao Leave a Comment

A salad with tomatoes, white peaches and burrata cheese.

Every summer, I look forward to biting into the first sweet peach. You know the kind- the one that is so juicy that it drips down your hand and runs down your elbow, like that scene of Belly and Conrad from The Summer I Turned Pretty. That famous scene is the inspiration for this White Peach and Burrata salad.

This is the ultimate dish to commemorate the end of summer. You can easily make it for a fancy but easy-to-make Labor Day side dish. Farmer’s market peaches and tomatoes add sweet and tangy flavors that compliment creamy burrata and peppery arugula. Crunchy pistachios and a drizzle of balsamic glaze are the finishing touches that make this salad look and taste decadent.

A salad with tomatoes, burrata and peaches.

Now you might be wondering,  why use white peaches? White peaches tend to be slightly sweeter than yellow peaches, which helps balance the acidity from the tomatoes and compliments the richness of the burrata. If you can’t find white peaches, substitute yellow peaches or nectarines. The truth is, the white peaches were on sale the day I was at the market and that’s what I came home with!

Here is what you will need for White Peach and Burrata Salad, which I am nick naming The Salad That Looks Pretty.

Ingredients

  • Peaches- if you cant find white ones, use yellow
  • Cherry or grape tomatoes-or a multicolored medley small tomatoes
  • Arugula- baby arugula or regular size
  • Burrata- removed from liquid
  • Pistachios- shelled, roasted and salted
  • Balsamic glaze-glaze or reduction; found in the oil and vinegar section at your local market
  • Fresh basil leaves
  • Extra virgin olive oil
  • Salt and pepper to taste
Fresh produce and ingredients for salad, including multicolored cherry tomatoes, organic arugula, burrata cheese, peaches, pistachios, and balsamic reduction.

How to Make White Peach and Burrata Salad

  1. Arugula and burrata

    Start by placing a mound of arugula on a plate or bowl. Place burrata on top, cut burrata into quarters so that the creamy middle oozes out.A plate of arugula topped with burrata cheese.

  2. Peaches and tomatoes

    Arrange peach slices and tomatoes around the burrata. Tuck in a few basil leaves randomly.A plate of salad with tomatoes, peaches and burrata cheese.

  3. Finishing touches

    Sprinkle with pistachios and a drizzle of balsamic glaze, extra virgin olive oil and salt and pepper to taste. Enjoy!a forkful of burrata, white peaches and arugula

Please leave a review and recipe rating if you make this! Your feedback helps me improve this blog!

Looking for more scrumptous salad recipes? check these out:

Harvest Salad

Strawberry Goat cheese Salad

A salad with tomatoes, white peaches and burrata cheese.

White Peach and Burrata Salad

This White Peach and Burrata Salad is the ultimate summer salad recipe- made with arugula, peaches, cherry tomatoes, creamy burrata, pistachios and balsamic glaze.
Print Recipe Pin Recipe
Nutrition Facts
White Peach and Burrata Salad
Amount per Serving
Calories
349
% Daily Value*
Fat
 
24
g
37
%
Saturated Fat
 
10
g
63
%
Polyunsaturated Fat
 
2
g
Monounsaturated Fat
 
5
g
Cholesterol
 
40
mg
13
%
Sodium
 
42
mg
2
%
Potassium
 
1129
mg
32
%
Carbohydrates
 
29
g
10
%
Fiber
 
14
g
58
%
Sugar
 
10
g
11
%
Protein
 
20
g
40
%
Vitamin A
 
1561
IU
31
%
Vitamin C
 
15
mg
18
%
Calcium
 
1013
mg
101
%
Iron
 
28
mg
156
%
* Percent Daily Values are based on a 2000 calorie diet.
Prep Time 15 minutes mins
Total Time 15 minutes mins
Course Salad
Cuisine American, Fusion
Servings 4 servings
Calories 349 kcal

Equipment

  • 1 large salad bowl
  • 1 salad serving utensils
  • 1 chef's knife

Ingredients
  

  • 2 medium white peaches pitted and sliced thinly
  • 1 cup cherry or grape tomatoes cut in halves
  • 4 cups arugula
  • 8 ounces burrata cheese drained
  • ⅓ cup roasted pistachios shelled and salted
  • 1 Tablespoon balsamic glaze plus more to taste
  • ½ cup basil leaves loosely packed
  • 1 Tablespoon extra virgin olive oil plus more to taste
  • salt and pepper to taste

Instructions
 

Arugula and burrata

  • Start by placing a mound of arugula on a plate or bowl. Place burrata on top, cut burrata into quarters so that the creamy middle oozes out.

Peaches and tomatoes

  • Arrange peach slices and tomatoes around the burrata. Tuck in a few basil leaves randomly.

Finishing touches

  • Sprinkle with pistachios and a drizzle of balsamic glaze, extra virgin olive oil and salt and pepper to taste. Enjoy!

Notes

Substitutions: White peaches tend to be slightly sweeter than yellow peaches, which helps balance the acidity from the tomatoes and compliments the richness of the burrata. If you can’t find white peaches, use yellow peaches or nectarines.

Nutrition

Calories: 349kcalCarbohydrates: 29gProtein: 20gFat: 24gSaturated Fat: 10gPolyunsaturated Fat: 2gMonounsaturated Fat: 5gCholesterol: 40mgSodium: 42mgPotassium: 1129mgFiber: 14gSugar: 10gVitamin A: 1561IUVitamin C: 15mgCalcium: 1013mgIron: 28mg
Keyword arugula, peach and burrata salad, pistachios, summer salad, white peach
Tried this recipe?Let us know how it was!
Click here to add your own private notes.

Zucchini Chocolate Chip Muffins

August 15, 2025 by Yao Leave a Comment

zucchini chocolate chip muffins

I’ve been given several zucchinis lately from friends and neighbors. And when life hands me more summer squash, than I can stir fry , I make muffins. These moist and delicious zucchini chocolate chip muffins are the kind of recipe that make you look forward to breakfast — soft, tender, and dotted with melty chocolate in every bite. The chocolate chips add just the right amount of indulgence.  They’re the perfect mid-morning treat, after-school snack, or sneaky dessert. And yes, you can make zucchini muffins with yellow zucchini — the flavor and texture are just as lovely, and it’s a fun way to use whatever’s fresh from the garden.What’s so special about this recipe? There’s a secret ingredient that guarantees your muffins will turn out moist. Nope, it is not sour cream or Greek yogurt. My now not-so-secret ingredient is mayonnaise! That’s right, mayo! The real stuff, not the sandwich spread!

Chocolate Chip Zucchini Muffins on a wire rack

How to Make Zucchini muffins (or bread) More Moist

Here’s the magic behind how plain zucchini muffins get upgraded. A dollop of mayonnaise gets mixed into the batter along with hand measured shredded zucchini. There is no need to squeeze the excess water out of the zucchini. Just pick up the zucchini shreds with your fingers. This trick helps create incredibly moist muffins. 

Pro Tip for Shredding Zucchini

Use the small hole side of a box grater to shred the zucchini. You will need two cups, about 2 medium sized zucchinis worth. My method is to place the box grater on a large plate and shred the zucchini onto the plate. Once you are done shredding, pour off any visible liquid. There is no need to strain the zucchini or squeeze out excess water. Measure the zucchini by scooping it up with your fingers and placing it into a measuring cup.

How long does it take to bake muffins?

Baking them is a breeze, but timing is everything. It usually takes 20-25 minutes at 375°F, but ovens can vary. The real trick is knowing when zucchini muffins are done — a toothpick inserted in the center should come out clean, with maybe a crumb or two clinging, but no wet batter.

Are you ready to bake? Here is what you will need:

Ingredients

  • 1 ¾ cup flour
  • 1 teaspoon baking powder
  • ½ teaspoon baking soda
  • 1 teaspoon salt
  • ½  teaspoon cinnamon (add more if you like)
  • 2 eggs
  • ¾ cup light brown sugar
  • ½ cup granulated sugar
  • 2 cups shredded zucchini* plus more for topping
  • ½ cup melted butter
  • ¼ cup mayonnaise
  • 1 teaspoon vanilla
  • 1 cup chocolate chips plus more for topping

How to Make Zucchini Chocolate Chip Muffins

Time needed: 45 minutes

Preheat oven to 375

  1. *Prepare zucchini

    Use the small hole side of a box grater to shred the zucchini. You will need two cups, about 2 medium sized zucchinis worth. My method is to place the box grater on a large plate and shred the zucchini onto the plate. Once you are done shredding, pour off any visible liquid. There is no need to strain the zucchini or squeeze out excess water. Measure the zucchini by scooping it up with your fingers and placing it into a measuring cup. Measure out 2 cups. Set aside . Additionally, save a few more shreds of zucchini for topping.

  2. Dry ingredients

    In a medium mixing bowl, whisk together flour, baking powder, baking soda and salt and cinnamon. I like only a hint of cinnamon so I only use a ½ teaspoon. Feel free to add up to 1 teaspoon if you prefer more. Set aside.
    a medium filled with dry flour and a whisk

  3. Wet ingredients

    In a large bowl whisk 2 eggs. Then stir in  light brown sugar, granulated sugar and melted butter. Next add shredded zucchini, mayonnaise and chocolate chips and give it a few stirs.
    a blue bowl with filled with wet ingredients for zucchini muffins

  4. Combine

    Now slowly add in flour mixture to the wet ingredients and stir until just combined.A blue bowl filled with a zucchini chocolate chip batter

  5. Scoop

    Use an ice cream scoop or cookie scoop to pour the batter into muffin cups until ¾ full. Top with a few chocolate chips and a few shreds of zucchini. This makes the muffins look prettier once baked. 
    unbaked zucchini chocolate chip muffins

  6. Bake

    Bake at 375 degrees for about 25 minutes or until muffins are lightly brown and toothpick inserted in the center of the muffin comes out clean. Muffins should be soft and spring back when poked with your finger.zucchini chocolate chip muffins on a wire rack

Can I use this recipe to make bread?- Reduce the oven temperature to 350 degrees and bake in a 9x5 inch loaf pan for 55-65 minutes or until the toothpick comes out clean when inserted in the center of the loaf.

Storage

Muffins can be left out at room temperature in a sealed container on the counter for up to 3 days. If you’re lucky enough to have extra, here’s how to freeze zucchini chocolate chip muffins: let them cool completely, wrap each one tightly in plastic wrap, then store in an airtight bag in the freezer for up to three months. Just thaw them at room temperature when you are ready to use them, I mean eat them!

Looking for more zucchini recipes? Try These:

The Best Zucchini Blueberry Bread

Gluten-free Zucchini Carrot Breakfast Cookies

zucchini chocolate chip muffins

Zucchini Chocolate Chip Muffins

Moist and delicious zucchini chocolate chip muffins made with shredded zucchini and a secret ingredient! Tips on baking time, doneness, and freezing for the perfect summer squash treat.
Print Recipe Pin Recipe
Nutrition Facts
Zucchini Chocolate Chip Muffins
Serving Size
 
1 muffin
Amount per Serving
Calories
295
% Daily Value*
Fat
 
13
g
20
%
Saturated Fat
 
7
g
44
%
Trans Fat
 
0.3
g
Polyunsaturated Fat
 
2
g
Monounsaturated Fat
 
3
g
Cholesterol
 
44
mg
15
%
Sodium
 
337
mg
15
%
Potassium
 
133
mg
4
%
Carbohydrates
 
41
g
14
%
Fiber
 
1
g
4
%
Sugar
 
28
g
31
%
Protein
 
4
g
8
%
Vitamin A
 
336
IU
7
%
Vitamin C
 
6
mg
7
%
Calcium
 
56
mg
6
%
Iron
 
1
mg
6
%
* Percent Daily Values are based on a 2000 calorie diet.
Prep Time 20 minutes mins
Cook Time 25 minutes mins
Total Time 45 minutes mins
Course Baking
Cuisine American
Servings 14 muffins
Calories 295 kcal

Equipment

  • 1 large mixing bowl
  • 1 medium mixing bowl
  • 1 box grater
  • 1 whisk
  • 1 rubber spatula
  • 1 muffin tin
  • 1 ice cream scoop
  • 14 paper muffin cups

Ingredients
  

  • 1¾ cup flour
  • 1 teaspoon baking powder
  • ½ teaspoon baking soda
  • 1 teaspoon salt
  • ½ teaspoon ground cinnamon* adjust cinnamon to your taste- use ½-1 teaspoon
  • 2 eggs
  • ¾ cup light brown sugar
  • ½ cup granulated sugar
  • 2 cups shredded zucchini* See step 1 for preparing zucchini
  • ½ cup melted butter
  • ¼ cup mayonnaise use the real stuff, not sandwich spread
  • 1 teaspoon vanilla
  • 1 cup chocolate chips plus more for topping

Instructions
 

Prepare Zucchini

  • Use the small hole side of a box grater to shred zucchini. Place a box grater on a large plate and shred the zucchini onto the plate.Pour off any visible liquid. Use your fingers to measure out 2 cups of zucchini. Do not squeeze out excess water. set aside. Additionally save a few more shreds of zucchini for topping.

Dry ingredients:

  • In a medium bowl whisk together flour, baking powder, baking soda, salt and cinnamon. Adjust cinnamon to your taste, use ½ to 1 teaspoon.

Wet ingredients

  • In a large bowl whisk 2 eggs. Then stir in light brown sugar, granulated sugar and melted butter. Next add 2 cups shredded zucchini, mayonnaise and chocolate chips. Give it a few stirs.

Combine

  • Slowly add the flour mixture to the large bowl of wet ingredients and stir until just combined.

Scoop

  • Use a ice cream or cookie scoop to fill muffin cups until ¾ full. Top each muffin with a few chocolate chips and a few shreds of zucchini.

Bake

  • Bake in a preheated oven at 375℉ for 20-25 minutes or until muffins are light brown and toothpick inserted in the center comes out clean.

Notes

How to make zucchini muffins more moist:
Do not squeeze excess water out of shredded zucchini. Measure zucchini by using your fingers to pick up the zucchini shreds and place in measuring cups.
Use real mayonnaise, not sandwich spread. 

Nutrition

Serving: 1muffinCalories: 295kcalCarbohydrates: 41gProtein: 4gFat: 13gSaturated Fat: 7gPolyunsaturated Fat: 2gMonounsaturated Fat: 3gTrans Fat: 0.3gCholesterol: 44mgSodium: 337mgPotassium: 133mgFiber: 1gSugar: 28gVitamin A: 336IUVitamin C: 6mgCalcium: 56mgIron: 1mg
Keyword baking, blueberry zucchini, moist and delicious muffins, secret ingredient, zucchini chocolate chip muffins
Tried this recipe?Let us know how it was!
Click here to add your own private notes.

Apple Arugula Salad

May 12, 2025 by Yao Leave a Comment

A bowl of salad with apples, lemons and parsley
a bowl of arugula, apples, cheese and pistachio salad

This Apple Arugula Salad with Lemon Vinaigrette is my new go-to when I want to make a fancy salad with little effort. Made with sweet and tart apples, arugula, tangy white cheddar cheese and roasted pistachios, this salad is bursting with flavor with each forkful. The apples and cheese are cut into matchstick-size pieces to make it look fancy and to make it easier to get a little of everything in each bite. I categorize this as a spring salad, but you're going to want to eat it all year round.

What sets this salad apart is how beautifully the flavors and textures meld together. The crisp apples ( I love using a combination of Envy and Granny Smith) add contrasting sweet and tart, while mild white cheddar cheese offers a creamy bite that balances the peppery arugula. Of course I couldn't resist adding nuts to this already amazing recipe- I tossed in crunchy roasted pistachios for extra crunch.

Ant to tie it all together? A vibrant lemon vinaigrette made simply with fresh lemon juice, olive oil, dijon mustard, a touch of honey and fresh chopped chives. It's zippy, light and lifts the salad into something that feels restaurant-worthy.

Ingredients

  • 1 large sweet apple (Honeycrisp, Envy, Fuji)
  • 1 large tart apple (Grannysmith)
  • arugula
  • white cheddar or Manchego cheese
  • shelled, roasted pistachios

For the Lemon Vinaigrette

  • fresh squeezed lemon juice
  • dijon mustard
  • honey
  • extra virgin olive oil
  • chopped fresh chives
  • salt
  • pepper

How to Make Apple Arugula Salad

Time needed: 15 minutes

  1. Cut into matchsticks

    Cut and slice apples, discard the core and seeds. Cut apple slices into thin matchstick-size pieces. Cut the cheese into thin matchstick-size pieces. It is OK if the cheese breaks into smaller pieces.Ingredients for apple and pear salad

  2. Make lemon vinaigrette

    Add lemon juice, dijon mustard, honey, olive oil, chopped chives, salt and pepper to a small glass jar. Cover and shake vigorously until emulsified. If you don't have a jar, pour the ingredients in a small bowl and whisk to combine.A spoon is pouring honey and oil into a jar with a spoon

  3. Toss

    In a large bowl, combine the arugula and apple matchsticks. Drizzle the vinaigrette over the salad and gently toss to coat everything evenly. Top with cheese and pistachios. Serve immediately.arugula and apples tossed in a vinaigrette and topped with cheese and pistachios

This salad is perfect as a light lunch, a side for grilled chicken or fish, or even as part of a spring brunch spread. It’s easy, elegant, and comes together in minutes.

Pro Tip

The star ingredients of the salad are the apples and cheese. For best results, choose apples that are crisp and crunchy. Although they would work in a pinch, Red Delicious and Macintosh apples are not recommended as they tend to be mealy.  I used a combination of sweet Envy and tart Granny Smith apples. 

Cheddar cheese is a delicious compliment to apples. For this salad, white cheddar is recommended as I prefer a milder and nuttier flavor. The exact cheese used for this recipe is Trader Joe’s Unexpected Cheddar. I love the tanginess and the bits of salty crumbles. Manchego cheese would be an excellent substitution if you want to splurge. I love it for  the nutty flavor and the firm texture, making it easy to slice into matchsticks. 

Looking for more unique salad ideas? Check these out:

Strawberry Goat Cheese Salad

Harvest Salad

Tuscan Kale Ceasar

A bowl of salad with apples, lemons and parsley

Apple Arugula Salad

Apple Arugula Salad with Lemon Vinaigrette made with sweet and tart apples, arugula, white cheddar cheese and pistachios is a spring salad you will want to eat all year round.
Print Recipe Pin Recipe
Nutrition Facts
Apple Arugula Salad
Amount per Serving
Calories
348
% Daily Value*
Fat
 
26
g
40
%
Saturated Fat
 
7
g
44
%
Polyunsaturated Fat
 
4
g
Monounsaturated Fat
 
14
g
Cholesterol
 
21
mg
7
%
Sodium
 
322
mg
14
%
Potassium
 
428
mg
12
%
Carbohydrates
 
21
g
7
%
Fiber
 
4
g
17
%
Sugar
 
12
g
13
%
Protein
 
10
g
20
%
Vitamin A
 
1493
IU
30
%
Vitamin C
 
13
mg
16
%
Calcium
 
255
mg
26
%
Iron
 
2
mg
11
%
* Percent Daily Values are based on a 2000 calorie diet.
Prep Time 15 minutes mins
Cook Time 0 minutes mins
Total Time 15 minutes mins
Course Salad
Cuisine American
Servings 4 servings
Calories 348 kcal

Equipment

  • 1 salad bowl
  • 1 whisk
  • 1 mason jar
  • 1 knife
  • 1 cutting board

Ingredients
  

  • 1 sweet apple Honeycrisp, Envy, Fuji
  • 1 tart apple Granny Smith
  • 7 ounces arugula
  • 3 ounces white cheddar cheese
  • ½ cup shelled and roasted pistachios

For the Lemon Vinaigrette

  • 2 tablespoon fresh lemon juice
  • 1 teaspoon dijon mustard
  • 1 Tbs honey
  • ¼ cup olive oil extra virgin
  • 1 Tbs fresh chopped chives
  • ¼ teaspoon salt
  • 3 dashes cracked black pepper

Nutrition

Calories: 348kcalCarbohydrates: 21gProtein: 10gFat: 26gSaturated Fat: 7gPolyunsaturated Fat: 4gMonounsaturated Fat: 14gCholesterol: 21mgSodium: 322mgPotassium: 428mgFiber: 4gSugar: 12gVitamin A: 1493IUVitamin C: 13mgCalcium: 255mgIron: 2mg
Keyword apple arugula salad, lemon, pistachios, spring salad
Tried this recipe?Let us know how it was!
Click here to add your own private notes.

The Best Blueberry Greek Yogurt Muffins

March 16, 2025 by Yao 4 Comments

Blueberry muffins made with yoghurt with streusel topping

The Best Blueberry Greek Yogurt Muffins are easy to make and packed with protein! Bake them plain or make them with the optional streusel topping to elevate them to bakery-style for serving them at your next brunch!

Lately, social media has been targeting me about getting more protein in my diet. Apparently, I fit some algorithm’s profile—probably because I’m a woman of a certain age. And while I know it’s all influencer-driven, I can’t deny they have a point. I could definitely use more protein.

the best blueberry yoghurt muffins

Now I know I could simply add protein powder to my drinks and baked goods, but I don't like the taste. No matter how much people swear they’re undetectable, I always notice that weird vitaminy aftertaste. So instead, I’ve been finding more natural ways to sneak in protein—like Greek yogurt.

And what better way to do that than with my famous blueberry muffins? If I’m known for any one thing in the kitchen, it’s these. They’re soft, tender, and packed with juicy blueberries. The Greek yogurt not only adds a little protein boost but also makes them incredibly moist.

Want to impress friends at your next brunch? The optional crumb topping gives them that bakery-style magic, but honestly, they’re perfect as-is. Or, if you’re like me, you’ll slather them with a little honey butter while they’re still warm. Absolute heaven.

Now, let’s get baking!

[feast_advanced_jump_to]

This was inspired by my Fresh Blueberry Tart recipe on this site, and perfect for serving at baby showers, bridal showers and holiday brunches like Mother's Day and Easter.

Equipment

  • large mixing bowl
  • medium mixing bowl
  • whisk
  • measuring spoons
  • measuring cups
  • muffin tin
  • paper muffin cups
  • spatula
  • scoop
baked blueberry yoghurt muffins

Ingredients

  • 2 ¼ cup flour
  • 1 tablespoon baking powder
  • 2 eggs beaten
  • 6 tablespoon melted butter
  • ½  cup light brown sugar
  • 1 cup sugar
  • 1 teaspoon vanilla
  • 2 cups blueberry ( fresh or frozen )
  • 1 cup milk (any kind works) I've used oat milk and lactose free dairy milk
  • 1 cup greek yogurt

Streusel Topping

  • ¾ cup flour
  • ¼ cup light brown sugar
  • ¼ cup granulated sugar
  • 3 tablespoon melted butter (salted or unsalted)

Instructions

Preheat oven to 400F. Line muffin tin with paper muffin cups or spray with cooking spray.

combine flour mixture with yogurt and milk
  1. Step 1: Combine eggs, melted butter, sugar, brown sugar and vanilla in a large mixing bowl.Then stir in milk and Greek Yogurt until creamy. 
add blueberries to the batter
  1. Step 2: Whisk flour and baking powder together in a medium bowl. Then add slowly stir it into the wet ingredients until just combined. Next stir in the blueberries.
pour batter into paper muffin cups
  1. Step 3: Scoop the batter into prepared muffin tins. You can either grease the muffin tins with cooking spray or use paper muffin cups. I like to use these tulip shaped ones to make big muffins.
place a tablespoon full of streusel topping on top of each muffin
  1. Step 4: Optional: Use a fork or your hands to combine all ingredients for streusel topping until crumbs form. Spoon topping over muffins and bake in a preheated oven at 400F for 15-20 minutes or until golden brown on top and toothpick comes out clean when poked in the center.
baked streusel topped blueberry muffins

Pro Tip

To keep berries from sinking to the bottom of muffins, toss them with 1-2 Tablespoons of flour before adding them to the batter.

coat blueberries in flour to prevent them from sinking to the bottom of the muffins

Substitutions

Its easy to make this recipe with ingredients you already have on hand.

  • Greek Yogurt - I used Chobani Plain Greek Yogurt but you can use your favorite brand or regular yogurt or sour cream. Obviously the protein content won’t be the same with substitutions.
  • Milk - any kind of dairy milk or nondairy milk will work. I've used oat milk and lactose free milk with success.
  • Blueberries - fresh is best but frozen blueberries are perfect when you are baking in the winter months

Storage

Place them in an airtight container and store them at room temperature for up to 3 days. Muffins can be frozen in a sealed container for 1 month.

Looking for more muffin recipes?

Try theses:

Strawberry White Chocolate Muffins

Peanut Butter Banana Muffins

Banana Chocolate Chip Sour Cream Muffins

Blueberry muffins made with yoghurt with streusel topping

The Best Blueberry Greek Yogurt Muffins

The Best Blueberry Greek Yogurt Muffins are easy to make and packed with protein! Bake them plain or make them with the optional streusel topping to elevate them to bakery-style for serving at your next brunch!
2 from 1 vote
Print Recipe Pin Recipe
Nutrition Facts
The Best Blueberry Greek Yogurt Muffins
Amount per Serving
Calories
370
% Daily Value*
Fat
 
10
g
15
%
Saturated Fat
 
6
g
38
%
Trans Fat
 
0.3
g
Polyunsaturated Fat
 
1
g
Monounsaturated Fat
 
3
g
Cholesterol
 
53
mg
18
%
Sodium
 
203
mg
9
%
Potassium
 
138
mg
4
%
Carbohydrates
 
64
g
21
%
Fiber
 
1
g
4
%
Sugar
 
38
g
42
%
Protein
 
7
g
14
%
Vitamin A
 
349
IU
7
%
Vitamin C
 
2
mg
2
%
Calcium
 
127
mg
13
%
Iron
 
2
mg
11
%
* Percent Daily Values are based on a 2000 calorie diet.
Prep Time 15 minutes mins
Cook Time 15 minutes mins
Total Time 30 minutes mins
Course Baking, Breakfast
Cuisine American
Servings 12
Calories 370 kcal

Equipment

  • 1 large mixing bowl
  • 1 medium mixing bowl
  • 1 measuring cups
  • 1 measuring spoons
  • 1 muffin tin
  • paper muffin cups
  • 1 spatula
  • 1 scoop
  • 1 whisk

Ingredients
  

Batter

  • 2¼ cup flour
  • 1 tablespoon baking powder
  • 2 eggs
  • 6 tablespoon salted butter melted
  • ½ cup light browns sugar
  • 1 cup granulated sugar
  • 1 teaspoon vanilla extract
  • 1 cup milk dairy or nondairy
  • 1 cup Greek yogurt
  • 2 cups blueberries

Streusel Topping

  • ¾ cup flour
  • 3 tablespoon melted butter
  • ¼ cup light brown sugar
  • ¼ cup granulated sugar

Instructions
 

For the Batter

  • Combine eggs, melted butter, sugar, brown sugar and vanilla in a large mixing bowl.Then stir in milk and Greek Yogurt until creamy.
  • Whisk flour and baking powder together in a medium bowl. Then add slowly stir it into the wet ingredients until just combined. Next stir in the blueberries.
  • Pour the batter into prepared muffin tins. You can either grease the muffin tins with cooking spray or use paper muffin cups. I like to use these tulip shaped ones to make big muffins. Top with streusel at this time if using.
  • Bake in a preheated oven at 400℉ for about 15-20 minutes for standard size muffins or 20-25 minutes for large muffins or until tops are golden brown and toothpick inserted in center of muffin comes out clean.

Optional Streusel Topping

  • Now the next step is optional, if you want to elevate the muffins to another level, make this simple streusel topping to make them look like you bought them from a bakery.
  • Combine ¾ cups flour, ¼ cup light brown sugar and ¼ cup granulated sugar in a bowl. Drizzle 3 Tablespoons of melted butter over top and stir with a fork or use your hands until crumbs form.
  • Top each muffin with 1-2 Tablespoons of streusel topping before baking.

Notes

Yields 12 standard size muffins or 8-10 big muffins.
Pro Tip- toss blueberries with 1-2 Tablespoons of flour before adding them to the batter to keep the blueberries from sinking to the bottom of the muffins.
Substitutions: Plain Greek yogurt-  I used Chobani plain Greek Yogurt but you can use your favorite brand or regular yogurt or sour cream. Obviously the protein content won’t be the same with substitutions.

Nutrition

Calories: 370kcalCarbohydrates: 64gProtein: 7gFat: 10gSaturated Fat: 6gPolyunsaturated Fat: 1gMonounsaturated Fat: 3gTrans Fat: 0.3gCholesterol: 53mgSodium: 203mgPotassium: 138mgFiber: 1gSugar: 38gVitamin A: 349IUVitamin C: 2mgCalcium: 127mgIron: 2mg
Keyword blueberry muffins, Greek yogurt
Tried this recipe?Let us know how it was!
Click here to add your own private notes.

Five Days in London

February 25, 2025 by Yao Leave a Comment

Big Ben
Big Ben

London Calling: A Family Adventure

London has been on my bucket list for as long as I can remember, and I finally got the chance to explore this vibrant city this past year! It was actually my mom's dream trip, so we built the itinerary around some of her must-see spots while making sure we all got to experience something special. Traveling with family can be a challenge—different interests, different energy levels—but we managed to survive! This 5-Day Itinerary is perfect for first-time visitors looking to make the most of their trip. Read on to see where to eat and what to see in London. Here’s a look at our whirlwind five-day adventure.


Day 1: A Classic London Welcome

There’s no better way to kick off a London trip than with a ride on the iconic Big Red Bus Tour. We hopped on and let the city unfold before us—sweeping past Westminster Abbey, the Tower of London, St. Paul’s Cathedral, Trafalgar Square, and the London Eye. It was the perfect way to get our bearings while soaking in some history.

View from Sky Garden looking out at the Shard Skyscraper

We were starving after our very educational but very long bus ride. So our first priority was to eat! Our first stop was Borough Market—a food lover’s paradise and the number one food stop on my wish list. The air was filled with the scent of sizzling chorizo, fresh-baked bread, and spiced chai. We grabbed bites from different vendors- classic fish and chips from Fish Kitchen, an assortment of pastries from multiple bakeries, chocolate covered strawberries and clotted cream fudge! If you're wondering where to eat in London, this is a great place to start!

Fish and Chips from fish Kitchen

Day 2: Royal Pageantry & Indulgence

We started our morning at St. James’s Palace to catch the Changing of the Guard. Following the procession to Buckingham Palace felt kind of surreal. This was definitely the highlight of the trip for my mother who is intrigued by all things royal! 

For lunch, we took a short stroll from Buckingham Palace to the original Hard Rock Cafe London, established in 1971. The mix of rock memorabilia and a solid burger hit the spot. One of the original waitresses happened to be working there that day. That was amazing to me as I don’t think I could work anywhere that long!

Next, we ventured to Harrods—because no trip to London is complete without a stop at this legendary department store. We wandered through the food hall (of course) eyeing the lobster rolls, pastries, teas, and everything in between.  A souvenir stop was a must, and I snagged some British flag reusable bags and tea biscuits to bring home.

Inside Westminster Abbey looking up at the ceiling

In the afternoon, we took a walking tour through Westminster Abbey, because mom had to see where Prince William and Kate Middleton got married.

Leadenhall Market

Dinner took us to the historic Leadenhall Market—a stunning Victorian marketplace with ornate ceilings and cozy restaurants. Here you can find a variety of British fare ranging from steak and ale pie, classic scones, and a pint to toast the day. We chose to  eat a quick snack here before heading back to our rental to rest before having a delicious dinner at Gogi, a Korean BBQ that satisfied our craving for Asian food!


Day 3: Ted Lasso & Botanical Beauty

As a Ted Lasso fan, I couldn’t resist a day trip to Richmond. This quaint town felt like a breath of fresh air after the city’s hustle. We took photos of ourselves posing in front of the infamous pedestrian walkway outside of Ted’s apartment before heading to The Ivy for lunch. I ordered the chicken curry which was delicious! Even if you don’t have a big appetite, I would recommend stopping there for just a drink to check out the decor. This brasserie is truly unique, think jewel toned beetles and plants printed on bright and bold wallpaper, floral ceilings in the restrooms, velvet banquettes and vintage inspired artwork. 

lunch entree at the Ivy Brasserie

Next, we made our way to Kew Gardens. Spanning over 300 acres, this royal garden can take several hours to walk through. We decided to cover ground faster by hopping on the land train. We passed by acres of beautiful plants as well as unique architecture that included a Japanese pagoda, mansions, and green houses. The Palm House, a stunning Victorian glasshouse, felt like stepping into a tropical paradise. I also recognized the Temperate House, which made an appearance in the Netflix series Queen Charlotte. Walking through the lush greenery, it was easy to see why this spot was chosen for a period drama.

Kew Gardens greenhouse

Day 4: London from the Sky & Afternoon Tea

We kicked off the morning at Sky Garden, a glass-enclosed oasis with 360-degree views of London. The lush indoor garden felt like a secret retreat above the city, and the café was the perfect place to sip coffee or tea while admiring landmarks like the Shard, Tower Bridge, and the Thames below. Tip: At the time of our visit, tickets were free but you must book in advance because they run out.

Inside Sky Garden London

For lunch, we headed to Old Spitalfields Market, where the variety of food stalls made choosing just one meal nearly impossible. We stopped at Melt to try their famous grilled cheese and had dessert at Humble Crumble where I ordered this creamy concoction mixed with granola and rose petals. It was so YUM!

Humble Crumble dessert with granola and rose petals

In the late afternoon, we took a tour of The Tower of London to see the Crown Jewels and a stare at the Beefeater royal guards, which I learned are actually called Yeoman Warders. We also tried to see the medieval tower of torture but ran out of time. Tip: The best location to snap a photo of Tower Bridge is right before the exit.


Day 5: Camden Market & a Canal Ride to Little Venice

On our last day, we explored the eclectic Camden Market. The mix of street food, vintage finds, and alternative fashion made it a fun, quirky stop. We finished the afternoon by taking the water taxi from Camden Market back to our rental. This scenic boat ride along Regent’s Canal was a peaceful way to see a different side of London as we made our way back to our rental in Little Venice.

For our farewell dinner, we chose The Bridge House, a pub across the street from our rental. It was a classic British setting with hearty meals and warm hospitality. A Green Bay Packers game played on the T.V. while we ate burgers and fries. It was almost like being back at home!


Final Thoughts

London was everything I hoped for and more.  From history to food to breathtaking views, we packed so much into our five days. My only regret? Not making it to the British Museum—it’s free, and I’ve heard it’s incredible. Oh, and I somehow managed to miss out on high tea. But hey, that just means I have the perfect excuse to return!

Until next time, London—cheers!

Strawberry Rice Krispie Treats

February 14, 2025 by Yao Leave a Comment

squares of Strawberry Rice Krispie Treats with freeze dried strawberries

If you’re looking for an easy, delicious, and festive treat to make for Valentine’s Day—or any time of year—these Strawberry Rice Krispie Treats are a must-try! They take the classic gooey, marshmallowy squares we all love and add a fruity, slightly tangy twist with freeze-dried strawberries. The result?  A pretty pink treat that is sweet with a hint of tartness that makes them a little more special from the original.

squares of Strawberry Rice Krispie Treats with freeze dried strawberries

Why You’ll Love These

  • Quick & Easy – Just a few ingredients and about 10 minutes of work!
  • No Artificial Colors – The freeze-dried strawberries naturally tint the treats a pretty pink.
  • Perfectly Sweet & Tart – The fruity flavor balances the marshmallow’s sweetness beautifully.
  • Easily Made Gluten-Free- Did you know that Kellogg’s Rice Krispies Cereal is not gluten-free? I discovered that malt flavoring is one of the listed ingredients, so that means bummer for my celiac friends. Aldi Crispy Rice Cereal and Nature’s Path Crispy Rice Cereal are two brands I found to be labeled gluten-free. Always check the label!

Will you be making these for someone special—or just for yourself? Either way, they won’t last long! Let me know in the comments if you try them. Happy snacking!

[feast_advanced_jump_to]

Ingredients

  • butter (salted or unsalted)- I used salted
  • marshmallows
  • freeze-dried strawberries
  • crispy rice cereal (Rice Krispies or your favorite brand)
  • vanilla or almond extract (optional)

See recipe card for quantities.

three squares of strawberry rice krispie treats

Equipment

9X9 or 9X13 inch pan

food processor

large saucepan

rubber spatula

measuring spoons

measuring cup

How to Make Strawberry Rice Krispie Treats

Time needed: 30 minutes

  1. Prepare your pan

    Grease  a 9x9-inch or 9X13-inch pan. I like to use the method of wiping butter on the pan with a paper towel.

  2. For the strawberries

    Use a food processor to pulverize the strawberries into a coarse powder. It's OK to have some larger pieces.ground freeze dried strawberries

  3. Melt the marshmallows

    In a large nonstick pan over low heat, melt the butter. Add the marshmallows and stir until completely melted and smooth.

  4. Add strawberries

    Remove from heat and stir in the crushed freeze-dried strawberries. If using vanilla or almond extract, add them at this time.

  5. Mix in cereal

    Quickly stir in crispy rice cereal, stirring until evenly coated with marshmallows.stir rice cereal into the melted marshmallow mixture

  6. Press and set

    Gently press the mixture into the prepared pan. Don’t compact it too much, or the treats will be dense. Let them cool for about 20 minutes.

Strawberry Rice Krispie treat cut into a square

Variations

  • Drizzle with White Chocolate – Make Strawberry Chocolate Rice Krispie Treats! Melt white chocolate and drizzle over the top.
  • Add Vanilla extract or Almond Extract- Mix in ½ teaspoon of extract for added flavor.
  • Heart-Shaped Treats – Use a cookie cutter to make Valentine’s Day hearts. I recommend making thinner treats by pressing the cereal mixture into a 9X13 inch pan for easier cutting.
  • Add Sprinkles – For a pop of extra color and fun.
  • Make them Gluten Free- Did you know that Kellogg’s Rice Krispies Cereal is not gluten-free? I discovered that malt flavoring is one of the listed ingredients, so that means bummer for my celiac friends. Aldi Crispy Rice Cereal and Nature’s Path Crispy Rice Cereal are two brands I found to be labeled gluten-free. Always check the label!

Storage

Store in an air tight container at room temperature for up to 2 days.

Pro Tip: How to Keep Rice Krispie Treats from Getting Hard

Melt slow and don’t use old! Make sure you melt butter and marshmallows on low heat. High heat causes the sugars to caramelize and the gelatin to lose its structure which creates more of a hard candy like texture. 

Don’t use old marshmallows. I made the mistake of using old, stale marshmallows because I didn’t want to be wasteful. It turned out buying a fresh bag was worth the two dollars.

FAQ

Can I freeze Strawberry Rice Krispie Treats?

Yes, you can store them in an airtight container in the freezer for up to 3 months.

Looking for other recipes like this? Try these:

Nutella Rice Krispie Treats

Strawberry White Chocolate Muffins

squares of Strawberry Rice Krispie Treats with freeze dried strawberries

Strawberry Rice Krispie Treats

These Strawberry Rice Krispie Treats made with freeze-dried strawberries are the perfect way to sweeten up your Valentine’s Day or any day! They’re easy to make, full of flavor, and a fun twist on a nostalgic favorite.
Print Recipe Pin Recipe
Nutrition Facts
Strawberry Rice Krispie Treats
Serving Size
 
1 bar
Amount per Serving
Calories
192
% Daily Value*
Fat
 
3
g
5
%
Saturated Fat
 
2
g
13
%
Trans Fat
 
0.1
g
Polyunsaturated Fat
 
0.1
g
Monounsaturated Fat
 
1
g
Cholesterol
 
8
mg
3
%
Sodium
 
37
mg
2
%
Potassium
 
305
mg
9
%
Carbohydrates
 
40
g
13
%
Fiber
 
3
g
13
%
Sugar
 
25
g
28
%
Protein
 
1
g
2
%
Vitamin A
 
87
IU
2
%
Vitamin C
 
271
mg
328
%
Calcium
 
7
mg
1
%
Iron
 
5
mg
28
%
* Percent Daily Values are based on a 2000 calorie diet.
Prep Time 10 minutes mins
Cook Time 20 minutes mins
Total Time 30 minutes mins
Course Dessert
Cuisine American
Servings 16 bars
Calories 192 kcal

Equipment

  • 1 food processor
  • 1 large saucepan
  • 1 9X9 pan or 9x13 pan
  • 1 rubber spatula
  • measuring spoons
  • measuring cups

Ingredients
  

  • 4 tablespoon butter salted or unsalted
  • 10 ounces marshmallows I used mini marshmallows but the big ones also work
  • 1½ cups freeze-dried strawberries
  • 5½ cups crispy rice cereal Rice Krispies or your favorite brand
  • cooking spray or butter for greasing the pan

Instructions
 

  • Prepare Your Pan – Grease  a 9x9-inch or 9X13-inch pan. I like to use the method of wiping butter on the pan with a paper towel.
  • For the Strawberries -  Use a food processor to pulverize the strawberries into a coarse powder. It's OK to have some larger pieces.
  • Melt the Marshmallows- In a large nonstick pan over low heat, melt the butter. Add the marshmallows and stir until completely melted and smooth.
  • Add the Strawberries- Remove from heat and stir in the strawberries. If using vanilla or almond extract, add them at this time.
  • Mix in the Cereal- Quickly stir in the rice krispie cereal , stirring until evenly coated with marshmallow mixture.
  • Press and Set- Gently press the mixture into the prepared pan. Don't compact it too much, or the treats will be dense. Cool for 20 minutes.
  • Cut into squares and enjoy.

Notes

Variations:

  • Drizzle with White Chocolate – Make Strawberry Chocolate Rice Krispie Treats! Melt white chocolate and drizzle over the top for an elegant finish.
  • Add Vanilla extract or Almond Extract- Mix in ½ teaspoon of extract for added flavor.
  • Heart-Shaped Treats – Use a cookie cutter to make Valentine’s Day hearts.
  • Add Sprinkles – For a pop of extra color and fun.
  • Make them Gluten Free- Did you know that Kellogg’s Rice Krispies Cereal is not gluten-free? I discovered that malt flavoring is one of the listed ingredients, so that means bummer for my celiac friends. Aldi Crispy Rice Cereal and Nature’s Path Crispy Rice Cereal are two brands I found to be labeled gluten-free. But always check the label!

Nutrition

Serving: 1barCalories: 192kcalCarbohydrates: 40gProtein: 1gFat: 3gSaturated Fat: 2gPolyunsaturated Fat: 0.1gMonounsaturated Fat: 1gTrans Fat: 0.1gCholesterol: 8mgSodium: 37mgPotassium: 305mgFiber: 3gSugar: 25gVitamin A: 87IUVitamin C: 271mgCalcium: 7mgIron: 5mg
Keyword freeze-dried strawberry, gluten free, rice krispie treats, strawberry, Valentine's Day
Tried this recipe?Let us know how it was!
Click here to add your own private notes.

Rotisserie Chicken Tortilla Soup

January 8, 2025 by Yao 1 Comment

two bowls of rotisserie chicken tortilla soup with toppings of tortilla strips, lime wedges and cilantro

This Rotisserie Chicken Tortilla Soup recipe is an easy one pot meal made with store bought rotisserie chicken, black beans, corn and crunchy tortilla strips. It’s hearty and comforting and comes together in less than 30-minutes!

two bowls of rotisserie chicken tortilla soup with toppings of tortilla strips, lime wedges and cilantro

Its the perfect meal on a cold winter day (but I eat it all year round)!

Why I Love This Soup

  • Budget friendly- the total cost to make this was less than 10 dollars.  It feeds a hungry family of four plus more. I had leftovers for the next day. The price of the rotisserie chicken at Amazon Fresh on the date this recipe was originally published was $5.99. I used 3 cups of shredded chicken for the soup and had at least 2 more cups of chicken leftover to use for other recipes like my Apple Pecan Chicken Salad or BBQ Chicken Flatbread.
  • Quick and easy- get dinner on the table in less than 30 minutes! This one pot wonder takes only 20 minutes to simmer. That’s faster than ordering carryout or delivery.
  • Hearty-Loaded with veggies and high in protein and fiber, it's perfect for adding to your menu rotation during those cold winter months.
rotisserie chicken tortilla soup
[feast_advanced_jump_to]

Ingredients

  • 1 rotisserie chicken- you’ll need 3 cups of shredded meat
  • 2 tablespoon olive oil (or any neutral oil)
  • 3 cloves minced garlic
  • ½ cup minced onion
  • 1 large jalapeno seeded and chopped (about ¼ cup)
  • 1 teaspoon cumin
  • 2 teaspoon chili powder
  • ½ teaspoon salt
  • 4 cups chicken broth * or make your own
  • 28 ounce can crushed tomatoes
  • 15 ounce can black beans
  • 2 cups corn (fresh, frozen or canned)
  • chipotle peppers in adobo sauce- spoon out 1-2 Tablespoons of sauce- we are only going to use the sauce
  • ¼ cup chopped cilantro

Toppings:

  • Tortilla strips, tortilla chips or make your own tortilla strips
  • Shredded Mexican blend, colby jack or cheddar cheese
  • Sliced avocado
  • Sour cream
  • Cilantro
  • Lime juice
rotisserie chicken tortilla soup in a black bowl

Equipment Needed

  • large stock pot
  • chef's knife
  • cutting board
  • measuring cups
  • measuring spoons
  • wooden spoon
  • ladle

How to Make Rotisserie Chicken Tortilla Soup

  1. Shred the chicken. Peel the meat off the bones of the rotisserie chicken and remove all the skin. You can discard all the skin and bones or save it to make home-made broth. Tear the chicken into smaller pieces to your preferred size.  Measure out 3 cups of chicken and reserve the rest to use for other recipes.
  1. For onions, garlic and jalapeno. Heat 2 Tablespoons of oil over medium heat in a large pot. Stir in ½ cup minced onion, 3 cloves minced garlic and 1 seeded and chopped jalapeno pepper. Add 1 teaspoon cumin, 2 teaspoons chili powder and ½ teaspoon salt. Stir a few times until the vegetables are coated with seasonings.
  1. Add the liquids. Pour in 4 cups of chicken broth, 28 ounces of crushed tomatoes and 1 to 2 Tablespoons of chipotle adobo sauce depending on your spice preference.
  1. Add vegetables and chicken. Add the can of black beans WITH liquid and 2 cups of corn kernels. If using canned corn, drain the liquid before adding. Bring to a boil. Once the soup begins to boil, add the chicken and chopped cilantro. Reduce heat to medium low and simmer for 20 minutes.
two bowls of rotisserie chicken tortilla soup

Serving Suggestions

Top with tortilla strips, shredded colby jack, cheddar or Mexican blend cheese, sliced avocado, sour cream and fresh cilantro.

What if I can't find tortilla strips?

I usually find the tortilla strips in the salad dressing aisle at the grocery store next to the croutons. If you don’t have tortilla strips, you can do the Nacho Libre (my favorite funny movie ) method and sprinkle on some crushed tortilla chips! 

If you're feeling ambitious, make your own tortilla strips by cutting up corn tortillas into strips and frying them in vegetable oil until crispy. 

Substitutions

  • Vegetarian - leave out the chicken and substitute vegetable broth for chicken broth. Add more veggies by adding chickpeas and peeled and cubed potatoes cut into small pieces.
  • Lower Sodium - In general, many canned goods contain added salt. For this recipe, drain the canned black beans and rinse them before adding to the soup. The original recipe calls for the beans with liquid because it gives the soup a slightly thicker consistency but you won’t notice a huge difference. Use low sodium chicken broth or make your own (see below for homemade broth). Use fresh or frozen corn instead of canned. 
  • *Homemade broth-If you don’t have chicken broth, you can make your own by boiling the chicken bones and carcass  in 6 cups of water for about 15 minutes. Turn off the heat and scoop out the skin and bones. 
  • Chicken- substitute leftover grilled, boiled or baked chicken without skin for rotisserie chicken. You can also purchase a small whole chicken or chicken breasts and thighs and boil until cooked through. Save the liquid for the broth.

Storing Leftover Soup

Store in an air-tight container in the refrigerator for up to 4 days.

Pro Tip

Break down a whole rotisserie chicken by removing the skin and bones and place it in your own storage containers right after you purchase it from the store. This saves room in the refrigerator and you have chicken meat ready to go.

FAQ

Can you freeze chicken tortilla soup?

Yes! You can store it in the freezer for up to 3 months.

More recipes made with rotisserie chicken

If you like this recipe, give these a try:

Chicken Tikka Tacos

Buffalo Chicken Empanadas

BBQ Chicken Flatbread

Chicken Enchiladas Rojas

two bowls of rotisserie chicken tortilla soup with toppings of tortilla strips, lime wedges and cilantro

Rotisserie Chicken Tortilla Soup

This Rotisserie Chicken Tortilla Soup recipe is an easy one pot meal made with store bought rotisserie chicken, black beans, corn and crunchy tortilla strips. It’s hearty and comforting and comes together in less than 30-minutes!
5 from 1 vote
Print Recipe Pin Recipe
Nutrition Facts
Rotisserie Chicken Tortilla Soup
Amount per Serving
Calories
312
% Daily Value*
Fat
 
9
g
14
%
Saturated Fat
 
2
g
13
%
Trans Fat
 
0.03
g
Polyunsaturated Fat
 
1
g
Monounsaturated Fat
 
5
g
Cholesterol
 
62
mg
21
%
Sodium
 
2140
mg
93
%
Potassium
 
990
mg
28
%
Carbohydrates
 
33
g
11
%
Fiber
 
9
g
38
%
Sugar
 
9
g
10
%
Protein
 
29
g
58
%
Vitamin A
 
603
IU
12
%
Vitamin C
 
20
mg
24
%
Calcium
 
103
mg
10
%
Iron
 
4
mg
22
%
* Percent Daily Values are based on a 2000 calorie diet.
Prep Time 10 minutes mins
Cook Time 20 minutes mins
Total Time 30 minutes mins
Course Main Course, Soup
Cuisine American, Fusion
Servings 6 Servings
Calories 312 kcal

Equipment

  • 1 large pot
  • 1 wooden spoon
  • 1 ladle
  • 1 chef's knife
  • 1 cutting board
  • measuring cups
  • measuring spoons

Ingredients
  

  • 3 cups rotisserie chicken shredded
  • 2 tablespoon olive oil or any neutral oil
  • 3 cloves minced garlic
  • ½ cup minced onion white or yellow onion
  • 1 large jalapeno pepper seeded and chopped (about ¼ cup)
  • 1 teaspoon cumin
  • 2 teaspoon chili powder
  • ½ teaspoon salt
  • 4 cups chicken broth purchased or make your own
  • 28 ounces crushed tomatoes
  • 15 ounces canned black beans with liquid
  • 2 cups corn kernels fresh, frozen or canned
  • 1 tablespoon chipotle adobo sauce *purchase a 7 ounce can of chipotle peppers in adobo sauce and use just the sauce
  • ¼ cup chopped cilantro

Suggested Toppings:

  • tortilla strips or chips
  • shredded Mexican blend, colby jack or cheddar cheese
  • sliced avocado
  • sour cream
  • cilantro leaves
  • fresh lime juice

Instructions
 

Shred the chicken

  • Peel the meat off the bones of the rotisserie chicken and remove all the skin. You can discard all the skin and bones or save it to make home-made broth. Tear the chicken into smaller pieces to your preferred size.  Measure out 3 cups of chicken and reserve the rest to use for other recipes

For the onions, garlic and jalapeno

  • Heat 2 Tablespoons of oil over medium heat in a large pot. Stir in ½ cup minced onion, 3 cloves minced garlic and 1 seeded and chopped jalapeno pepper. Add 1 teaspoon cumin, 2 teaspoons chili powder and ½ teaspoon salt. Stir a few times until the vegetables are coated with seasonings.

Add liquids, vegetables and chicken

  • Pour in 4 cups of chicken broth, 28 ounces of crushed tomatoes and 1 to 2 Tablespoons of chipotle adobo sauce, the can of black beans WITH liquid and 2 cups of corn kernels. If using canned corn, drain the liquid before adding. Bring to a boil. Once the soup begins to boil, add the chicken and chopped cilantro. Reduce heat to medium low and simmer for 20 minutes.

Notes

*Calories estimated for soup alone without toppings, see nutritional disclaimer.
Homemade broth-If you don’t have chicken broth, you can make your own by boiling the chicken bones and carcass  in 6 cups of water for about 15 minutes. Turn off the heat and scoop out the skin and bones. 
Chicken- substitute leftover grilled, boiled or baked chicken without skin for rotisserie chicken. You can also purchase a small whole chicken or chicken breasts and thighs and boil until cooked through. Save the liquid for the broth.
 

Nutrition

Calories: 312kcalCarbohydrates: 33gProtein: 29gFat: 9gSaturated Fat: 2gPolyunsaturated Fat: 1gMonounsaturated Fat: 5gTrans Fat: 0.03gCholesterol: 62mgSodium: 2140mgPotassium: 990mgFiber: 9gSugar: 9gVitamin A: 603IUVitamin C: 20mgCalcium: 103mgIron: 4mg
Keyword chicken tortilla soup, one pot meals, rotisserie chicken, soup recipes, winter recipes
Tried this recipe?Let us know how it was!
Click here to add your own private notes.

Pistachio Dark Chocolate Cookies with Sea Salt

December 10, 2024 by Yao Leave a Comment

pistachio dark chocolate cookies with sea salt with melty chocolate chunks

These are the best Pistachio Dark Chocolate Cookies with Sea Salt ever! This glammed up version of a chocolate chip cookie is a perfect addition to your holiday baking list, cookie exchange or anytime you want a special treat. Chock full of pistachios, melty dark chocolate chunks and sprinkled with just a pinch of flaky sea salt, what’s not to love? How about a chewy texture and crispy edges? I know you want some!

several pistachio dark chocolate cookies with sea salt spread out on a baking sheet

Why You Will Love This Recipe

If you are a pistachio and dark chocolate  fan, you are going to love these cookies. What makes this recipe stand out is that it is low effort with maximum results. 

There is no need to chill the dough. That means less time from the oven to your mouth!  You can make these cookies in less than 30 minutes.

You can use raw or roasted pistachios (although I am a fan of raw), unsalted or salted. If using salted pistachios, reduce salt from ½ teaspoon to ¼ teaspoon. 

Use melted butter-no brown butter or softened butter needed, just microwave it or melt it on the stovetop.

Dark chocolate chunks- if you are a fan of dark chocolate, this cookie is calling your name. If not, a simple fix is to substitute semi sweet, white, or milk chocolate chips instead.

baked pistachio dark chocolate cookies on parchment paper

Chewy texture with crispy edges-  inspired by the pan banging cookies from the  Vanilla Bean Blog , a modified version of the pan banging method right after you take the cookies out of the oven helps create  a cookie that is chewy towards the center and crispy on the edges. Plus you can release any pent up aggression as a bonus! 

The right amount of egg-The one egg plus 1 egg yolk combined with the right amount of white and brown sugar creates the right texture.

Flaky sea salt- adds a special finishing touch that elevates deliciousness to a whole new level.

Ingredients

  • 1 ¾ cup flour
  • 1 teaspoon baking soda
  • ½ teaspoon baking powder
  • ½ teaspoon salt
  • 1 cup raw unsalted pistachios* coarsely ground or finely chopped
  • ¾ cup of salted melted butter
  • 1 egg plus 1 egg yolk beaten
  • ¾ cup granulated sugar
  • ¾ cup light brown sugar
  • 1  teaspoon vanilla extract
  • 2 cups dark chocolate chunks
  • flaky sea salt

How to Make Pistachio Dark Chocolate Cookies with Sea Salt

Time needed: 22 minutes

Preheat oven to 375F

  1. Dry ingredients

    In a medium bowl: Whisk flour, baking soda, baking powder, salt and ¾ cup of coarsely ground pistachios . Save the remaining pistachios for sprinkling on top of cookies. Set aside.whisk and dry ingredients flour , baking soda, baking powder, salt and pistachios

  2. Wet ingredients

    In a large bowl or stand mix: Combine melted butter, eggs,  granulated sugar, light brown sugar, and vanilla.

  3. Combine wet and dry ingredients and add chocolate

    Slowly add dry ingredients and dark chocolate chunks to the wet ingredients and mix until well combined.dry and wet ingredients combined to form pistachio dark chocolate cookie dough

  4. Form dough balls

    Form dough balls using 2 to 2.5 tablespoons of  dough or a #30 cookie scoop. Place cookie dough balls one inch apart on a parchment lined  cookie sheet. Sprinkle the remaining ground pistachios over each cookie.cookie dough balls topped with chopped pistachio pieces

  5. Bake

     Bake at 375 degrees for 10-12 minutes until slightly brown on the edges.Six baked cookies

  6. Bang

    Remove cookies from the oven and carefully bang the cookie sheet on a heat proof surface 5 to 6 times so that cookies deflate. Immediately sprinkle  a pinch of sea salt on each cookie.


Storing cookies: If by some miracle the cookies do not get devoured in one day, they can be stored in an airtight container for up to 4 days.


If you make these cookies, please leave a recipe rating! I love to hear your comments and it helps me improve!

Looking for more Christmas Cookie recipes or other holiday treats? Check these out:

Soft Cut Out Sugar Cookies

Nutella Rice Krispie Treats

The Best Coconut Lime Cookies

pistachio dark chocolate cookies with sea salt with melty chocolate chunks

Pistachio Dark Chocolate Cookies with Sea Salt

The best Pistachio Dark Chocolate Cookies with Sea Salt are a glammed up version of a chocolate chip cookie that's perfect for your holiday cookie exchange or any time you want a special treat.
Print Recipe Pin Recipe
Nutrition Facts
Pistachio Dark Chocolate Cookies with Sea Salt
Amount per Serving
Calories
336
% Daily Value*
Fat
 
17
g
26
%
Saturated Fat
 
11
g
69
%
Trans Fat
 
0.3
g
Polyunsaturated Fat
 
1
g
Monounsaturated Fat
 
4
g
Cholesterol
 
30
mg
10
%
Sodium
 
226
mg
10
%
Potassium
 
227
mg
6
%
Carbohydrates
 
41
g
14
%
Fiber
 
2
g
8
%
Sugar
 
26
g
29
%
Protein
 
5
g
10
%
Vitamin A
 
269
IU
5
%
Vitamin C
 
0.3
mg
0
%
Calcium
 
88
mg
9
%
Iron
 
1
mg
6
%
* Percent Daily Values are based on a 2000 calorie diet.
Prep Time 10 minutes mins
Cook Time 12 minutes mins
Total Time 22 minutes mins
Course Baking, Dessert
Cuisine American
Servings 18 cookies
Calories 336 kcal

Equipment

  • baking sheets
  • large mixing bowl
  • medium mixing bowl
  • measuring cups
  • measuring spoons
  • spatula
  • whisk
  • parchment paper

Ingredients
  

  • 1¾ cup flour
  • 1 teaspoon baking soda
  • ½ teaspoon baking powder
  • ½ teaspoon salt
  • 1 cup raw unsalted pistachios may substitute roasted salted pistachios*
  • ¾ cup salted butter melted
  • 1 egg plus 1 egg yolk beaten
  • ¾ cup sugar
  • ¾ cup light brown sugar
  • 1 teaspoon vanilla extract
  • 2 cups dark chocolate chunks
  • flaky sea salt

Instructions
 

  • Preheat oven to 375℉

Dry ingredients

  • In a medium bowl: Whisk flour, baking soda, baking powder, salt and ¾ cup of coarsely ground pistachios . Save the remaining pistachios for sprinkling on top of cookies. Set aside.

Wet ingredients

  • In a large bowl or stand mix: Combine melted butter, eggs, granulated sugar, light brown sugar, and vanilla.

Combine wet and dry ingredients and add chocolate

  • Slowly add dry ingredients and dark chocolate chunks to the wet ingredients and mix until well combined.

Form dough balls

  • Form dough balls using 2 to 2.5 tablespoons of dough or a #30 cookie scoop. Place cookie dough balls one inch apart on a parchment lined cookie sheet. Sprinkle the remaining ground pistachios over each cookie.

Bake

  • Bake at 375℉ for 10-12 minutes until slightly brown on the edges.

Bang

  • Remove cookies from the oven and carefully bang the cookie sheet on a heat proof surface 5 to 6 times so that cookies deflate. Immediately sprinkle a pinch of sea salt on each cookie.

Notes

Storing cookies: If by some miracle the cookies do not get devoured in one day, they can be stored in an airtight container for up to 4 days.
Raw or roasted pistachios may be used, unsalted or salted. If using salted pistachios, reduce salt from ½ teaspoon to ¼ teaspoon.

Nutrition

Calories: 336kcalCarbohydrates: 41gProtein: 5gFat: 17gSaturated Fat: 11gPolyunsaturated Fat: 1gMonounsaturated Fat: 4gTrans Fat: 0.3gCholesterol: 30mgSodium: 226mgPotassium: 227mgFiber: 2gSugar: 26gVitamin A: 269IUVitamin C: 0.3mgCalcium: 88mgIron: 1mg
Keyword christmas cookie recipes, cookie exchange, pistachio dark chocolate cookies, sea salt
Tried this recipe?Let us know how it was!
Click here to add your own private notes.

Chewy Pumpkin Pecan Cookies

November 15, 2024 by Yao Leave a Comment

a dozen pumpkin pecan cookies

Take a break from chocolate chip and try these Chewy Pumpkin Pecan Cookies made with pumpkin puree, brown sugar, chopped pecans and pumpkin spice! That’s right, that can of pumpkin puree is not just for pumpkin pie. By  tweaking a few ingredients, I came up with this pumpkin cookie recipe that will melt in your mouth.

big chewy pumpkin pecan cookies

I’m just going to dive right into the key ingredients so you know what you will need before baking.

Browned Butter-using browned butter gives these cookies a nutty and  “caramelly” quality. It's an extra step but simple and well worth it.

Egg yolk- Using just the yolk helps create a velvety texture. 

Light brown sugar- when combined with the browned butter, it creates a caramel like flavor. Dark brown sugar may be used as a substitute, it will result in a darker and sweeter cookie.

Pumpkin Puree- use your favorite brand of canned pumpkin puree. Just make sure you don’t accidentally grab pumpkin pie filling.

Pecans- I used unsalted roasted pecans. Walnuts would work too, but then I would have to change the name. Hah! If you don’t like nuts in your cookies, you can just leave them out.

Now let’s get down to the details….

nine pumpkin pecan cookies

Ingredients

  • 1 cup unsalted butter
  • 1 ¾ cup flour
  • ½ teaspoon salt
  • 1 teaspoon baking soda
  • 1 ½ teaspoon pumpkin pie spice
  • 1 egg yolk
  • 1 ¼ cup light brown sugar
  • ⅓ cup pumpkin puree
  • 2 teaspoon vanilla
  • ½ cup chopped pecans

How to Make Chewy Pumpkin Pecan Cookies

Time needed: 45 minutes

Preheat oven to 375F

  1. Make browned butter

    Melt butter in a small saucepan over medium heat. The butter will foam, stir frequently. Once butter turns a light amber, turn off the heat. This melting process should take approximately 4-5 minutes. Important:  Let butter cool for 20 minutes or until butter solidifies.

  2. Combine dry ingredients

    Whisk flour, salt, baking soda and pumpkin pie spice in a medium bowl. Set aside.

  3. Combine wet ingredients

    In a large bowl, mix together browned butter, egg yolk, light brown sugar, pumpkin puree and vanilla. Then stir in pecan pieces.

  4. Add dry ingredients to the wet

    Add the flour mixture to the wet ingredients and stir until a sticky dough forms. It should be a very thick batter like consistency.

  5. Scoop the dough

    Use a cookie scoop or rounded tablespoon to drop a 1 inch ball of dough on a parchment line baking sheet.  Important: Make sure to space at least 2 inches apart because these cookies will spread! Press a few more pieces of pecans on top of each cookie.

  6. Bake

    Bake in a preheated oven at 375F for 10 minutes. Let cool for 20-30 minutes before serving.

chewy pumpkin pecan cookies

How to Store Chewy Pumpkin Pecan Cookies

If you happen to not devour the whole batch, cookies may be stored in a sealed container for up to three days.

Looking for more baking recipes with pumpkin? Try these:

Soft Pumpkin Cookies

Pumpkin Nutella Muffins

Buttermilk Pumpkin Bread

a dozen pumpkin pecan cookies

Chewy Pumpkin Pecan Cookies

Take a break from chocolate chip and try these Chewy Pumpkin Pecan Cookies made with pumpkin puree, brown sugar, chopped pecans and pumpkin spice!
Print Recipe Pin Recipe
Nutrition Facts
Chewy Pumpkin Pecan Cookies
Serving Size
 
1 cookie
Amount per Serving
Calories
165
% Daily Value*
Fat
 
10
g
15
%
Saturated Fat
 
5
g
31
%
Trans Fat
 
0.3
g
Polyunsaturated Fat
 
1
g
Monounsaturated Fat
 
3
g
Cholesterol
 
28
mg
9
%
Sodium
 
99
mg
4
%
Potassium
 
46
mg
1
%
Carbohydrates
 
19
g
6
%
Fiber
 
1
g
4
%
Sugar
 
11
g
12
%
Protein
 
1
g
2
%
Vitamin A
 
778
IU
16
%
Vitamin C
 
0.2
mg
0
%
Calcium
 
18
mg
2
%
Iron
 
1
mg
6
%
* Percent Daily Values are based on a 2000 calorie diet.
Prep Time 15 minutes mins
Cook Time 10 minutes mins
browned butter cooling time 20 minutes mins
Total Time 45 minutes mins
Course Baking, Dessert
Cuisine American
Servings 24 cookies
Calories 165 kcal

Equipment

  • 2 sheet pans
  • 1 small saucepan
  • measuring cups
  • measuring spoons
  • mixing bowls
  • spatula
  • stiff whisk

Ingredients
  

  • 1 cup unsalted butter
  • 1¾ cup flour
  • ½ teaspoon salt
  • 1 teaspoon baking soda
  • 1½ teaspoon pumpkin pie spice
  • 1 egg yolk
  • 1¼ cup light brown sugar
  • 2 teaspoon vanilla
  • ⅓ cup pumpkin puree
  • ½ cup chopped pecans plus more for sprinkling on top of cookies

Instructions
 

  • Preheat oven to 375℉

Make browned butter

  • Melt 2 sticks of butter in a small saucepan over medium heat.The butter will foam, stir frequently. Once butter turns a light amber, turn off the heat. This melting process should take approximately 4-5 minutes. Important:  Let butter cool for 20 minutes or until butter solidifies.

Combine dry ingredients

  • While butter is cooling, combine the dry ingredients :Whisk flour, salt, baking soda and pumpkin pie spice in a medium bowl. Set aside.

Combine wet ingredients

  • In a large bowl, mix together browned butter, egg yolk, light brown sugar, pumpkin puree and vanilla. Then stir in pecan pieces.

Add dry ingredients to the wet

  • Add the flour mixture to the wet ingredients and stir until a sticky dough forms. It should be a very thick. batter like consistency.

Scoop

  • Use a cookie scoop or rounded tablespoon to drop a 1 inch ball of dough on a parchment line baking sheet. Important: Space cookies at least 2 inches apart because these cookies will spread. Press a few more pieces of pecans on top of each cookie.

Bake

  • Bake in a preheated oven at 375℉ for 10 minutes. Let cookies cool for 20-30 minutes before serving.

Notes

For best results, make sure the browned butter solidifies before continuing with the next steps.
Let cookies cool for 20-30 minutes before serving.
Store in a sealed container for up to 3 days.

Nutrition

Serving: 1cookieCalories: 165kcalCarbohydrates: 19gProtein: 1gFat: 10gSaturated Fat: 5gPolyunsaturated Fat: 1gMonounsaturated Fat: 3gTrans Fat: 0.3gCholesterol: 28mgSodium: 99mgPotassium: 46mgFiber: 1gSugar: 11gVitamin A: 778IUVitamin C: 0.2mgCalcium: 18mgIron: 1mg
Keyword browned butter, chewy pumpkin cookies, egg yolk, pumpkin cookie recipe, pumpkin pecan
Tried this recipe?Let us know how it was!
Click here to add your own private notes.

Browned Butter Butternut Squash Ravioli with Crispy Sage and Salami Bits

November 3, 2024 by Yao 2 Comments

a skillet with browned butter butternut squash ravioli with sage, salami bits and walnuts

This Browned Butter Butternut Squash Ravioli with Crispy Sage and Salami Bits and walnuts is an incredibly easy meal that is rustic yet fancy and can be made in 15 minutes using store bought ravioli. Fresh sage leaves and salami slices get elevated to a whole new level by being flash fried until crispy. Toasting the walnut pieces in the browned butter creates a buttery and nutty aroma that will make you want to drool. These unexpected toppings elevate plain ravioli to fancy enough for a dinner party!

I am so excited to share this recipe with everyone because it is so good in so many ways!

a bowl of browned butter butternut squash ravioli with crispy sage, salami bits and walnuts with a fork

Why I Love Browned Butter Butternut Squash Ravioli with Crispy Sage and Salami Bits

-Just a few simple ingredients: There are only 7 total ingredients needed for this recipe that can be found at most supermarkets. I found everything I needed at Trader Joe’s.

-Its budget friendly. The total amount I spent on ingredients was $17.34. I already had butter at home so I did not have to buy it on this trip.

Trader Joe's Receipt for browned Butter Butternut Squash Ravioli ingredients totaling $17.34

As you can see, I did not spend much. The walnuts were the most expensive ingredient at $5.99, since you only need half a cup, there was plenty left over to use for cookies and salad toppings. The salami was the second most expensive item at $5.29 but I only used 4 slices, so the remainder can be used for sandwiches. On a side note, the idea for crispy salami bits was inspired by Lou Malnati's salad. It's really good if you haven't tried it.

-It can be prepared in 15 minutes. That’s right! You will be able to get dinner on the table in no time. The most time-consuming part is waiting for the water to boil. 

-It's easily customizable. Here are some substitutions:

Butternut squash ravioli can be substituted with pumpkin ravioli or plain cheese ravioli when squash is not in season. If you don’t have sage leaves, you can omit them, it will still taste great. The salami can be replaced with crispy crumbled bacon bits, or leave them out if you want a vegetarian meal. Pecans are a nice substitution for walnuts or leave the nuts out completely if you have a nut allergy. Sprinkling toasted pepitas on top is another option.

browned butter butternut squash ravioli in a bowl with a fork

Here is what you will need to make this amazing dish:

Ingredients

  • 1 package of butternut squash ravioli (8-10 ounces)
  • 2 Tbs olive oil (plus more depending on span size)
  • 3-5 sage leaves (3 large or 5 small)
  • 4-6 slices of salami slices chopped into small pieces (or crispy crumbled bacon)
  • 4 Tbs (½ stick) salted butter
  • ½ cup walnut pieces
  • freshly grated parmesan cheese for serving
a forkful of butternut squash

How To Make Browned Butter Butternut Squash Ravioli with Crispy Sage and Salami Bits

Time needed: 15 minutes

  1. Cook ravioli

    Boil ravioli according to package directions. Drain and set aside. I used Trader Joe's brand butternut squash ravioli and it took 4 minutes to cook.ravioli in a colander

  2. Fry the sage

    Heat 2 tablespoons of olive oil in a small pan over LOW heat. It should take 3-5 minutes for the oil to heat up depending on the type of stove you are using. Add the sage leaves and fry for about 10 seconds on each side or until lightly browned. The leaves brown very quickly so be careful not to burn. Remove sage from the pan and place on a paper towel lined plate.sage leaves being fried in oil

  3. For the salami

    To the same small pan-add the salami pieces and fry until the edges get crispy. It should take 10-20 seconds depending on how big the pieces are. Remove the salami bits and place on a paper towel lined plate.
     

  4. Brown butter and walnuts

    Grab a large saucepan and melt the butter over medium heat. Once the butter starts foaming, add the walnuts. Stir frequently until the butter turns a light amber color. This should take about 3-4 minutes. Watch carefully so the walnuts do not burn. Turn off the heat. Add the ravioli to the pan and toss.walnuts and browned butter in a skillet

  5. To serve

    Top with crispy sage, salami bits and freshly grated parmesan. I like to crumble a few of the sage leaves for the topping and keep a couple whole to make it look pretty.
     
    close up view of butternut squash ravioli with sage, salami and walnuts

If you like this recipe, you might enjoy:

Creamy Pumpkin Pasta

Roasted Garlic Pasta with Zucchini

Penne with Tomoatoes, Basil and Sausage

a skillet with browned butter butternut squash ravioli with sage, salami bits and walnuts

Browned Butter Butternut Squash Ravioli with Crispy Sage and Salami Bits

This Browned Butter Butternut Squash Ravioli with Crispy Sage and Salami Bits and walnuts is an incredibly easy meal that is rustic yet fancy and can be made in 15 minutes using store bought ravioli.
5 from 1 vote
Print Recipe Pin Recipe
Nutrition Facts
Browned Butter Butternut Squash Ravioli with Crispy Sage and Salami Bits
Amount per Serving
Calories
588
% Daily Value*
Fat
 
44
g
68
%
Saturated Fat
 
17
g
106
%
Trans Fat
 
1
g
Polyunsaturated Fat
 
11
g
Monounsaturated Fat
 
13
g
Cholesterol
 
95
mg
32
%
Sodium
 
867
mg
38
%
Potassium
 
516
mg
15
%
Carbohydrates
 
39
g
13
%
Fiber
 
5
g
21
%
Sugar
 
7
g
8
%
Protein
 
13
g
26
%
Vitamin A
 
470
IU
9
%
Vitamin C
 
0.3
mg
0
%
Calcium
 
65
mg
7
%
Iron
 
1
mg
6
%
* Percent Daily Values are based on a 2000 calorie diet.
Prep Time 5 minutes mins
Cook Time 10 minutes mins
Total Time 15 minutes mins
Course Main Course
Cuisine American, Fusion
Servings 3 Servings
Calories 588 kcal

Equipment

  • chef's knife
  • wooden spoon
  • cutting board
  • colander
  • small saucepan
  • large saucepan or skillet

Ingredients
  

  • 1 package butternut squash ravioli 8-10 ounces
  • 2 Tbs olive oil plus more depending on pan size
  • 3-5 sage leaves use more or less depending on the size of leaves
  • 4-6 slices salami chopped into small pieces
  • 4 Tbs salted butter
  • ½ cup walnut pieces
  • freshly grated parmesan cheese for serving

Instructions
 

Cook the ravioli

  • Boil ravioli according to package directions. Drain and set aside.

Fry the sage

  • Heat 2 tablespoons of olive oil in a small pan over LOW heat.It should take 3-5 minutes for the oil to heat up depending on the type of stove you are using. Add the sage leaves and fry for about 10 seconds on each side or until lightly browned. The leaves brown very quickly so be careful not to burn. Remove sage from the pan and place on a paper towel lined plate.

For the salami

  • To the same small pan-add the salami pieces and fry until edges get crispy. It should take 10-20 seconds depending on how big the pieces are. Remove the salami bits and place on a paper towel lined plate.

Brown butter and walnuts

  • Grab a large saucepan and melt the butter over medium heat. Once the butter starts foaming, add the walnuts. Stir frequently until the butter turns a light amber color. This should take about 3-4 minutes. Watch carefully so the walnuts do not burn. Turn off the heat. Add the ravioli to the pan and toss.

To serve

  • Top with crispy sage, salami bits and freshly grated parmesan. I like to crumble a few of the sage leaves for the topping and keep a couple whole to make it look pretty.

Notes

Butternut squash ravioli can be substituted with pumpkin ravioli or plain cheese ravioli when squash is not in season. If you don’t have sage leaves, you can omit them, it will still taste great. The salami can be replaced with crispy crumbled bacon bits. Pecans are a nice substitution for walnuts or leave the nuts out completely if you have a nut allergy. Sprinkling toasted pepitas on top is another option.

Nutrition

Calories: 588kcalCarbohydrates: 39gProtein: 13gFat: 44gSaturated Fat: 17gPolyunsaturated Fat: 11gMonounsaturated Fat: 13gTrans Fat: 1gCholesterol: 95mgSodium: 867mgPotassium: 516mgFiber: 5gSugar: 7gVitamin A: 470IUVitamin C: 0.3mgCalcium: 65mgIron: 1mg
Keyword browned butter, butternut squash ravioli, grilled butternut squash, ravioli recipes, sage
Tried this recipe?Let us know how it was!
Click here to add your own private notes.

Thai Yellow Curry Cashew Chicken

October 10, 2024 by Yao Leave a Comment

a bowl of yellow curry cashew chicken with lime zest

I love curry. That should be a bumper sticker! Thai red curry is my favorite, but I’ve been craving yellow curry lately. One comforting meal I’ve been making a lot lately is this simple, non-traditional Thai Yellow Curry Cashew Chicken.

This one pot Thai Yellow Curry Cashew Chicken is a fusion of savory and nutty flavors you can make in 30 minutes. Ground turmeric and coriander is added to store bought red curry paste and coconut milk to create a rich golden coconut curry sauce. All you need to do is toss in chicken and cashews and let it simmer. It’s that easy! Garnish with fresh herbs and lime zest to really make the flavors pop. Serve with Jasmine rice, brown rice or rice noodles.

Thai Yellow Curry Cashew Chicken

Why I love this recipe:

-It only takes 30 minutes from start to finish. The cooking process is so quick and easy, you might be able to memorize the recipe for next time.

-Store bought red curry paste is a time saver, no need to buy multiple curry pastes. My favorite brands are Aroy-D and Maesri. I usually don’t buy yellow curry paste (but I always have the red stuff) so I improvise by doctoring up the red stuff with just two ingredients: turmeric and coriander.

-Turmeric is healthy- this spice has anti-inflammatory and antioxidant properties. Gotta love eating cancer fighting ingredients! In addition, the ground turmeric used for this recipe is convenient and easier to find than fresh turmeric.

-It reheats nicely, leftovers are delicious the next day.

-Add ins: You can get creative and add veggies or starches. Try adding peeled and quartered potatoes, red bell pepper, chickpeas, cauliflower, peas or spinach.

Curry Cashew Chicken with rice and lime zest

Ingredients

  • 2 Tbs Thai red curry paste- use a good quality paste like Aroy-D or Maesri
  • 2 teaspoon ground turmeric
  • 1 teaspoon ground coriander
  • 3 Tbs canola oil or other neutral oil
  • 1 can full fat coconut milk – Aroy-D or Chaoko are brands I use
  • 1-pound boneless skinless chicken thighs cut unto bite sized pieces or chicken breasts
  • 2 teaspoon brown sugar
  • 2 TBS fish sauce
  • ¾ cup unsalted roasted cashews
  • 2 Tbs fresh lime Juice
  • 2 Tbs lime zest
  • For garnish: basil leaves (thai, sweet, or holy), cilantro and shredded carrots

How To Make Thai Yellow Curry Cashew Chicken

Time needed: 30 minutes

  1. For the curry paste

    In a small cup or bowl: mix 2 tablespoons red curry paste, 2 teaspoons of ground turmeric and 1 teaspoon of ground coriander.

  2. Curry sauce

    Heat 3 tablespoons of canola oil or other neutral oil in a large skillet or over medium heat. Add curry paste and stir until fragrant, about 30- seconds. Stir in coconut milk and bring it to a simmer.yellow curry paste being stirred in coconut milk

  3. Chicken and cashews

    Now add the chicken pieces and continue to simmer until sauce begins to thicken and chicken is fully cooked. Stir in cashews, brown sugar, and fish sauce during the last 3 minutes of cooking.raw chicken pieces simmering in yellow curry sauce

  4. Garnish

    Turn off heat. Stir in fresh lime juice and lime zest right before serving. Garnish with fresh basil leaves, cilantro and shredded carrots.a bowl of yellow curry cashew chicken

Serve over jasmine rice or your favorite type of rice.

Thai Yellow Curry Cashew Chicken served in a bowl with garnished with lime, basil and cilantro

Looking for Asian chicken recipes? Check out these recipes:

 Cashew Chicken

Chicken Meatball Curry

Thai Chicken and Pumpkin Curry

a bowl of yellow curry cashew chicken with lime zest

Thai Yellow Curry Cashew Chicken

One pot Thai Yellow Curry Cashew Chicken is a fusion of savory flavors in a golden coconut curry sauce made with ground turmeric and red curry paste.
 
Print Recipe Pin Recipe
Nutrition Facts
Thai Yellow Curry Cashew Chicken
Amount per Serving
Calories
591
% Daily Value*
Fat
 
48
g
74
%
Saturated Fat
 
23
g
144
%
Trans Fat
 
0.1
g
Polyunsaturated Fat
 
6
g
Monounsaturated Fat
 
16
g
Cholesterol
 
108
mg
36
%
Sodium
 
825
mg
36
%
Potassium
 
705
mg
20
%
Carbohydrates
 
16
g
5
%
Fiber
 
2
g
8
%
Sugar
 
4
g
4
%
Protein
 
28
g
56
%
Vitamin A
 
1215
IU
24
%
Vitamin C
 
5
mg
6
%
Calcium
 
62
mg
6
%
Iron
 
6
mg
33
%
* Percent Daily Values are based on a 2000 calorie diet.
Prep Time 10 minutes mins
Cook Time 20 minutes mins
Total Time 30 minutes mins
Course Main Course
Cuisine Asian, Fusion, Thai
Servings 4 Servings
Calories 591 kcal

Equipment

  • 1 large skillet
  • 1 wooden spoon
  • measuring spoons
  • cutting board
  • chef's knife

Ingredients
  

  • 2 Tbs Thai red curry paste Aroy-D and Maesri are brands I use
  • 2 teaspoon ground turmeric
  • 1 teaspoon ground coriander
  • 3 Tbs canola oil or other neutral oil
  • 1 can full fat coconut milk Aroy-D and Chao Koh are brands I use
  • 1 pound boneless skinless chicken thighs cut into bite sized pieces or breasts if you prefer white meat
  • 2 teaspoon brown sugar
  • 2 Tbs fish sauce
  • ¾ cup roasted cashews
  • 2 Tbs fresh lime juice
  • 2 Tbs lime zest
  • basil leaves(Thai, sweet, or holy), cilantro, shredded carrots for garnish

Instructions
 

For the curry paste

  • In a small cup or bowl: mix 2 tablespoons red curry paste, 2teaspoons of ground turmeric and 1 teaspoon of ground coriander.

Curry sauce

  • Heat 3 tablespoons of canola oil or other neutral oil in a large skillet or over medium heat. Add curry paste and stir until fragrant, about 30- seconds. Stir in coconut milk and bring it to a simmer.

Chicken and cashews

  • Now add the chicken pieces and continue to simmer until sauce begins to thicken and chicken is fully cooked. Stir in cashews, brown sugar, and fish sauce during the last 3 minutes of cooking.

Garnish

  • Turn off heat. Stir in fresh lime juice and lime zest right before serving. Garnish with fresh basil leaves, cilantro and shredded carrots.

Notes

Serve with jasmine rice, brown rice or rice noodles.

Nutrition

Calories: 591kcalCarbohydrates: 16gProtein: 28gFat: 48gSaturated Fat: 23gPolyunsaturated Fat: 6gMonounsaturated Fat: 16gTrans Fat: 0.1gCholesterol: 108mgSodium: 825mgPotassium: 705mgFiber: 2gSugar: 4gVitamin A: 1215IUVitamin C: 5mgCalcium: 62mgIron: 6mg
Keyword cashew chicken, chicken curry, Thai yellow curry
Tried this recipe?Let us know how it was!
Click here to add your own private notes.

Soft Pumpkin Cookies

October 5, 2024 by Yao Leave a Comment

a pumpkin cookie with a bite taken out of it
soft pumpkin cookies on a wire rack with decorative gourds

These thick and Soft Pumpkin Cookies are the perfect fall treat. Canned pumpkin puree, browned butter and a dusting of powdered sugar are all key ingredients for making these soon to be famous cookies. They’re cakey but not too cakey, and incredibly light tasting for a sweet treat that is packed with fall flavors.

a pumpkin cookie with a bite taken out of it

Canned pumpkin puree is not just for making pie and bread. The moisture from the pumpkin helps to create soft cookies. Browning the butter adds rich flavor and amber color when mixed in with the puree. After you mix in the flour and leavening agents, you get this beautiful rusty orange dough that gets rolled in pumpkin spice and sugar before baking.  The final special touch is powdered sugar dusted on top of the baked cookies.  If a Panera pumpkin muffin and snickerdoodle had a baby, it would look and taste like this!

I knew I had to post this recipe when I got a request from my daughter’s friend. I consider the approval of a teenager a great accomplishment, especially one not related to me! 

soft pumpkin cookies dusted with powdered sugar

Thanks to the Pogue family for being my taste testers! I know it’s hard work, but someone’s  gotta do it. Just don’t blame me for the extra calories.

This is what you will need to make Soft Pumpkin Cookies

Ingredients

  • 1 cup butter- unsalted
  • 2 cups flour
  • ½ teaspoon salt
  • ½ teaspoon baking powder
  • 1 teaspoon baking soda
  • 2 ½ teaspoon pumpkin pie spice- divided into 1tsp and 1½ tsp
  • 1 egg
  • 1 cup light brown sugar
  • ⅓ cup canned pumpkin puree- make sure not to grab pumpkin pie filling
  • 2 teaspoon vanilla extract
  • ¼ cup granulated sugar
  • Powdered sugar for dusting
soft pumpkin cookies on a wire rack with decorative mini pumpkins

How to Make Soft Pumpkin Cookies

Time needed: 40 minutes

  1. Brown the butter

    Melt butter over medium heat in a small saucepan. In my experience it will bubble and foam twice before settling down and turning brown. Stir frequently. Cook until the butter turns amber in color. There should be some brown bits on the bottom of pan. This whole process should take 3-5 minutes. Turn off heat and let cool for 10 minutes.melted butter in a pot that is foaming and being stirred with a wooden spoon

  2. Dry ingredients

    Whisk flour, baking soda, baking powder, salt and 1 and ½ teaspoons of pumpkin spice in a small bowl. Set aside.

  3. Wet ingredients

    In a large bowl: combine eggs, light brown sugar, pumpkin puree, vanilla and browned butter. Make sure to include all of the brown bits of butter from the bottom of the pan.wet ingredients in a mixing bowl for pumpkin cookies

  4. Combine wet and dry

    Add flour mixture to the bowl of wet ingredients and stir until well combined.pumpkin cookie cookie dough in a bowl with spatula

  5. Pumpkin spice sugar

    In a separate small bowl: Mix granulated sugar and 1 teaspoon of pumpkin spice.

  6. Form the dough

    Form dough into 1-inch balls.  Then roll each ball in pumpkin spice sugar. Place balls on a parchment lined baking sheet, spaced about 2 inches apart. Slightly flatten each ball with a fork.

  7. Bake

    Bake in a preheated oven at 350 degrees for 10-12 minutes. Let cool for 30 minutes.soft pumpkin cookies on a cooling rack

  8. Finish with powdered sugar

    Dust with powdered sugar. I use a shaker for sprinkling the powdered sugar but you can also spoon it into a fine wire mesh strainer and shake it over the cookies.cookies on parchment paper dusted with powdered sugar

Storage: Soft Pumpkin Cookies taste best when eaten the same day they are baked. They may be stored in an airtight container for 1 day max before they start drying out. Cookies will start getting dry and crumbly after day 1.

Looking for more fall baking ideas? Check these out:

Caramel Apple Pie Cookies

Pumpkin Nutella Muffins

Buttermilk Pumpkin Bread

Pumpkin Cheesecake

a pumpkin cookie with a bite taken out of it

Soft Pumpkin Cookies

Soft Pumpkin cookies made with canned pumpkin puree browned butter and a dusting of powdered sugar taste like a pumpkin muffin and snickerdoodle baked into one.
Print Recipe Pin Recipe
Nutrition Facts
Soft Pumpkin Cookies
Serving Size
 
1 cookie
Amount per Serving
Calories
151
% Daily Value*
Fat
 
8
g
12
%
Saturated Fat
 
5
g
31
%
Trans Fat
 
0.3
g
Polyunsaturated Fat
 
0.3
g
Monounsaturated Fat
 
2
g
Cholesterol
 
20
mg
7
%
Sodium
 
167
mg
7
%
Potassium
 
35
mg
1
%
Carbohydrates
 
20
g
7
%
Fiber
 
0.4
g
2
%
Sugar
 
11
g
12
%
Protein
 
1
g
2
%
Vitamin A
 
766
IU
15
%
Vitamin C
 
0.2
mg
0
%
Calcium
 
19
mg
2
%
Iron
 
1
mg
6
%
* Percent Daily Values are based on a 2000 calorie diet.
Prep Time 1 hour hr 10 minutes mins
Cook Time 10 minutes mins
butter cooling time 10 minutes mins
Total Time 40 minutes mins
Course Dessert
Cuisine American
Servings 24 cookies
Calories 151 kcal

Equipment

  • 2 baking sheets
  • 1 whisk
  • 1 cookie scoop
  • 1 fork
  • mixing bows
  • measuring spoons
  • measuring cups
  • rubber spatula
  • parchment paper

Ingredients
  

  • 1 cup butter unsalted
  • 2 cups flour
  • ½ teaspoon salt
  • ½ teaspoon baking powder
  • 1 teaspoon baking soda
  • 2½ teaspoon pumpkin pie spice divided into 1 teaspoon and 1½tsps
  • 1 cup light brown sugar
  • ⅓ cup canned pumpkin puree do not use pumpkin pie filling
  • 2 teaspoon vanilla extract
  • ¼ cup granulated sugar
  • powdered sugar for dusting

Instructions
 

Browned butter

  • Melt butter over medium heat in a small saucepan. In my experience it will bubble and foam twice before settling down and turning brown. Stir frequently. Cook until the butter turns amber in color. There should be some brown bits on the bottom of pan. This whole process should take3-5 minutes. Turn off heat and let cool for 10 minutes.

Dry ingredients

  • Whisk flour, baking soda, baking powder, salt and 1 and ½teaspoons of pumpkin spice in a small bowl. Set aside.

Wet ingredients

  • In a large bowl: combine eggs, light brown sugar, pumpkin puree, vanilla and browned butter. Make sure to include all of the brown bits of butter from the bottom of the pan.

Combine wet and dry

  • Add flour mixture to the bowl of wet ingredients and stir until well combined.

Pumpkin spice sugar

  • In a separate small bowl: Mix granulated sugar and 1teaspoon of pumpkin spice.

Form the dough

  • Form dough into 1-inch balls.  Then roll each ball in pumpkin spice sugar. Place balls on a parchment lined baking sheet, spaced about 2 inches apart.Slightly flatten each ball with a fork.

Bake

  • Bake in a preheated oven at 350 degrees for 10-12 minutes.Let cool for 30 minutes.

Finish with powdered sugar

  • Dust with powdered sugar. I use a shaker for sprinkling the powdered sugar but you can also spoon it into a fine wire mesh strainer and shake it over the cookies.

Notes

Soft Pumpkin Cookies taste best when eaten the same day they are baked. They may be stored in an airtight container for 1 day max before they start drying out. Cookies will start getting dry and crumbly after day 1.

Nutrition

Serving: 1cookieCalories: 151kcalCarbohydrates: 20gProtein: 1gFat: 8gSaturated Fat: 5gPolyunsaturated Fat: 0.3gMonounsaturated Fat: 2gTrans Fat: 0.3gCholesterol: 20mgSodium: 167mgPotassium: 35mgFiber: 0.4gSugar: 11gVitamin A: 766IUVitamin C: 0.2mgCalcium: 19mgIron: 1mg
Keyword browned butter, snickerdoodle, soft pumpkin cookies
Tried this recipe?Let us know how it was!
Click here to add your own private notes.

Peanut Butter Banana Muffins

September 16, 2024 by Yao 2 Comments

Peanut Butter Banana Muffins

Peanut Butter Banana Muffins is a product of my thought process. See if you can follow. There is this Pan-Asian restaurant in my neighborhood that draws in crowds on the weekends for live Elvis impersonator performances. The scene is not my vibe, but I had to check it out just once. Let me say it was entertaining, but once was enough for me. I would have been more content lounging on my couch watching Netflix while eating a peanut butter banana sandwich. Now I know the Elvis sandwich also has bacon, but you get the idea. In conclusion, when I think of Elvis, I think of peanut butter banana, which is the inspiration for this muffin recipe.

Peanut Butter Banana Muffins on a cooling rack

Peanut butter and banana is a flavor combination that always sounded unusual to me, but it works. Over ripe bananas and your favorite store bought creamy peanut butter are the main ingredients. This muffin recipe calls for a mixture of all-purpose flour and whole wheat flour for added texture. I try to sneak in whole wheat flour in my baking recipes whenever I can to make them a little healthier. Just don't think about the added sugar. Speaking of sugar, although this recipe calls for ⅔ cup of sugar, you can reduce it to ½ cup sugar if you prefer. It will still be sweet enough in my opinion. The reason why I bumped it up to ⅔ cup is because my family preferred the sweeter version. No surprise. Let me know what you think if decide if you make this.

Don't forget to leave a comment! Your feedback is appreciated and helps me improve recipes.

One Peanut Butter Banana Muffin

Ingredients

  • 3 large ripe bananas
  • 2 cups all-purpose flour
  • ¼ cup whole wheat flour
  • 1 teaspoon baking soda
  • ½ teaspoon salt
  • 2 eggs
  • ⅓ cup vegetable oil (or other neutral oil)
  • ⅔ cup sugar
  • 1 cup milk- any kind (I've used oat, almond and dairy milk. They all work)
  • ⅓ cup peanut butter- *creamy or crunchy
  • 2 teaspoon vanilla extract
  • 1 cup peanut butter chips

How to Make Peanut Butter Banana Muffins

Time needed: 35 minutes

Preheat oven to 400F

  1. Bananas

    Use a fork to mash the bananas in a small bowl. Set aside.a fork mashing bananas in a bowl

  2. Dry ingredients

    Whisk all-purpose flour, wheat flour, baking soda and salt in a bowl. Set aside.

  3. Wet ingredients

    In large mixing bowl: Beat eggs, oil and sugar together. Then add peanut butter, mashed bananas, milk and vanilla. Stir a few times. Batter will be lumpy.

  4. Combine wet and dry ingredients

    Add flour mixture and peanut butter chips to the bowl of wet ingredients. Mix until you no longer see white flour and batter is smooth.

  5. Scoop

    Use an ice cream scoop to drop batter into lined muffin tin. There is enough batter to make 15 standard sized muffins or 8 big muffins. I made 8 big muffins for the photos.8 unbaked muffins in muffin tin

  6. Bake

    Bake in a preheated oven at 400 degrees.
    For 15 standard size muffins, bake for 12-15 minutes
    For 8 large muffins, bake 20-25 minutes.four big peanut butter banana muffins

FAQ's on making Peanut Butter Banana Muffins

Can I make this into bread?

Yes, but you will want to reduce the heat. Spray a loaf pan with cooking spray and bake at 350F for 50-60 minutes or until toothpick comes out clean in the center.

What kind of peanut butter should I use?

*Creamy or chunky processed peanut butter works best. Do not use all-natural peanut butter. It is too thick.

Can I freeze Peanut Butter Banana Muffins?

Yes! Place muffins in a sealed plastic bag and freeze for up to 2 months.

What other mix-ins can I add?

Mini chocolate chips, chopped nuts, and blueberries are delicious additions. If you are feeling Elvis vibes, try adding crispy cooked bacon bits!

Check out more of my favorite muffin recipes:

Strawberry White Chocolate Muffins

Banana Chocolate Chip Muffins

Peanut Butter Banana Muffins

Peanut Butter Banana Muffins

Peanut Butter Banana Muffins made with ripe bananas and creamy peanut butter is a favorite flavor combination baked into a muffin.
Print Recipe Pin Recipe
Nutrition Facts
Peanut Butter Banana Muffins
Amount per Serving
Calories
193
% Daily Value*
Fat
 
5
g
8
%
Saturated Fat
 
1
g
6
%
Trans Fat
 
0.002
g
Polyunsaturated Fat
 
1
g
Monounsaturated Fat
 
2
g
Cholesterol
 
25
mg
8
%
Sodium
 
211
mg
9
%
Potassium
 
193
mg
6
%
Carbohydrates
 
32
g
11
%
Fiber
 
2
g
8
%
Sugar
 
15
g
17
%
Protein
 
6
g
12
%
Vitamin A
 
74
IU
1
%
Vitamin C
 
2
mg
2
%
Calcium
 
31
mg
3
%
Iron
 
1
mg
6
%
* Percent Daily Values are based on a 2000 calorie diet.
Prep Time 15 minutes mins
Cook Time 20 minutes mins
Total Time 35 minutes mins
Course Baking
Cuisine American
Servings 15 muffins
Calories 193 kcal

Equipment

  • paper cupcake liners
  • muffin tins
  • ice cream scoop
  • mixing bowls
  • whisk
  • measuring cups
  • measuring spoons
  • rubber spatula

Ingredients
  

  • 3 large ripe bananas
  • 2 cups all purpose flour
  • ¼ cup whole wheat flour
  • 1 teaspoon baking soda
  • ½ teaspoon salt
  • 2 eggs
  • ⅓ cup vegetable oil or other neutral oil
  • ⅔ cup sugar
  • 1 cup milk any kind: dairy, almond or oat milk all work
  • ⅓ cup peanut butter* the processed kind, do not use All-natural
  • 2 teaspoon vanilla extract
  • 1 cup peanut butter chips

Instructions
 

Preheat oven to 400℉

    Bananas

    • Use a fork to mash the bananas in a small bowl. Set aside.

    Dry Ingredients

    • Whisk all-purpose flour, wheat flour, baking soda and salt in a bowl. Set aside.

    Wet ingredients

    • In large mixing bowl: Beat eggs, oil and sugar together.Then add peanut butter, mashed bananas, milk and vanilla. Stir a few times.Batter will be lumpy.

    Combine wet and dry ingredients

    • Add flour mixture and peanut butter chips to the bowl of wet ingredients. Mix until you no longer see white flour and batter is smooth.

    Scoop

    • Use an ice cream scoop to drop batter into lined muffin tin.There is enough batter to make 15 standard sized muffins or 8 big muffins.

    Bake

    • Bake in a preheated oven at 400℉
      For 15 standard size muffins, bake for 12-15 minutes.
      For 8 large muffins, bake 20-25 minutes.

    Notes

    *Creamy or crunchy peanut butter may be used. Avoid using all-natural as it is too thick. I used Skippy creamy peanut butter.
    This recipe makes 15 standard sized muffins or 8 big muffins. 
    To make Peanut Butter Banana Bread: Spray a loaf pan with cooking spray and bake at 350F for 50-60 minutes or until toothpick comes out clean in the center.
    Storage: Muffins can be kept at room temperature in a sealed container for up to 3 days or frozen in a sealed bag for up to 2 months.
    Other mix- ins: Mini chocolate chips, chopped nuts, and blueberries are delicious additions. If you are feeling Elvis vibes, try adding crispy cooked bacon bits!

    Nutrition

    Calories: 193kcalCarbohydrates: 32gProtein: 6gFat: 5gSaturated Fat: 1gPolyunsaturated Fat: 1gMonounsaturated Fat: 2gTrans Fat: 0.002gCholesterol: 25mgSodium: 211mgPotassium: 193mgFiber: 2gSugar: 15gVitamin A: 74IUVitamin C: 2mgCalcium: 31mgIron: 1mg
    Keyword creamy peanut butter, peanut butter banana, ripe bananas
    Tried this recipe?Let us know how it was!
    Click here to add your own private notes.

    Baked Coconut Chicken Tenders

    August 31, 2024 by Yao Leave a Comment

    Coconut chicken tenders on a sheet pan with coconut flakes and sweet chili sauce
    Coconut chicken tenders on a sheet pan with coconut flakes and sweet chili sauce

    This Baked Coconut Chicken Tenders recipe might be one of the best chicken tenders recipe ever! There is no better way to get sweet, savory, crispy and juicy chicken in one bite. 

    The inspiration for this recipe is my daughter‘s obsession with Cane’s chicken fingers. I have tried to convince her that I can make fried chicken tenders just as good, but I will never win. My efforts to create simple fried chicken pieces just like Cane’s will never measure up because I do not own an industrial fryer that can make chicken that crispy and crank out that heavenly greasy smell that comes with it. They only way to for me to win is to create something equally delicious but different.

    baked coconut chicken tenders

    Let me introduce Baked Coconut Chicken Tenders! Less messy and healthier than deep frying!

    I love adding a touch of the tropics to a household staple with a little coconut. Its also a great way to use leftover coconut flakes from baking these amazing Coconut Lime Cookies.

    The trick for making crispy chicken in the oven is rolling the tenders in a mixture of fine panko breadcrumbs and coconut flakes and then coating them in a light layer of oil directly on the baking sheet. You will need to get your hands a little dirty, but it will be worth it.

    Ingredients

    • 2 pounds chicken breast tenders
    • 1 ½ cups panko breadcrumbs
    • 1 cup  sweetended shredded coconut flakes (found in the baking aisles)
    • 2 teaspoon chili powder
    • 1 teaspoon garlic powder
    • ½ teaspoon onion powder
    • ½ teaspoon salt
    • ⅓ cup flour
    • 2 eggs
    • 2 Tbs water
    • ½ cup vegetable oil, avocado oil or canola oil plus a little more

    How to Make Baked Coconut Chicken Tenders

    Preheat oven to 425F

    1. Oil the pans

      Line 2 sheet pans with parchment paper for easy cleanup.  Pour ¼ cup oil on top of parchment lined pan.  Use a brush or your fingers to spread oil evenly on pan. Set aside.oiled parchment paper on a sheet pan

    2. Set up three medium shallow bowls as follows:

      Measure ⅓ cup flour and place in Bowl 1.

      Scramble 2 eggs with 2 Tbs water in Bowl 2.
       
      Combine panko, chili powder, garlic powder, onion powder and salt in a food processor and pulse a few times until combined*. Place this mixture in Bowl 3. Add the coconut flakes and mix well.
       
      *If you do not have a food processor, simply mix all these ingredients together with a whisk or fork. I find that finer panko crumbs stick better to the chicken. Larger panko breadcrumbs will still work but it will be a different texture.three separate bowls containing eggwash, flour and coconut panko breadcrumbs

    3. Bread the chicken

      Bread the chicken pieces by dipping the pieces in the following order: flour, then eggs then panko coconut mixture.unbaked coconut crusted chicken tenders

    4. Bake

      Place the tenders on the oiled parchment lined baking sheets. Flip each piece over 1 or 2 times to coat with oil. Spread pieces out so they are not touching, about ½ inch apart. Bake in a preheated oven at 425F degrees for 10 minutes. Flip each piece over. Bake another 10-12 minutes until fully cooked and crispy.coconut chicken tenders

    Can you Air Fry Coconut Chicken Tenders?

    Yes! Spray panko coconut coated chicken with cooking spray and air fry at 400 degrees for 10 minutes. Turn chicken pieces over, spray with more cooking spray and cook for another 10 minutes until internal temperature reaches 165F or 74C.

    Can plain breadcrumbs be used instead of panko?

    I do not recommend using plain breadcrumbs, you will not get the same crispy results.

    Can unsweetened coconut flakes be used?

    Yes and No. It won’t taste the same but if you don’t like sweet or want to cut back on sugar, unsweetened coconut flakes may be substituted.
     

    What to serve with coconut chicken tenders

    Sweet chili sauce, honey mustard and hot honey are great dipping sauces.

    Looking for more mouthwatering chicken recipes? Check these out:

    Baked Garlic Parmesan Wings

    Lemongrass Chicken Thighs

    Chili Lime Chicken Skewers

    Coconut chicken tenders on a sheet pan with coconut flakes and sweet chili sauce

    Baked Coconut Chicken Tenders

    This Baked Coconut Chicken Tenders recipe is one of the best ways to make sweet, savory, crispy and juicy chicken without frying.
    Print Recipe Pin Recipe
    Nutrition Facts
    Baked Coconut Chicken Tenders
    Amount per Serving
    Calories
    574
    % Daily Value*
    Fat
     
    18
    g
    28
    %
    Saturated Fat
     
    8
    g
    50
    %
    Trans Fat
     
    0.04
    g
    Polyunsaturated Fat
     
    3
    g
    Monounsaturated Fat
     
    4
    g
    Cholesterol
     
    236
    mg
    79
    %
    Sodium
     
    945
    mg
    41
    %
    Potassium
     
    1128
    mg
    32
    %
    Carbohydrates
     
    36
    g
    12
    %
    Fiber
     
    4
    g
    17
    %
    Sugar
     
    9
    g
    10
    %
    Protein
     
    64
    g
    128
    %
    Vitamin A
     
    488
    IU
    10
    %
    Vitamin C
     
    3
    mg
    4
    %
    Calcium
     
    74
    mg
    7
    %
    Iron
     
    4
    mg
    22
    %
    * Percent Daily Values are based on a 2000 calorie diet.
    Prep Time 15 minutes mins
    Cook Time 20 minutes mins
    Total Time 35 minutes mins
    Course Main Course
    Cuisine American
    Servings 4 Servings
    Calories 574 kcal

    Equipment

    • 3 shallow bowls
    • 2 baking sheets
    • food processor optional*
    • parchment paper

    Ingredients
      

    • 2 pounds chicken tenders
    • 1½ cups panko breadcrumbs
    • 1 cup sweetened coconut flakes
    • 2 teaspoon chili powder
    • 1 teaspoon garlic powder
    • ½ teaspoon salt
    • ⅓ cup flour
    • 2 eggs
    • 2 Tbs water
    • ½ cup vegetable oil plus a little more

    Instructions
     

    • Preheat oven to 425℉

    Oil the pans

    • Line 2 sheet pans with parchment paper for easy cleanup.  Pour ¼ cup oil on top of each parchment lined pan.  Use a brush or your fingers to spread oil evenly on pan. Set aside.

    Set up three shallow bowls as follows:

    • Measure ⅓ cup flour and place in Bowl 1.
      Scramble 2 eggs and 2 Tbs water in Bowl 2.
      Combine panko, chili powder, garlic powder, onion powder and salt in a food processor and pulse a few times until combined. Place this mixture in Bowl 3. Add the coconut flakes and mix well.
      *If you do not have a food processor, simply mix all these ingredients together with a whisk or fork. I find that finer panko crumbs sticks better to the chicken. Larger panko breadcrumbs will still work but it will be a different texture.

    Bread the chicken

    • Bread the chicken pieces by dipping the pieces in the following order: flour, then eggs then panko coconut mixture.

    Bake

    • Place the tenders on the oiled parchment lined sheet pans. Flip each piece over 1 or 2 times to coat with oil. Spread pieces out so they are not touching, about ½ inch apart.
      Bake in a preheated oven at 425℉ for 10 minutes. Flip each piece over. Bake another 10-12 minutes until fully cooked and crispy.

    Notes

    Air fryer method: Spray basket of air fryer with cooking spray. Place panko coconut coated tenders in basket and spray with cooking spray. Air fry at 400 degrees for 10 minutes. Turn chicken pieces over, spray with more cooking spray and cook for another 10 minutes until internal temperature reaches 165F or 74C.
     
    Serve with sweet chili sauce, honey mustard or hot honey.

    Nutrition

    Calories: 574kcalCarbohydrates: 36gProtein: 64gFat: 18gSaturated Fat: 8gPolyunsaturated Fat: 3gMonounsaturated Fat: 4gTrans Fat: 0.04gCholesterol: 236mgSodium: 945mgPotassium: 1128mgFiber: 4gSugar: 9gVitamin A: 488IUVitamin C: 3mgCalcium: 74mgIron: 4mg
    Keyword baked chicken wings, baked coconut chicken tenders, coconut flakes
    Tried this recipe?Let us know how it was!
    Click here to add your own private notes.

    Grilled Butternut Squash with Whipped Ricotta

    August 10, 2024 by Yao Leave a Comment

    overhead view of grilled butternut sqush with whipped ricotta and honey
    overhead view of grilled butternut sqush with whipped ricotta and honey

    I’ve been cooking everything on the grill lately. Last week it was chicken and eggplant, this week its squash. I’m excited about this Grilled Butternut Squash with Whipped Ricotta Sauce I concocted. Its sweet, savory and simple to make! If you want to make a side dish you can throw on the grill alongside steak or chicken, this is it!

    grilled butternut squash with whipped feta and honey

    This inspiration for this recipe is from the Argentinian Asado I recently attended with my wonderful friend Sandra. Thank you for inviting us Sandra! I have never eaten so much meat in my life! It was pure gluttony. This was a 9-hour affair that included tango lessons, cultural education, great company and lots and lots of beef! I’m going to eat just salad and lots of vegetables for the rest of the year! Okay, this won’t happen, but I’ll be eating this grilled squash a few more times before the end of summer.

    You will love how easy it is to make Grilled Butternut Squash with Whipped Ricotta!

    three slices of grilled butternut squash with whipped ricotta

    Ingredients

    • 1 medium butternut squash
    • ¼ cup olive oil
    • salt
    • black pepper
    • 1 cup ricotta
    • 1 Tbs honey plus more for serving
    • ¼ teaspoon red pepper flakes
    • 2 large basil leaves
    • 1 Tbs olive oil
    peeled butternut squash

    How to Make Grilled Butternut Squash with Whipped Ricotta

    Time needed: 29 minutes

    Prepare grill.

    1. Prepare squash

      Peel, remove seeds and cut squash into ½ inch thick slices. Brush both sides with olive oil and season with salt and pepper.butternut squash slices on a cutting board

    2. Grill

      Grill squash 5-7 minutes on each side, turning frequently until cooked through. Check for doneness by piercing with a fork, squash will be tender.grilled butternut squash slices

    3. Make whipped ricotta sauce

      In a food processor combine ricotta, honey, red pepper flakes, olive oil and basil leaves. Pulse until well blended and smooth.

    4. Serve

      Spoon ricotta sauce over squash and drizzle with more honey.grilled butternut squash with whipped feta and honey on a plate

    Looking for more exciting vegetable side dishes? Try these!

    Grilled Eggplant with Harissa Tomato Sauce

    Tuscan Kale Caesar

    Elote (Mexican Street Corn)

    grilled butternut squash with whipped feta and honey

    Grilled Butternut Squash with Whipped Ricotta

    Grilled Butternut Squash with Whipped Ricotta is sweet, savory and simple to make. It’s the perfect side dish to make alongside grilled steak or chicken.
    Print Recipe Pin Recipe
    Nutrition Facts
    Grilled Butternut Squash with Whipped Ricotta
    Amount per Serving
    Calories
    355
    % Daily Value*
    Fat
     
    23
    g
    35
    %
    Saturated Fat
     
    7
    g
    44
    %
    Polyunsaturated Fat
     
    2
    g
    Monounsaturated Fat
     
    13
    g
    Cholesterol
     
    32
    mg
    11
    %
    Sodium
     
    73
    mg
    3
    %
    Potassium
     
    731
    mg
    21
    %
    Carbohydrates
     
    32
    g
    11
    %
    Fiber
     
    4
    g
    17
    %
    Sugar
     
    9
    g
    10
    %
    Protein
     
    9
    g
    18
    %
    Vitamin A
     
    20255
    IU
    405
    %
    Vitamin C
     
    39
    mg
    47
    %
    Calcium
     
    219
    mg
    22
    %
    Iron
     
    2
    mg
    11
    %
    * Percent Daily Values are based on a 2000 calorie diet.
    Prep Time 15 minutes mins
    Cook Time 14 minutes mins
    Total Time 29 minutes mins
    Course Side Dish
    Cuisine American
    Servings 4 Servings
    Calories 355 kcal

    Equipment

    • grill gas or charcoal
    • grill tools
    • pastry brush
    • food processor

    Ingredients
      

    • 1 medium butternut squash
    • ¼ cup olive oil
    • salt
    • black pepper
    • 1 cup ricotta
    • 1 Tbs honey plus more for serving
    • ¼ teaspoon red pepper flakes
    • 2 large basil leaves
    • 1 Tbs olive oil

    Instructions
     

    Prepare squash

    • Peel, remove seeds and cut squash into ½ inch thick slices. Brush both sides with olive oil and season with salt and pepper.

    Grill

    • Grill squash 5-7 minutes on each side, turning frequently until cooked through. Check for doneness by piercing with a fork, squash will be tender.

    Make Sauce

    • In a food processor combine ricotta, honey, red pepper flakes, olive oil and basil leaves. Pulse until well blended and smooth.

    Serve

    • Spoon Ricotta sauce over squash and drizzle with more honey.

    Notes

    Pro Tip: To make it easier to cut squash, poke it all around several times with a fork and microwave it 2-3 minutes before cutting.

    Nutrition

    Calories: 355kcalCarbohydrates: 32gProtein: 9gFat: 23gSaturated Fat: 7gPolyunsaturated Fat: 2gMonounsaturated Fat: 13gCholesterol: 32mgSodium: 73mgPotassium: 731mgFiber: 4gSugar: 9gVitamin A: 20255IUVitamin C: 39mgCalcium: 219mgIron: 2mg
    Keyword fall side dish, grilled butternut squash, whipped ricotta
    Tried this recipe?Let us know how it was!
    Click here to add your own private notes.

    Grilled Eggplant with Harissa Tomato Sauce

    August 7, 2024 by Yao Leave a Comment

    overhead view of grilled eggplant with harissa tomato sauce on a plate with basil
    overhead view of grilled eggplant with harissa tomato sauce on a plate with basil

    Grilled Eggplant with Harissa Tomato Sauce is a summer recipe I’ll be making on repeat until the fall. It’s a delicious vegetarian main course meal but can also be served as a side dish. This is not your mama’s eggplant! It’s a hybrid of Italian and Moroccan flavors.  I was inspired to create a new eggplant dish ever since I had the best eggplant of my life at the beautiful Calajanara Restaurant during a trip to the Amalfi Coast in early June. BTW, I’m still working on my travel tips for Amalfi Coast, so be sure to check back soon!

    grilled sliced eggplant
    uncooked harissa tomato sauce

    Why I Love Grilled Eggplant with Harissa Tomato Sauce

    • can be served as a vegetarian main course or side dish
    • a great way to use fresh eggplant and fresh herbs
    • you adjust the spice level to your taste
    • its not boring!
    Grilled Eggplant with Harissa Tomato Sauce

    BUT WAIT...

    What is harissa?

    In case you are not familiar, harissa is a hot chili paste used in North African cooking that is often used as a condiment or marinade. I forgot to pick some up at the specialty store but saw some at Trader Joe’s and decided to give it a try. I know it is not authentic, but it works for this recipe! If you are a harissa snob, please don’t judge me.

    Ingredients

    • 1 eggplant
    • ¼ cup olive oil
    • kosher salt
    • black pepper
    • 2 cloves garlic
    • 14.5 ounce can fire roasted tomatoes
    • ½ cup pitted kalamata olives in brine
    • 1-2 teaspoon harissa paste (adjust to your spice preference)- I used 2 teaspoons
    • 2 teaspoon honey
    • 4 basil leaves
    a can of Trader Joe's fire roasted tomatoes , a jar of harissa and jar of kalamata olives

    How to Make Grilled Eggplant with Harissa Tomato Sauce

    Time needed: 50 minutes

    Preheat grill to medium heat

    1. Prepare eggplant

      Slice eggplant lengthwise into ½  inch thick pieces. Brush with olive oil and season with salt and pepper on both sides. Grill 5 minutes on each side. Set aside.raw sliced eggplant on a sheet pan with olive oil

    2. Blend

      Combine garlic, fire roasted tomatoes, olives with brine, harissa paste, honey and basil leaves in a food processor. Pulse a few times until tomatoes and olives are coarsely chopped.

      pureed harissa tomato sauce

    3. Simmer

      Pour mixture into a medium saucepan. Heat over medium heat until sauce begins to simmer. Reduce heat to low, cover and cook for 20-30 minutes until sauce is reduced. Turn off heat.harissa tomato sauce

    4. Serve

      Spoon sauce over eggplant and garnish with fresh basil.grilled eggplant with harissa tomato sauce on a plate with fork

    What to serve with this dish?

    I love soaking up the sauce with crusty bread or naan. Pasta and couscous also goes well.

    Looking for more eggplant recipes?

    Try my recipe for Tuna with Crispy Eggplant Pasta!

    grilled eggplant with harissa tomato sauce on a plate with fork

    Grilled Eggplant with Harissa Tomato Sauce

    Grilled Eggplant with Harissa Tomato Sauce is a delicious vegetarian dish that combines Italian and Moroccan flavors.
    Print Recipe Pin Recipe
    Nutrition Facts
    Grilled Eggplant with Harissa Tomato Sauce
    Amount per Serving
    Calories
    434
    % Daily Value*
    Fat
     
    29
    g
    45
    %
    Saturated Fat
     
    4
    g
    25
    %
    Polyunsaturated Fat
     
    4
    g
    Monounsaturated Fat
     
    20
    g
    Sodium
     
    905
    mg
    39
    %
    Potassium
     
    774
    mg
    22
    %
    Carbohydrates
     
    41
    g
    14
    %
    Fiber
     
    13
    g
    54
    %
    Sugar
     
    19
    g
    21
    %
    Protein
     
    6
    g
    12
    %
    Vitamin A
     
    1084
    IU
    22
    %
    Vitamin C
     
    10
    mg
    12
    %
    Calcium
     
    285
    mg
    29
    %
    Iron
     
    9
    mg
    50
    %
    * Percent Daily Values are based on a 2000 calorie diet.
    Prep Time 10 minutes mins
    Cook Time 40 minutes mins
    Total Time 50 minutes mins
    Course Main Course
    Cuisine Fusion
    Servings 2 people
    Calories 434 kcal

    Equipment

    • 1 grill gas or charcoal
    • 1 food processor
    • 1 pastry brush
    • 1` medium saucepan

    Ingredients
      

    • 1 medium eggplant
    • ¼ cup olive oil
    • kosher salt
    • black pepper
    • 2 cloves garlic
    • 14.5 ounce fire roasted tomatoes
    • ½ cup pitted kalamata olives in brine
    • 1-2 teaspoon harissa paste * adjust to your preference
    • 2 teaspoon honey
    • 4 basil leaves

    Instructions
     

    • Preheat grill to medium heat.

    Prepare eggplant

    • Slice eggplant lengthwise into ½  inch thick pieces. Brush with olive oil and season with salt and pepper on both sides. Grill 5 minutes on each side. Set aside.

    Blend

    • Combine garlic, fire roasted tomatoes, olives with brine, harissa paste, honey and basil leaves in a food processor. Pulse a few times until tomatoes and olives are coarsely chopped.

    Simmer

    • Pour mixture into a medium saucepan. Heat over medium heat until sauce begins to simmer. Reduce heat to low, cover and cook for 20-30 minutes until sauce is reduced. Turn off heat.

    Serve

    • Spoon sauce over eggplant and garnish with fresh basil.

    Notes

     
    *Harissa is a hot chili paste used in North African cooking that is often used as a condiment or marinade. 
    Serve with crusty bread, naan, couscous or pasta.
     

    Nutrition

    Calories: 434kcalCarbohydrates: 41gProtein: 6gFat: 29gSaturated Fat: 4gPolyunsaturated Fat: 4gMonounsaturated Fat: 20gSodium: 905mgPotassium: 774mgFiber: 13gSugar: 19gVitamin A: 1084IUVitamin C: 10mgCalcium: 285mgIron: 9mg
    Keyword eggplant recipes, grilled eggplant, harissa
    Tried this recipe?Let us know how it was!
    Click here to add your own private notes.

    Four Days in Key West

    July 27, 2024 by Yao Leave a Comment

    Cayo Hueso Cafe at Fort Zachary Taylor State Park Beach
    Cayo Hueso Cafe at Fort Zachary Taylor State Park Beach

    Key West is hot! I mean that literally and figuratively! Even though it gets incredibly hot and humid in Florida during the summer, it didn’t stop me from visiting the tip of the Florida Keys in June. I enjoyed four days in Key West, exploring, swimming and of course eating! I even met the inventor of shark repellent! My son and I went on a tour of the College of the Florida Keys and got a chance to meet Dr. Patrick Rice who shared his passion for marine biology and how shark repellent came to be. If you are planning a trip to Key West, you don’t need a travel agent. The destination is not that big, so you can cover a lot of ground in just a few days. It was the perfect place to spend a long weekend with my beach loving family.

    How to Get to Key West

    The fastest way to get to Key West is to fly directly into (EYW). We flew from Chicago on American Airlines. You can find a list of airlines with direct routes here. Driving there is also an option. If you are starting your journey in Miami, it is about a 4 to 4 ½ hour drive without stopping. Factor in an additional 1-2 hours for pit stops along the way. Key Largo, Marathon, and Big Pine Key are places where you can pull off to rest and find a place to eat.

    Key West view from airplane

    Key West Travel Tips

    Things to know before you go. Here are some things I learned before and during our trip.

    • Key West is expensive. You will spend a good chunk of your budget on accommodations. Options range from luxury resorts to motels and cute colorful cottages. No matter where you stay, just know that even the modest choice is going to be pricey for the average consumer. We rented a two-bedroom condo at Lost Key Rentals at 1800 Atlantic Avenue. I would definitely stay there again. Our spacious unit had a modern kitchen and baths, balcony and was nicely decorated. The owners left us complimentary key lime pie! It was also right on the ocean and conveniently located, just a 7-minute drive to Duval Street. You could also walk, but I wouldn’t recommend it in the summer months during peak sunlight hours. You will melt!
    • The weather is hot. It might be obvious to say it is hot and humid in the summer months. We were there the middle of June, and it felt like a jungle with highs in the 80’s and 90’s and extremely sticky. If you want milder weather, the best time to visit Key West is December through April. The temperatures during the winter months are usually around the mid 70’s, though that may unfortunately change with global warming.
    • Jet Skis are considered boats. If you plan on jet skiing, you must be at least 16 years old and take a test to get your boating license to operate a jet ski!
    • It smells. In certain areas, it can smell like rotten eggs or sewage. During our time there, we noticed it on and off. This smell is due to decaying sargassum, a type of seaweed. This is something to consider before visiting if you are sensitive to smells or have allergies or respiratory conditions such as asthma. Getting a strong whiff of this might be a trigger.
    • Its LGBTQ friendly. Rainbow flags everywhere, welcoming guest houses, shops and Drag brunch. We were there in June and saw pride parades every evening. Just follow the music and lights.
    • Transportation. Although there are car rentals available, we opted to rent a golf cart just because we could!  Just know that finding a parking spot can be challenging no matter what vehicle you drive. This is especially true in Old Town, the historic district. We also used Uber to travel to farther areas for tours. We DO NOT recommend driving a golf cart too far from Old Town. Do not drive to Stock Island in a golf cart no matter what anyone tells you! The speed of traffic is fast, getting hit while riding a golf cart would be tragic.
    Two women walking down a street in Key West

    Where to Eat in Key West

    By now, you know that I am all about the food. Seafood is bountiful everywhere in the keys. I usually make a list of places I want to eat at, but hardly ever get to visit all of them. My eyes are always bigger than my stomach and it’s a battle between what I want to eat and what I can eat. Here are our recommendations for places to eat.

    DJ’s Clam Shack-This was one of the must go to places on our list, ever since I saw it featured on Diners, Drive-Ins and Dives. Of course I ordered the lobster roll! There is not a lot of seating in the front, but if you go around the side to the back, there are a few more tables to sit down at.

    Lobster roll from DJ'sClam Shack

    Seaside Café at the Mansion- This was my favorite place to dine oceanside! It is located on the grounds of the Southernmost Mansion, a free museum and guest house.  We ordered honey-butter lobster biscuits and The Best Lobster Pizza while taking in sunset views of the Atlantic Ocean. After eating until we couldn’t eat anymore, we enjoyed walking around the grounds and people watching. There was a lovely wedding on site that day.

    Cuban Coffee Queen- Go for good strong coffee, breakfast served all day and Cuban sandwiches.

    River Street Sweets- The pralines are a must!  Handmade chocolates, caramel apples and ice cream. Yes please! The perfect place to satisfy your sweet- tooth.

    Two Friends Patio- When you want to dine al fresco but under shade. We ate here before boarding the bus for a ghost tour which was located down the street. They have a wide menu ranging from burgers to seafood. The covered patio was a nice place to relax. We enjoyed the broiled oysters and seafood pasta.

    Fried Soft Shell Crabs , fries and green beans

    Hogfish Grill- We saw this place on You Tube and wanted to check out the hogfish sandwich. Located on Stock Island, a little out of the way and somewhat of a sketchy neighborhood to pass through before getting there. Go there if you like local eats and don’t mind the drive.

    Lots of places for key lime pie- There is no shortage of places to get this signature dessert. I can’t remember the names of all the places we tried. Everyone claims they have the best. I think you should just try them all and judge for yourself.

    Things to Do

    This might surprise you, but I did more than just eat. There are plenty of activities and tours to check out in this vibrant community.

    My favorite things to do in key west were:

    Fort Zachary Taylor State Park- Entrance fees for a golf cart of four people was around $8.00. Don’t miss this gem! This was my favorite beach on Key West! The water is turquoise blue, warm and clean. You can spend the whole day here snorkeling, sunbathing, fishing, hiking and picnicking. Conveniences include restrooms, a snack shack and chair and umbrella rentals. Don’t forget to explore the fort and learn about local Civil War history- we ran out of time and didn’t get a chance to go back and do this.

    Jet Ski Tour- It was a last-minute decision to go on this jet ski tour that started out at Parrot Key Villa. After a lot of indecisiveness we took the plunge and did it. An important thing to know is that you must take a test to get your boating license before you can rent drive a jet ski! Our friend Google helped us out with some of the answers.

    Kayaking Tour- Kayaking through mangrove tunnels, spotting fish, crustaceans, jellyfish and birds was wonderful! The drunk woman that joined our tour group last minute was not.

    Ghost Tour- The Key West Ghosts and Gravestones Trolley Tour was a fun way to get an overview of town. Not very scarry but interesting tales of pirates, ghosts and local legends. Fun fact:  the underside of porches and overhangs are painted “Haint Blue” to ward off evil spirits.

    Southernmost Point Buoy- The iconic 0-mile maker is a big cone of cement. People wait in line a long time in the blazing hot sun to get their picture taken next to it. We chose to skip and take our picture next to a replica at a restaurant across the street instead.

    Hen and chicks in Key West

    These places were also on the list of things to see but we just ran out of time:

    • Earnest Hemmingway Home and Museum
    • Sunset at Mallory Square
    • Butterfly Museum

    Maybe next time. I have so many other destinations to see first!

    Browned Butter Chocolate Chip Cookies

    July 8, 2024 by Yao Leave a Comment

    Browned Butter Chocolate Chip Cookies
    Browned Butter Chocolate Chip Cookies

    You might be thinking, do I really need another chocolate chip cookie recipe? Of course you do! If you haven’t tried these Browned Butter Chocolate Chip Cookies, you would be missing out on a true work of art. Brown on the outside and gooey soft and chocolatey on the inside is everything the best browned butter chocolate chip cookie should be. The questions is not IF you need another cookie recipe, but rather WHEN will you make these amazing homemade cookies. Hopefully the answer is soon!

    baked chocolate chip cookies with walnuts

    I have been meaning to create a browned butter cookie chocolate chip cookie recipe ever since I was experimenting with a recipe for browned butter fish in foil. Now I know fish and cookies don’t exactly go together, but the nutty, caramelly scent of melted butter is what inspired me.

    How are Browned Butter Chocolate Chip Cookies different from classic chocolate chip cookies?

    There is no secret ingredient for these cookies. I use the same exact ingredients you will find in most other chocolate chip cookie recipe. But the reason why these cookies are different and oh so much yummier than your average recipe is the technique! Melting the butter until it becomes a caramel amber removes the water content from butter. Adding this butter to cookie dough makes cookies soft and tender and adds a toasty and slightly nutty flavor. Shaping these cookies into large balls and letting them rest before baking at 375F creates a nice brown outside and soft center.

    Browned Butter Chocolate Chip Cookies

    Ingredients

    • 1 cup salted butter
    • 2 ½ cups flour
    • ½ teaspoon salt
    • 2 teaspoon baking soda
    • ¾ cup sugar
    • ¾ cup light brown sugar
    • 2 teaspoon vanilla
    • 2 eggs-slightly beaten
    • 1 cup semi-sweet chocolate chips
    • 1 cup dark chocolate chunks
    • ½ cup chopped walnut pieces (optional)

    How to Make Browned Butter Chocolate Chip Cookies

    Time needed: 1 hour and 5 minutes

    1. Brown the butter

      Melt butter in a small saucepan over medium heat. The butter will foam, stir frequently. Once butter turns a light amber, turn off the heat. This melting process should take approximately 4-5 minutes.  Let butter cool for 10 minutes.browned butter

    2. Combine dry ingredients

      While the butter is cooling, use a whisk to combine the flour, salt and baking soda in a medium bowl. Set aside.

    3. Make dough

      In a large bowl- Combine melted butter, sugar, brown sugar and vanilla. Then add eggs and mix well.  Slowly add flour mixture and stir until dough forms. Add chocolate chips and chocolate chunks and stir again a few times.

    4. Scoop dough

      Scoop dough out onto a parchment lined baking sheet, leaving at least 1 ½ inches between each  ball of dough. I used a ¼ cup measuring scoop. Let rest at room temperature for 30 minutes.browned butter cookie dough balls with chocolate chips and walnuts

    5. Bake

      Preheat oven to 375 degrees and bake cookies for 10 minutes. Let cookies cool for 30 minutes or longer before serving. Cookies will be light brown on the outside and soft and gooey on the inside.

    6. Cool

      Let cookies cool for 30 minutes to set before serving.

    browned butter chocolate chip cookies with chocolate chips and walnuts on parchment paper

    Still looking for more chocolate chip cookie recipes? Try these!

    Soft Chocolate Chip Miso Cookies

    Dark Chocolate Pistachio Cookies

    Chocolate Chip Potato Pretzel Cookies

    Browned Butter Chocolate Chip Cookies

    Browned Butter Chocolate Chip Cookies

    This Browned Butter Chocolate Chip cookie recipe is everything you need to make the best chocolate chip cookie that is lightly brown on the outside and soft and gooey on the inside.
    Print Recipe Pin Recipe
    Nutrition Facts
    Browned Butter Chocolate Chip Cookies
    Serving Size
     
    1 cookie
    Amount per Serving
    Calories
    271
    % Daily Value*
    Fat
     
    14
    g
    22
    %
    Saturated Fat
     
    8
    g
    50
    %
    Trans Fat
     
    0.3
    g
    Polyunsaturated Fat
     
    2
    g
    Monounsaturated Fat
     
    3
    g
    Cholesterol
     
    36
    mg
    12
    %
    Sodium
     
    214
    mg
    9
    %
    Potassium
     
    82
    mg
    2
    %
    Carbohydrates
     
    33
    g
    11
    %
    Fiber
     
    1
    g
    4
    %
    Sugar
     
    21
    g
    23
    %
    Protein
     
    3
    g
    6
    %
    Vitamin A
     
    277
    IU
    6
    %
    Vitamin C
     
    0.1
    mg
    0
    %
    Calcium
     
    28
    mg
    3
    %
    Iron
     
    1
    mg
    6
    %
    * Percent Daily Values are based on a 2000 calorie diet.
    Prep Time 25 minutes mins
    Cook Time 10 minutes mins
    Resting time 30 minutes mins
    Total Time 1 hour hr 5 minutes mins
    Course Dessert
    Cuisine American
    Servings 24 cookies
    Calories 271 kcal

    Equipment

    • 1 small saucepan or pot
    • 1 wooden spoons
    • 1 rubber spatula
    • 1 whisk
    • 1 large mixing bowl
    • 1 medium mixing bowl
    • measuring cups
    • measuring spoons
    • 2 baking sheets
    • parchment paper

    Ingredients
      

    • 1 cup salted butter
    • 2½ cups flour
    • ½ teaspoon salt
    • 2 teaspoon baking soda
    • ¾ cup sugar
    • ¾ cup light brown sugar
    • 2 teaspoon vanilla
    • 2 eggs slightly beaten
    • 1 cup chocolate chips semi-sweet
    • 1 cup chocolate chunk dark chocolate or bittersweet
    • ½ cup chopped walnuts optional

    Instructions
     

    Brown the butter

    • Melt butter in a small saucepan over medium heat. The butter will foam, stir frequently. Once butter turns a light amber, turn off the heat.This melting process should take approximately 4-5 minutes.  Let butter cool for 10 minutes.

    Combine dry ingredients

    • While the butter is cooling, use a whisk to combine the flour, salt and baking soda in a medium bowl. Set aside.

    Make dough

    • In a large bowl- Combine melted butter, sugar, brown sugar and vanilla. Then add eggs and mix well. Slowly add flour mixture and stir until dough forms. Add chocolate chips and chocolate chunks and stir again a few times.

    Scoop dough

    • Scoop dough out onto a parchment lined baking sheet, leaving at least 1 ½ inches between each  ball of dough. I used a ¼ cup measuring scoop. Let rest at room temperature for 30 minutes.

    Bake

    • Preheat oven to 375 degrees and bake cookies for 10 minutes.Let cookies cool for 30 minutes or longer before serving. Cookies will be light brown on the outside and soft and gooey on the inside.

    Cool

    • Let cookies cool for 30 minutes to set before serving.

    Nutrition

    Serving: 1cookieCalories: 271kcalCarbohydrates: 33gProtein: 3gFat: 14gSaturated Fat: 8gPolyunsaturated Fat: 2gMonounsaturated Fat: 3gTrans Fat: 0.3gCholesterol: 36mgSodium: 214mgPotassium: 82mgFiber: 1gSugar: 21gVitamin A: 277IUVitamin C: 0.1mgCalcium: 28mgIron: 1mg
    Keyword browned butter chocolate chip cookies
    Tried this recipe?Let us know how it was!
    Click here to add your own private notes.

    Chili Lime Chicken Skewers

    June 10, 2024 by Yao Leave a Comment

    a plate of chili lime chicken skewers with lime slices and small dish of dipping sauce
    a plate of chili lime chicken skewers with lime slices and small dish of dipping sauce

    Its officially summer and with that comes grilling season. Aside from steaks and burgers, chicken is the most grilled protein at my house. One of my favorite dishes to make is Chili Lime Chicken Skewers.  This is not your ordinary chicken kebab. This recipe is inspired by Thai street food I remember eating as a kid. Bite sized pieces of chicken are first marinaded with ginger, garlic, oyster sauce and sesame oil and then threaded on bamboo skewers. Finally, they get perfectly grilled and smothered with a finger licking sauce made with soy sauce, fresh lime juice and sriracha. Yummy!

    Three chili lime chicken skewers and dipping sauce with cilantro and lime garnish

    Don’t have a grill? Don’t have skewers? I got you! You can make this in the air fryer or oven*! This recipe is so easy, you can make it any time of year. It is also versatile. I prefer chicken thighs, but you can also use skinless chicken breasts cut into small pieces if you like white meat.

    Ingredients

    • 6 boneless skinless chicken thighs
    • 3 cloves garlic minced
    • 1 teaspoon grated ginger
    • 2 Tbs sesame oil
    • 2Tbs oyster sauce low sodium
    • 2.5 Tbs soy sauce
    • 1 teaspoon red pepper flakes
    • 1Tbs brown sugar
    • 1 teaspoon sriracha
    • ½ cup water
    • juice of 1 lime
    • green onion, cilantro and lime wedges for garnish
    a plateful of chili lime chicken skewers with lime slices

    How to Make Chili Lime Chicken Skewers

    Time needed: 50 minutes

    1. Prep the skewers (if using)

      Completely submerge bamboo skewers in water and soak for at least 30 minutes. This prevents the skewers from burning during grilling. As an alternative, you can use metal skewers. If air frying or baking, do not use skewers.bamboo skewers soaked in a container of water

    2. Cut pieces

      Cut chicken into large chunks. I cut each thigh into 6 pieces.

    3. Marinate

      Place chicken pieces in a bowl and add 1 Tablespoon of sesame oil (save other Tablespoon for sauce), 2 Tablespoons oyster sauce, half of the grated ginger and half of the minced garlic. Mix well and let marinate for 20 minutes.raw chicken thigh pieces in marinade

    4. Thread on skewers

      Thread chicken pieces onto skewers. Leave about an inch of space showing on both ends of each skewer. Skip this step if using air frying or baking method.

    5. Cooking methods

      To Grill: Grill chicken skewers over medium high heat. Turn frequently until cooked through, about 12-15 minutes.
      OR
      Air Fry: Preheat to 400F. Do not use skewers. Place chicken pieces single layer in air fryer and cook 12-15 minutes, flip over halfway through cooking.
      OR
      Oven method: Line baking sheet with aluminum foil or parchment paper. Bake at 400F  in a preheated oven for 20 minutes or until fully cooked.

    6. For the sauce

       Heat the remaining sesame oil, garlic and ginger over medium heat and stir for a few seconds.
      Add oyster sauce, soy sauce, sriracha, red pepper flakes, water. Simmer for 2-3 minutes. Turn off heat and stir in juice of 1 lime.saucepan simmering chili lime sauce

    7. Serve

      Place chicken on serving dish and spoon sauce over chicken.  Serve with lime wedges, and remaining sauce.
      Garnish with green onions, cilantro and lime wedges.Overhead view of chili lime chicken skewers with green onion garnish and lime

    What to Serve with Chili Lime Chicken Skewers

    Chicken skewers go great with jasmine rice, couscous, grilled vegetables and rice noodles.

    Looking for more easy chicken recipes? Check these out:

    Cashew Chicken

    Chicken Larb

    Lemongrass Chicken Thighs

    a plate of chili lime chicken skewers with lime slices and small dish of dipping sauce

    Chili Lime Chicken Skewers

    This recipe for Chili Lime Chicken Skewers inspired by Thai street food can be made with or without a grill. Bite sized pieces of chicken are marinated then grilled to perfection and smothered with a finger licking sauce made with soy sauce, fresh lime juice and sriracha.
    Print Recipe Pin Recipe
    Nutrition Facts
    Chili Lime Chicken Skewers
    Amount per Serving
    Calories
    292
    % Daily Value*
    Fat
     
    14
    g
    22
    %
    Saturated Fat
     
    3
    g
    19
    %
    Trans Fat
     
    0.03
    g
    Polyunsaturated Fat
     
    5
    g
    Monounsaturated Fat
     
    5
    g
    Cholesterol
     
    161
    mg
    54
    %
    Sodium
     
    1062
    mg
    46
    %
    Potassium
     
    470
    mg
    13
    %
    Carbohydrates
     
    6
    g
    2
    %
    Fiber
     
    0.4
    g
    2
    %
    Sugar
     
    3
    g
    3
    %
    Protein
     
    34
    g
    68
    %
    Vitamin A
     
    191
    IU
    4
    %
    Vitamin C
     
    1
    mg
    1
    %
    Calcium
     
    30
    mg
    3
    %
    Iron
     
    2
    mg
    11
    %
    * Percent Daily Values are based on a 2000 calorie diet.
    Prep Time 15 minutes mins
    Cook Time 15 minutes mins
    marinate time 20 minutes mins
    Total Time 50 minutes mins
    Course Main Course
    Cuisine Fusion, Thai
    Servings 4 Servings
    Calories 292 kcal

    Equipment

    • bamboo or metal skewers optional *
    • grill
    • sharp knife
    • cutting board

    Ingredients
      

    • 6 boneless skinless chicken thighs
    • 3 cloves minced garlic
    • 1 teaspoon grated ginger
    • 2 Tbs sesame oil
    • 2 Tbs oyster sauce low sodium preferred
    • 2½ Tbs soy sauce low sodium preferred
    • 1 teaspoon red pepper flakes
    • 1 Tbs brown sugar light or dark
    • 1 teaspoon sriracha
    • ½ cup water
    • juice from 1 medium lime
    • green onions, cilantro and lime wedges for garnish

    Instructions
     

    Prep skewers ( if using)

    • Completely submerge bamboo skewers in water and soak for at least 30 minutes. This prevents the skewers from burning during grilling. As an alternative, you can use metal skewers. If air frying or baking, do not use skewers.

    Cut pieces

    • Cut chicken into large chunks. Each thigh can be cut into 6 pieces.

    Marinate

    • Place chicken pieces in a bowl and add 1 Tablespoon of sesame oil (save other Tablespoon for sauce), 2 Tablespoons oyster sauce, half of the grated ginger and  half of the minced garlic. Mix well and let marinate for 20 minutes.

    Thread Skewers

    • Thread chicken pieces onto skewers. Leave about an inch of space showing on both ends of each skewer.

    Cooking Methods

    • To Grill: Grill chicken skewers over medium high heat. Turn frequently until cooked through, about 12-15 minutes.
    • *Air Fry method: Do not use skewers. Airfry chicken pieces at 400℉ for 12-15 minutes, turn half way through cooking.
    • *Oven method: Line baking sheet with aluminum foil or parchment paper. Bake chicken pieces at 400℉ in a preheated oven for 20 minutes or until fully cooked through.

    For the sauce

    • Heat the remaining sesame oil, garlic and ginger over medium heat for a few seconds.
      Add oyster sauce, soy sauce, sriracha, red pepper flakes and water. Simmer for 2-3 minutes. Turn off heat and stir in juice of 1 lime.

    Serve

    • Place chicken on serving dish and spoon sauce over chicken.  Serve with lime wedges, and remaining sauce.
      Garnish with green onions, cilantro and lime wedges.

    Notes

    What to serve with Chili Lime Chicken Skewers
    jasmine rice
    grilled vegetables
    couscous
    rice noodles

    Nutrition

    Calories: 292kcalCarbohydrates: 6gProtein: 34gFat: 14gSaturated Fat: 3gPolyunsaturated Fat: 5gMonounsaturated Fat: 5gTrans Fat: 0.03gCholesterol: 161mgSodium: 1062mgPotassium: 470mgFiber: 0.4gSugar: 3gVitamin A: 191IUVitamin C: 1mgCalcium: 30mgIron: 2mg
    Keyword chicken recipes, chili lime chicken
    Tried this recipe?Let us know how it was!
    Click here to add your own private notes.

    Big White Chocolate Macadamia Cookies

    May 20, 2024 by Yao Leave a Comment

    a close up of 6 white chocolate macadamia cookies
    a close up of 6 white chocolate macadamia cookies

    Sweet, chewy, crunchy, soft, buttery and a little coconutty is how I describe my recipe for Big White Chocolate Macadamia Cookies. It's a copycat recipe inspired by the iconic Mrs. Field’s version.

    white chocolate chip cookies with light brown edges

    I usually don’t like to go to indoor shopping malls these days but decided to stop in at the one near my house to buy a few last-minute items for my Italy trip! As I was leaving, a very familiar scent lured me to an old-time favorite store…Mrs. Field’s Cookies. I couldn’t resist buying my favorite White Chocolate Macadamia Cookies and Chocolate Chip with Walnut.  These cookies will always have a place in my heart as they remind me of my high school days hanging out at the mall with my friends. (Sigh) How times have changed. Now I sound like an old person, so let’s get back to the cookies.

    White Chocolate Macadamia Cookies overlapped

    My favorite Mrs. Field’s cookie is the White Chocolate Macadamia Cookie. You get so many textures in one bite. Its sweet, chewy, crunchy and soft.  Not only that, the butter and coconut flavors just melt in your mouth. I decided to spend a hot spring day cranking up my oven and air conditioning to make my own version of this cookie. I think this recipe is pretty darn good, do I dare say I might like it even more than Mrs. Field’s?  Let me know in the comments what you think!

    Six Big white Chocolate Macadamia Cookies

    Here is what you will need to make this copycat recipe:

    Ingredients

    • 1 cup butter softened
    • 1 cup sugar
    • ½ cup light brown sugar
    • 2 eggs
    • 1 teaspoon vanilla
    • 2 ½ cups flour
    • 1 teaspoon baking soda
    • ½ teaspoon baking powder
    • ½ teaspoon salt
    • 1 ½ cups white chocolate chips
    • 1 cup macadamia nuts, roughly chopped
    • ½ cup coconut flakes
    Six White Chocolate Macadamia Cookies with white chocolate chips on a sheet pan on a wooden surface

    How To Make Big White Chocolate Chip Macadamia Cookies

    Time needed: 26 minutes

    Preheat oven to 375F

    1. Dry ingredients

      In a medium bowl, whisk together flour, baking soda, baking powder and salt. Set aside.
       

    2. Wet ingredients

      In a large bowl or stand mixer with paddle attachment: Combine butter, sugar and light brown sugar. Then mix in eggs and vanilla.

    3. Add dry to wet

      Slowly add the flour mixture until dough forms. Finally, mix in white chocolate chips, macadamia nuts and coconut flakes.

    4. Scoop the dough

      Use an ice cream scoop (for big cookies) to drop dough onto a parchment lined baking sheet. Space cookies 3 inches apart for big cookies, 2 inches apart if making smaller cookies. If you are making large cookies, bake them 4 to 6 at a time. The dough will spread a lot during baking.three balls of cookie dough

    5. Bake

      Bake for 9-11 minutes at 375 degrees. Do not over bake. Cookies will be slightly brown on the edges and soft in the middle. Let cool for 30 minutes to let cookies set. I know it’s so hard to wait!

    How to Store Cookies

    Store cookies in an airtight container at room temperature for up to 4-5 days. Seriously, these cookies are so good, you won’t have any problems looking for a container to store them in!

    Freezing Cookie Dough

    Scoop dough out with cookie scoop and place on parchment lined sheet pan. Refrigerate for 1 hour. Place balls of dough in parchment lined container with lid. Balls of dough can be stacked by placing a sheet of parchment paper in between each level.  Freeze for up to 3 months. To bake, take cookie dough out and place on parchment lined baking sheet and let sit at room temperature for 20 minutes before baking.

    Looking for more cookie recipes you'll want to make over and over again? Try these:

    Bakery Style Chocolate Chip Cookies

    The Best Coconut Lime Cookies

    Soft Chocolate Chip Miso Cookies

    a close up of 6 white chocolate macadamia cookies

    Big White Chocolate Macadamia Cookies

    Print Recipe Pin Recipe
    Nutrition Facts
    Big White Chocolate Macadamia Cookies
    Serving Size
     
    1 cookie
    Amount per Serving
    Calories
    495
    % Daily Value*
    Fat
     
    29
    g
    45
    %
    Saturated Fat
     
    15
    g
    94
    %
    Trans Fat
     
    1
    g
    Polyunsaturated Fat
     
    1
    g
    Monounsaturated Fat
     
    11
    g
    Cholesterol
     
    62
    mg
    21
    %
    Sodium
     
    311
    mg
    14
    %
    Potassium
     
    155
    mg
    4
    %
    Carbohydrates
     
    55
    g
    18
    %
    Fiber
     
    2
    g
    8
    %
    Sugar
     
    37
    g
    41
    %
    Protein
     
    5
    g
    10
    %
    Vitamin A
     
    445
    IU
    9
    %
    Vitamin C
     
    0.3
    mg
    0
    %
    Calcium
     
    73
    mg
    7
    %
    Iron
     
    2
    mg
    11
    %
    * Percent Daily Values are based on a 2000 calorie diet.
    Prep Time 15 minutes mins
    Cook Time 11 minutes mins
    Total Time 26 minutes mins
    Course Dessert
    Cuisine American
    Servings 14 Big Cookies
    Calories 495 kcal

    Equipment

    • 1 stand mizer recommended
    • 1 medium mixing bowl
    • measuring cups
    • measuring spoon
    • cookie scoop or ice cream scoop
    • 2 baking sheet
    • parchment paper

    Ingredients
      

    • 1 cup butter softened
    • 1 cup sugar
    • ½ cup light brown sugar
    • 2 eggs
    • 1 teaspoon vanilla
    • 2½ cups flour
    • 1 teaspoon baking soda
    • ½ teaspoon baking powder
    • ½ teaspoon salt
    • 1½ cups white chocolate chips
    • 1 cup macadamia nuts coarsely chopped
    • ½ cup coconut flakes

    Instructions
     

    • Preheat oven to 375℉

    Dry Ingredients

    • In a medium bowl, whisk together flour, baking soda, baking powder and salt. Set aside.

    Wet ingredients

    • In a large bowl or stand mixer with paddle attachment: combine butter sugar and light brown sugar. Then mix in eggs and vanilla.

    Add Dry to Wet

    • Slowly add the flour mixture until dough forms. Finally, mix in white chocolate chips, macadamia nuts and coconut flakes.

    Scoop the Dough

    • Use an ice cream scoop to make big cookies or cookie scoop of your choice to drop dough onto a parchment lined baking sheet. Space cookies 3 inches apart for big cookies, 2 inches apart for smaller cookies. If you are making large cookies, bake them 4 to 6 at a time. The dough will spread a lot during baking.

    Bake

    • Bake for 9-11 minutes at 375 degrees. Do not over bake. Cookies will be slightly brown on the edges and soft in the middle. Let cool for 30 minutes to let cookies set. I know it’s so hard to wait!

    Notes

    Storage: Store cookies in an airtight container at room temperature for up to 4-5 days. Seriously, these cookies are so good, you won’t have any problems looking for a container to store them in!
    Freezing cookie dough: Scoop dough out with cookie scoop and place on parchment lined sheet pan. Refrigerate for 1 hour. Place balls of dough in parchment lined container with lid. Balls of dough can be stacked by placing a sheet of parchment paper in between each level.  Freeze for up to 3 months. To bake, take cookie dough out of the freezer and place on a parchment lined baking sheet and let sit for 20 minutes at room temperature before baking. 

    Nutrition

    Serving: 1cookieCalories: 495kcalCarbohydrates: 55gProtein: 5gFat: 29gSaturated Fat: 15gPolyunsaturated Fat: 1gMonounsaturated Fat: 11gTrans Fat: 1gCholesterol: 62mgSodium: 311mgPotassium: 155mgFiber: 2gSugar: 37gVitamin A: 445IUVitamin C: 0.3mgCalcium: 73mgIron: 2mg
    Keyword copycat Mrs. Field's, white chocolate chips, white chocolate macadamia cookies
    Tried this recipe?Let us know how it was!
    Click here to add your own private notes.

    Lemon Thyme Gin Cocktail

    April 11, 2024 by Yao Leave a Comment

    lemon thyme gin cocktail with a bottle of gin , lemon and thyme in the background
    lemon thyme gin cocktail with a bottle of gin , lemon and thyme in the background

    For readers 21+: This recipe contains alcohol and is intended for adult readers of legal drinking age. Please enjoy responsibly.

    This Lemon Thyme Gin Cocktail is perfect for serving at your next dinner party or for a party of one (no judgement here!) when you are craving a light refreshing drink with a little extra something! This recipe is inspired by memories of hot summer days, chilling on the deck in the back yard with friends. The best part is, it’s easy to whip up this drink any time of year. Whether it be January, September, or June, you can make this sweet and tart boozy drink in just minutes.

    a cocktail glass filled with ice, gin, simple syrup and thyme sprig

    If you’re looking for a drink that is citrusy, sweet, and savory all in one, Lemon Thyme Gin Cocktail might be just what you need.

    What makes this drink special is homemade Thyme Simple Syrup. Why buy it in the store when you can make your own flavored syrup with ingredients you already have at home. All you need to do is boil equal parts sugar and water and toss in some fresh herbs. It doesn’t get much simpler than that!

    pineapple thyme gin cocktail with a carton of pineapple juice, gin and lemon in the background

    Ingredients

    • 4 ounces gin
    • 2 lemon slices
    • 2 ounces thyme simple syrup (see below)
    • 2 ounces lemon sparkling water
    • Ice

    Thyme Simple Syrup

    • ½ cup sugar
    • ½  cup water                                                                   
    • 4 sprigs fresh thyme

    How To Make Lemon Thyme Gin Cocktail

    Time needed: 5 minutes

    1. Make thyme simple syrup

      In a small pot, combine ½ cup sugar and ½ cup water and 4 sprigs of fresh thyme. Bring to a boil and cook 2-3 minutes or until sugar is dissolved. Turn off heat and let cool. Discard thyme sprigs.simple syrup with thyme sprigs in a pot

    2. Shake it up

      Fill a cocktail shaker with ice. Add gin, lemon slices and thyme simple syrup. Shake vigorously for a minute or two.
      Strain liquid into 2 cocktail glasses filled with ice. Top with lemon sparkling water. Garnish with thyme sprigs or lemon slices.  Cheers!lemon thyme gin cocktail on ice with a half lemon and thyme in the background

    lemon thyme gin cocktail with a bottle of gin , lemon and thyme in the background

    Lemon Thyme Gin Cocktail

    If you’re looking for a drink that is citrusy, sweet, and savory all in one, Lemon Thyme Gin Cocktail might be just what you need.
    Print Recipe Pin Recipe
    Nutrition Facts
    Lemon Thyme Gin Cocktail
    Serving Size
     
    1 serving
    Amount per Serving
    Calories
    207
    % Daily Value*
    Sodium
     
    23
    mg
    1
    %
    Potassium
     
    20
    mg
    1
    %
    Carbohydrates
     
    21
    g
    7
    %
    Sugar
     
    21
    g
    23
    %
    Calcium
     
    5
    mg
    1
    %
    Iron
     
    1
    mg
    6
    %
    * Percent Daily Values are based on a 2000 calorie diet.
    Prep Time 5 minutes mins
    Cook Time 0 minutes mins
    Total Time 5 minutes mins
    Course Drinks
    Cuisine American
    Servings 2 servings
    Calories 207 kcal

    Equipment

    • 1 cocktail shaker
    • 1 jigger
    • 1 small pot
    • 1 spoon

    Ingredients
      

    Cocktail

    • 4 ounces gin
    • 2 ounces thyme simple syrup
    • 2 lemon slices
    • 2 ounces lemon sparkling water
    • ice cubes

    thyme simple syrup

    • ½ cup sugar
    • ½ cup water
    • 4 sprigs fresh thyme

    Instructions
     

    Make thyme simple syrup

    • In a small pot, combine ½ cup sugar and ½ cup water and 4 sprigs of fresh thyme. Bring to a boil and cook 2-3 minutes or until sugar is dissolved. Turn off heat and let cool. Discard thyme sprigs.

    Cocktail

    • Fill a cocktail shaker with ice. Add gin, lemon slices and thyme simple syrup. Shake vigorously for a minute or two.
      Strain liquid into 2 cocktail glasses filled with ice. Top with lemon sparkling water. Garnish with thyme sprigs or lemon slices.  Cheers!

    Notes

    Thyme simple syrup can be stored in the refrigerator in a squeeze bottle or airtight jar for up to 1 month.

    Nutrition

    Serving: 1servingCalories: 207kcalCarbohydrates: 21gSodium: 23mgPotassium: 20mgSugar: 21gCalcium: 5mgIron: 1mg
    Keyword gin cocktail, lemon, thyme simple syrup
    Tried this recipe?Let us know how it was!
    Click here to add your own private notes.

    Zucchini Gruyere Puff Pastry Tart

    April 2, 2024 by Yao Leave a Comment

    Zucchini and gruyere tart with fresh herbs on a sheet pan
    Zucchini and gruyere tart with fresh herbs on a sheet pan

    I’m loving this Zucchini Gruyere Puff Pastry Tart for its simplicity, beauty, and taste! You can’t go wrong with a triple win. Serve it as an appetizer for baby showers, Mother’s Day brunch or weeknight vegetarian dinner. It doesn’t take much effort to transform just three simple ingredients into a beautiful dish. All you need is store bought puff pastry, 2 medium zucchinis and Gruyere cheese. I know I’m posting this recipe in April, which is a not exactly zucchini season, but I was thinking it makes a nice springtime dish. Just remember to bookmark this for the late summer harvest!

    Zucchini Gruyere Tart on a sheet pan

    Ingredients

    • 1 sheet puff pastry- I use store bought puff pastry found in the freezer section. Remember to thaw it out before using.
    • Gruyere cheese- The nutty and creamy flavor compliment the otherwise bland zucchini. I shred my own cheese, but buying pre-shredded cheese will save you a step.
    • zucchini slices- about 2 medium zucchinis sliced thin. I used a mandolin, but a sharp knife works just fine. Yellow squash will also work if you don’t have zucchini.
    • 3 Tbs grated parmesan cheese- I used Kraft grated parmesan cheese in the green can because that is what I had in the fridge. Freshly grated parmesan would be delicious, but you won’t get the same finished texture.
    • 1 teaspoon red pepper flakes- use a little or a lot depending on your spice preference, but I definitely recommend using some!
    • 1 teaspoon garlic powder
    • 1 teaspoon Italian seasoning
    • ¼ teaspoon salt
    • ⅛  teaspoon black pepper
    • Optional: fresh chopped herbs (oregano, parsley, chives)- makes it look even prettier!
    Corner piece of Zucchini Gruyere Tart

    How to Make Zucchini Gruyere Puff Pastry Tart

    Time needed: 45 minutes

    Preheat oven to 400F

    1. Crust

      Line sheet pan with parchment paper and spray with cooking spray.
      Roll puff pastry onto the pan and gently press to spread out towards edges.

    2. Toppings

      Next sprinkle Gruyere cheese evenly over the puff pastry.Then top with zucchini slices by arranging the slices in rows by slightly overlapping slices.unbaked puff pastry with cheese an zucchini slices

    3. Season

      Mix parmesan cheese, red pepper flakes, garlic powder, Italian seasoning, salt and pepper in a small bowl. Sprinkle evenly on top of zucchini.seasoned zucchini slices

    4. Bake

      Place in oven on the middle rack and bake for 30 minutes. Edges of puff pastry should be golden brown when finished.
      Let rest 10 minutes before cutting.Zucchini Gruyere Tart

    5. Optional

      Top with fresh herbs before serving.

    Why I Love This Zucchini Tart

    This zucchini tart is easily customizable to make it more fancy or appease picky eaters. You can adjust the toppings just like a pizza. I have made different variations of this tart using:

    • Caramelized onions
    • Roasted red peppers
    • Cherry tomatoes
    • Goat cheese

    Experiment with what you have in the refrigerator!

    Looking for more zucchini recipes? Give these a try!

    Zucchini Carrot Breakfast Cookies

    Roasted Garlic Pasta with Zucchini

    The Best Zucchini and Blueberry Bread

    Zucchini and gruyere tart with fresh herbs on a sheet pan

    Zucchini and Gruyere Puff Pastry

    Zucchini Gruyere Puff Pastry Tart made with fresh zucchini slices and creamy Gruyere cheese is a simple and delicious vegetarian dish that can be served as a main entrée or appetizer.
    Print Recipe Pin Recipe
    Nutrition Facts
    Zucchini and Gruyere Puff Pastry
    Amount per Serving
    Calories
    214
    % Daily Value*
    Fat
     
    15
    g
    23
    %
    Saturated Fat
     
    6
    g
    38
    %
    Polyunsaturated Fat
     
    1
    g
    Monounsaturated Fat
     
    7
    g
    Cholesterol
     
    25
    mg
    8
    %
    Sodium
     
    283
    mg
    12
    %
    Potassium
     
    95
    mg
    3
    %
    Carbohydrates
     
    10
    g
    3
    %
    Fiber
     
    1
    g
    4
    %
    Sugar
     
    1
    g
    1
    %
    Protein
     
    9
    g
    18
    %
    Vitamin A
     
    313
    IU
    6
    %
    Vitamin C
     
    4
    mg
    5
    %
    Calcium
     
    242
    mg
    24
    %
    Iron
     
    1
    mg
    6
    %
    * Percent Daily Values are based on a 2000 calorie diet.
    Prep Time 15 minutes mins
    Cook Time 30 minutes mins
    Total Time 45 minutes mins
    Course Appetizer, Main Course
    Cuisine American, Vegetarian
    Servings 12 Servings
    Calories 214 kcal

    Equipment

    • 1 sheet pan 18"x12"x1"
    • parchment paper
    • 1 sharp knife or mandolin slicer
    • 1 cheese grater
    • cooking spray

    Ingredients
      

    • 1 puff pastry sheet
    • 2 cups Gruyere cheese shredded
    • 2 cups zucchini slices about 2 medium zucchinis
    • 3 Tbs grated parmesan cheese
    • 1 teaspoon red pepper flakes
    • 1 teaspoon garlic powder
    • 1 teaspoon Italian seasoning
    • ¼ teaspoon salt
    • ⅙ teaspoon black pepper
    • fresh chopped herbs such as oregano, parsley and chives optional

    Instructions
     

    • Preheat oven to 400℉

    Crust

    • Line a sheet pain with parchment paper then spray with cooking spray. Roll out puff pastry do onto the sheet pan, gently press dough out towards edges.

    Toppings

    • Next sprinkle Gruyere cheese evenly over the puff pastry.Then top with zucchini slices by arranging the slices in rows by slightly overlapping slices.

    Season

    • Mix parmesan cheese, red pepper flakes Italian seasoning, salt and pepper in a small bowl. Sprinkle this seasoning mixture over zucchini.

    Bake

    • Place in the oven on the middle rack and bake for 30 minutes or until puff pastry edges turn golden brown.
    • Optional: top with fresh herbs just before serving.

    Notes

    puff pastry- I use store bought puff pastry found in the freezer section. Remember to thaw it out before using.
    Gruyere cheese- The nutty and creamy flavor compliment the otherwise bland zucchini. I shred my own cheese, but buying pre-shredded cheese will save you a step.
    zucchini slices- about 2 medium zucchinis sliced thin. I used a mandolin, but a sharp knife works just fine. Yellow squash will also work if you don’t have zucchini.
    grated parmesan cheese- I used Kraft grated parmesan cheese in the green can because that is what I had in the fridge. Freshly grated parmesan would be delicious, but you won’t get the same finished texture.

    Nutrition

    Calories: 214kcalCarbohydrates: 10gProtein: 9gFat: 15gSaturated Fat: 6gPolyunsaturated Fat: 1gMonounsaturated Fat: 7gCholesterol: 25mgSodium: 283mgPotassium: 95mgFiber: 1gSugar: 1gVitamin A: 313IUVitamin C: 4mgCalcium: 242mgIron: 1mg
    Keyword Gruyere Cheese, puff pastry appetizers, vegetarian, zucchini
    Tried this recipe?Let us know how it was!
    Click here to add your own private notes.

    Skillet Chimichurri Shrimp

    March 12, 2024 by Yao Leave a Comment

    chimichurri shrimp
    chimichurri shrimp

     Skillet Chimichurri Shrimp made with fresh parsley, shrimp, and a few pantry staples might be the easiest and tastiest shrimp recipe ever! It can be served as a fancy appetizer or quick meal because it comes together in just minutes! All you need is some fresh parsley, shrimp, a few pantry staples, and a food processor. How good does that sound?!

    Before I get into the details, let me first say that this is not an authentic Argentinian or Uruguayan recipe. You’ll need to look someplace else if that’s what you’re searching for.

    But, if you want an easy to make an Argentinian inspired dish that is delicious and practical, this is it! The ingredients are easy to find, and you don’t need to fire up the grill!

    chimichurri shrimp on toast

    Ingredients

    • 2 ounces flat leaf parsley
    • 3 cloves garlic
    • 1-2 teaspoon red pepper flakes
    • 1 teaspoon dried oregano (Mexican preferred)
    • 2 Tbs red wine vinegar
    • ½ cup olive oil
    • ½ teaspoon salt
    • 2 Tbs olive oil
    • 1 pound large peeled and deveined shrimp
    parsley, garlic red pepper and oregano in a food processor

    How to Make Skillet Chimichurri Shrimp

    Time needed: 16 minutes

    1. Make chimichurri

      Combine parsley, garlic cloves, red pepper flakes, dried oregano, vinegar, half cup of olive oil and a half teaspoon of salt in a food processor. Pulse until ingredients are coarsely ground. Set aside.chimichurri sauce in a food processor

    2. Cook shrimp

      Heat 2 tablespoon of olive oil in a skillet over medium heat.  Add shrimp and cook 2 minutes on each side.
      shrimp in a skillet with a wooden spoon

    3. Add chimichurri

      shrimp in a pan with spoonfuls of chimichurri sauce

    4. Combine

      Stir in 4 Tablespoons of chimichurri sauce or (more if you like) and cook another 2 minutes.  Shrimp are cooked when they turn opaque, and tails are curled.
       chimichurri shrimp on toast and in a skillet

    What to Serve with Chimichurri Shrimp

    My favorite way to eat Chimichurri Shrimp is with extra sauce and crusty French bread.  I love soaking up every bit of the zesty and garlicky sauce with the bread! But if that doesn’t float your boat, here are some more ideas:

    • Serve it over rice and add your favorite veggies to make a rice bowl
    • Toss it with your favorite noodle to make Chimichurri Shrimp Pasta
    • Add Roasted vegetables or potatoes
    • Top off some mashed potatoes
    chimichurri shrimp on toast

    Skillet Chimichurri Shrimp

    Skillet Chimichurri Shrimp made with fresh parsley, shrimp, and a few pantry staples might be the easiest and tastiest shrimp recipe ever! It can be served as a fancy appetizer or quick meal because it comes together in just minutes!
    Print Recipe Pin Recipe
    Nutrition Facts
    Skillet Chimichurri Shrimp
    Amount per Serving
    Calories
    515
    % Daily Value*
    Fat
     
    41
    g
    63
    %
    Saturated Fat
     
    6
    g
    38
    %
    Trans Fat
     
    0.01
    g
    Polyunsaturated Fat
     
    5
    g
    Monounsaturated Fat
     
    28
    g
    Cholesterol
     
    191
    mg
    64
    %
    Sodium
     
    1295
    mg
    56
    %
    Potassium
     
    313
    mg
    9
    %
    Carbohydrates
     
    15
    g
    5
    %
    Fiber
     
    1
    g
    4
    %
    Sugar
     
    0.3
    g
    0
    %
    Protein
     
    22
    g
    44
    %
    Vitamin A
     
    2074
    IU
    41
    %
    Vitamin C
     
    26
    mg
    32
    %
    Calcium
     
    127
    mg
    13
    %
    Iron
     
    2
    mg
    11
    %
    * Percent Daily Values are based on a 2000 calorie diet.
    Prep Time 10 minutes mins
    Cook Time 6 minutes mins
    Total Time 16 minutes mins
    Course Main Course
    Cuisine Fusion
    Servings 3 Servings
    Calories 515 kcal

    Equipment

    • 1 food processor
    • 1 skillet
    • 1 wooden spoon

    Ingredients
      

    • 3 cloves garlic
    • 2 ounces flat leaf parsley about 2 cups packed
    • 1-2 teaspoon red pepper flakes or 1-2 small chilis
    • 1 teaspoon dried oregano Mexican preferred but Italian is also good
    • ½ teaspoon salt
    • 2 Tbs red wine vinegar may substitute cider vinegar
    • ½ cup olive oil
    • 2 Tbs olive oil
    • 1 pound large shrimp peeled and deveined

    Instructions
     

    Make chimichurri

    • Combine parsley, garlic cloves, red pepper flakes, dried oregano, vinegar, half cup of olive oil and a half teaspoon of salt in a food processor. Pulse until ingredients are coarsely ground. Set aside.

    Cook shrimp

    • Heat 2 tablespoon of olive oil in a skillet over medium heat.  Add shrimp and cook 2 minutes on each side.

    Add chimichurri

    • Stir in 4 Tablespoons of chimichurri sauce or (more if you like) and cook another 2 minutes.  Shrimp are cooked when they turn opaque, and tails are curled.

    Notes

    Note:  I prefer cooking the shrimp in the chimichurri sauce for 2 minutes for a deeper flavor. If you prefer serving your shrimp with fresh chimichurri, simply fully cook shrimp first before tossing with the sauce.

    Nutrition

    Calories: 515kcalCarbohydrates: 15gProtein: 22gFat: 41gSaturated Fat: 6gPolyunsaturated Fat: 5gMonounsaturated Fat: 28gTrans Fat: 0.01gCholesterol: 191mgSodium: 1295mgPotassium: 313mgFiber: 1gSugar: 0.3gVitamin A: 2074IUVitamin C: 26mgCalcium: 127mgIron: 2mg
    Keyword Cajun shrimp, chimichurri, food processor
    Tried this recipe?Let us know how it was!
    Click here to add your own private notes.

    Looking for more amazing appetizers? Try these:

    Salmon Wonton Cups

    Fried Oyster Mushrooms with Bang Bang Sauce

    Fig and Prosciutto Flatbread

    Lemongrass Chicken Thighs

    February 23, 2024 by Yao Leave a Comment

    overhead view of a plate of lemongrass chicken thighs over rice and stalks of lemongrass
    overhead view of a plate of lemongrass chicken thighs over rice and stalks of lemongrass

    Are you making chicken tonight? If you want to make something a little different from your usual dinner rotation, try my recipe for lemongrass chicken! It smells so good and is downright yummy! These Lemongrass Chicken Thighs are made by marinating dark meat chicken in fragrant lemongrass oyster sauce and garlic before baking.  The skin gets brown and crispy, and the meat is perfectly tender.  It’s the perfect weeknight dinner when you want something more exciting than plain old chicky bok-bok!

    two golden brown chicken thighs over rice

    This Thai chicken with lemongrass recipe is very similar to the Vietnamese version and can be cooked in the oven or air fryer. But before I jump into the recipe, let me answer a few common questions about the star ingredient.

    a plate of lemongrass chicken thighs and rice

    What is lemongrass?

    Lemongrass is a common ingredient in Thai and Vietnamese cooking. It looks like stalks of coarse grass and has a fragrant citrus scent and flavor.

    lemongrass stalks on a bamboo cutting board

    How to Pick Out Lemongrass

    If you are lucky, the freshest lemongrass has thick stalks with a big bulb at the end with a top that is pale yellow with green tips. Unfortunately, when I see it at the local grocery stores here in the Midwest, it is a bit dried out. I buy it anyways because it’s the best I can get. If it is not completely brown and dried, it still has flavor and works with this recipe. The alternative is to use lemongrass paste.

    1 Tablespoon lemongrass paste = 1 Tablespoon minced lemongrass

    lemongrass slices

    Ingredients for Lemongrass Chicken Thighs

    • 3 Tbs Lemongrass- finely minced or grated
    • 2 cloves garlic grated
    • Juice from half a lime
    • 3 Tbs low sodium oyster sauce
    • 2 Tbs fish sauce
    • 2 teaspoon brown sugar
    • 2 pounds bone in chicken thighs (5-6 thighs)
    lime wedges, grated lemongrass, garlic cloves and small dishes if brown sugar and fish sauce

    How to Make Lemongrass Chicken Thighs

    Time needed: 50 minutes

    Preheat oven to 425 degrees

    1. For the marinade

      Combine all the ingredients except the chicken in a large bowl.

    2. Marinate chicken

      Add the chicken to the bowl and massage it with the marinade. Let sit for 20 minutes.raw chicken thighs in marinade in a glass bowl

    3. Bake or Air Fry

      Bake: Place chicken on a parchment lined baking sheet or oven safe dish. Bake in oven at 425F for 40 minutes until skin gets brown and crispy.
      OR
      Air fry: air fry three peices at a time at 400F for 20 minutes, turning once halfway through.
      three lemongrass chicken thighs in an air fryer

    Can I use boneless thighs or chicken breasts for this recipe?

    Yes, reduce the cooking time by about 10 minutes. Chicken is cooked when internal temperature reaches 165F/73C degrees.

    What do I serve with lemongrass chicken thighs?

    I always serve this with jasmine rice and Nam Pla Prik, a Thai dipping sauce.
    You can also serve it with Nouc Cham, which is the Vietnamese version.
    They are basically made with the same ingredients, except Nam Pla Prik uses Thai fish sauce and Nouc Cham uses Vietnamese fish sauce and added water.

    Nam Pla Prik

    3 Tablespoons fish sauce

    1 ½ Tablespoons lime juice

    2 cloves minced garlic

    1 Tablespoon brown sugar

    1-2 Thai birdseye chili peppers sliced

    Combine all ingredients in a small bowl and let sit for 10 minutes to allow sugar to dissolve before serving.

    a plate of lemongrass chicken thighs and rice

    Looking for more Thai style chicken recipes?

    You might like:

    Thai Chicken and Pumpkin Curry

    Thai Basil Chicken

    Chicken Meatball Curry

    overhead view of a plate of lemongrass chicken thighs over rice and stalks of lemongrass

    Lemongrass Chicken Thighs

    Lemongrass Chicken Thighs marinated in fragrant lemongrass oyster sauce can be made in the oven or air fryer is more exciting than your usual weeknight chicken recipe!
    Print Recipe Pin Recipe
    Nutrition Facts
    Lemongrass Chicken Thighs
    Serving Size
     
    2 thighs
    Amount per Serving
    Calories
    594
    % Daily Value*
    Fat
     
    43
    g
    66
    %
    Saturated Fat
     
    12
    g
    75
    %
    Trans Fat
     
    0.2
    g
    Polyunsaturated Fat
     
    9
    g
    Monounsaturated Fat
     
    18
    g
    Cholesterol
     
    252
    mg
    84
    %
    Sodium
     
    1633
    mg
    71
    %
    Potassium
     
    619
    mg
    18
    %
    Carbohydrates
     
    8
    g
    3
    %
    Fiber
     
    0.1
    g
    0
    %
    Sugar
     
    3
    g
    3
    %
    Protein
     
    43
    g
    86
    %
    Vitamin A
     
    202
    IU
    4
    %
    Vitamin C
     
    1
    mg
    1
    %
    Calcium
     
    41
    mg
    4
    %
    Iron
     
    2
    mg
    11
    %
    * Percent Daily Values are based on a 2000 calorie diet.
    Prep Time 10 minutes mins
    Cook Time 40 minutes mins
    Total Time 50 minutes mins
    Course Main Course
    Cuisine Thai
    Servings 3 Servings
    Calories 594 kcal

    Equipment

    • parchment paper
    • baking dish
    • microplane
    • large bowl
    • food thermometer

    Ingredients
      

    • 3 Tbs lemongrass finely minced or grated
    • 2 cloves garlic grated
    • juice from half a lime
    • 3 Tbs oyster sauce low sodium
    • 2 Tbs fish sauce
    • 2 teaspoon brown sugar
    • 2 pounds bone-in chicken thighs about 5-6 thighs *

    Instructions
     

    For the marinade

    • Combine all the ingredients except the chicken in a large bowl.

    Marinate chicken

    • Add the chicken to the bowl and massage it with the marinade. Let sit for 20 minutes.

    Bake or air fry

    • Place chicken on a parchment lined baking sheet or oven safe dish.  
      Bake in the oven at  425℉ degrees for 40 minutes until skin gets brown and crispy.
      OR Air Fry at 400℉ for 20 minutes, turning once half way through.

    Notes

    • May substitute boneless thighs or chicken breasts. Reduce cooking time by about 10 minutes- chicken is cooked when internal temperature reaches 165 F/73 C.
    Serve with Nam Pla Prik dipping sauce and jasmine rice.

    Nutrition

    Serving: 2thighsCalories: 594kcalCarbohydrates: 8gProtein: 43gFat: 43gSaturated Fat: 12gPolyunsaturated Fat: 9gMonounsaturated Fat: 18gTrans Fat: 0.2gCholesterol: 252mgSodium: 1633mgPotassium: 619mgFiber: 0.1gSugar: 3gVitamin A: 202IUVitamin C: 1mgCalcium: 41mgIron: 2mg
    Keyword lemongrass chicken, oyster sauce, thai food, Vietnamese
    Tried this recipe?Let us know how it was!
    Click here to add your own private notes.

    Nutella Rice Krispie Treats

    February 9, 2024 by Yao Leave a Comment

    six Nutella Rice Krispie Squares on crinkled parchment paper and a jar of Nutella
    six Nutella Rice Krispie Squares on crinkled parchment paper and a jar of Nutella

    Sometimes I need a quick fix – of course I’m talking dessert! Four ingredient Nutella Rice Krispie Treats are perfect for when I want something quick and easy but also want a little extra something-something! The addition of chocolate hazelnut spread to crisp rice cereal mixed with melted marshmallows and butter elevates one of my favorite childhood treats. Nutella can make almost anything better in my book!

    Nutella Rice Krispie Treats stacked

    I’m sure half the world has made Rice Krispie Treats before, so it’s no secret that they are extremely easy to make. It takes literally just minutes to cook. There’s not much to it but I have a couple of helpful tips.

    For Best Results

    Use fresh marshmallows! The one very important tip I must stress is use FRESH marshmallows. I once made the mistake of using stale marshmallows thinking they would be fine since they would just melt. Boy was I wrong! There was no problem melting them but when the treats cooled down, they were hard as a rock! I could barely cut them and almost broke a tooth when I bit into one!

    Make sure you prepare your pan-You will need a 9x9-inch or 9x13 inch pan. Line your pan with parchment and then spray it with cooking spray. You can get away with just buttering your pan, but I like the parchment and spray method for guaranteed no stick.

    Nutella Rice Krispie Treats stacked in a tower

    There is no need to add any more commentary, so here is what you need to make Nutella Rice Krispie Treats.

    Ingredients

    • 4 Tbs butter
    • 10 ounces (1 package) marshmallows
    • ¾ cup Nutella chocolate hazelnut spread
    • 5 ½ cups Rice Krispie Cereal (generic crisp rice cereal also works fine)
    • cooking spray or more butter for greasing the pan
    a bag of mini marshmallows, jar of Nutella, box of rice cereal and a dish of butter

    How to Make Nutella Rice Krispie Treats

    Time needed: 30 minutes

    1. Melt

      Melt butter in a large nonstick saucepan over medium low heat. Add the marshmallows and stir until smooth and completely melted.mini marshmallows in a skillet

    2. Nutella

      Now add the Nutella and stir until mixture is chocolatey and smooth. There should be no white lumps from the marshmallows.Melted Nutella and marshmallows

    3. Cereal

      Turn off heat. Add the rice cereal and stir until completely coated with the Nutella marshmallow mixture. If you are adding any extra mix-ins like nuts or chocolate chips, add them now.rice cereal being stirred with melted Nutella and marshmallows

    4. Pour

      Pour and press the mixture into a greased and parchment lined pan. A 9x9 or 9x13-inch pan works best. Press down firmly. Pro-tip: use a buttered spatula or place a sheet of waxed paper over the top and press with your hands.

    5. Cool

      Let cool at room temperature for 20 minutes or place in the refrigerator uncovered for 10-15 minutes if you are impatient!  Cut into squares or rectangles and serve.

    Variations

    Why stop at just Nutella? To make these even more decadent, try these mix-ins:

    • chocolate chips
    • nuts
    • crushed pretzels
    • mini marshmallows
    • freeze dried strawberries
    • M&M candies

    How to Store Nutella Rice Krispie Treats

    Store in an air tight container at room temperature for up to 2 days.

    Want more Nutella recipes?

    Try my Pumpkin Nutella Muffins!

    six Nutella Rice Krispie Squares on crinkled parchment paper and a jar of Nutella

    Nutella Rice Krispie Treats

    Nutella Rice Krispie Treats made with just four ingredients is the perfect no bake dessert if you love Nutella! The addition of chocolate hazelnut spread to crisp rice cereal mixed with melted marshmallows and butter elevates a favorite childhood treat.
    Print Recipe Pin Recipe
    Nutrition Facts
    Nutella Rice Krispie Treats
    Serving Size
     
    1 bar
    Amount per Serving
    Calories
    194
    % Daily Value*
    Fat
     
    7
    g
    11
    %
    Saturated Fat
     
    6
    g
    38
    %
    Trans Fat
     
    0.1
    g
    Polyunsaturated Fat
     
    0.2
    g
    Monounsaturated Fat
     
    1
    g
    Cholesterol
     
    8
    mg
    3
    %
    Sodium
     
    93
    mg
    4
    %
    Potassium
     
    71
    mg
    2
    %
    Carbohydrates
     
    31
    g
    10
    %
    Fiber
     
    1
    g
    4
    %
    Sugar
     
    19
    g
    21
    %
    Protein
     
    2
    g
    4
    %
    Vitamin A
     
    728
    IU
    15
    %
    Vitamin C
     
    6
    mg
    7
    %
    Calcium
     
    17
    mg
    2
    %
    Iron
     
    4
    mg
    22
    %
    * Percent Daily Values are based on a 2000 calorie diet.
    Prep Time 10 minutes mins
    Cook Time 20 minutes mins
    Total Time 30 minutes mins
    Course Dessert
    Cuisine American
    Servings 16 bars
    Calories 194 kcal

    Equipment

    • 1 large saucepan
    • 1 spatula
    • measuring cups
    • 1 9x9-inch pan or 9x 13-inch pan
    • parchment paper

    Ingredients
      

    • 4 Tbs butter or margarine
    • 10 ounces marshmallows
    • ¾ cup Nutella chocolate hazelnut spread
    • 5½ cups Rice Krispie Cereal or your favorite crisp rice cereal
    • cooking spray or more butter for greasing pan

    Instructions
     

    Melt

    • Melt butter in a large nonstick saucepan over medium low heat.Add the marshmallows and stir until smooth and completely melted.

    Nutella

    • Now add the Nutella and stir until mixture is chocolatey and smooth. There should be no white lumps from the marshmallows.

    Cereal

    • Turn off heat. Add the rice cereal and stir until completely coated with the Nutella marshmallow mixture.

    Pour

    • Pour and press the mixture into a greased and parchment lined pan. A 9x9 or 9x13-inch pan works best. Press down firmly. Pro-tip: Use a buttered spatula or place a sheet of waxed paper over the top and press with your hands.

    Cool

    • Let cool at room temperature for 20 minutes or place in the refrigerator uncovered for 10-15 minutes if you are impatient!  Cut into squares or rectangles and serve.

    Notes

    Variations:
    Try these mix-ins:
    chocolate chips, nuts, mini marshmallows, freeze-dried strawberries, crushed pretzels, M&M candies.
    Storage: place in air tight container at room temperature for up to 2 days.


    Nutrition

    Serving: 1barCalories: 194kcalCarbohydrates: 31gProtein: 2gFat: 7gSaturated Fat: 6gPolyunsaturated Fat: 0.2gMonounsaturated Fat: 1gTrans Fat: 0.1gCholesterol: 8mgSodium: 93mgPotassium: 71mgFiber: 1gSugar: 19gVitamin A: 728IUVitamin C: 6mgCalcium: 17mgIron: 4mg
    Keyword easy desserts, hazelnut, nutella, rice krispie treats
    Tried this recipe?Let us know how it was!
    Click here to add your own private notes.

    Tuscan Kale Caesar

    February 7, 2024 by Yao Leave a Comment

    Kale Caesar Salad on a wooden plate with grated parmesan cheese and croutons and a bunch of tuscan kale on the side
    Kale Caesar Salad on a wooden plate with grated parmesan cheese and croutons and a bunch of tuscan kale on the side

    Here is a twist on a classic salad: Tuscan Kale Caesar! Tuscan kale is tossed with homemade Caesar dressing made with mayonnaise, lemon, garlic, and fish sauce as the secret ingredient!  It adds a nice umami flavor without being fishy. I rarely have a tin of anchovies on hand, but I always have a bottle of fish sauce ( A Thai household staple!). If you love Caesar salad, you need to try this one.

    Kale Caesar salad on a wooden plate with fork

    This recipe was inspired by the kale Caesar that was served at Fiore Pizza and Bakery in Forest Park. I am so sad that they closed. They had the best Neapolitan style pizza in town. They also had an amazing kale Caesar served with white anchovies and lots of freshly grated parmesan cheese. I started recreating their recipes because I miss eating there so much! I’m still working on the pizza dough, but this salad is pretty spot on.

    Tuscan Kale Caesar Salad on wooden plate with fork with leafy kale, dressing and lemon in the background

    Do you not like kale? I hear you.  I know some of you may be thinking kale is just not my thing. It’s OK, I’m not offended. Kale was not one of my favorite veggies either, until I discovered Tuscan Kale.

    The Difference Between Tuscan Kale and Curly Kale

    tuscan kale versus curly kale photos

    My first encounter with kale was with the variety that has the tough stalks and prickly leaves known as curly kale. Curly kale is not my favorite but seems to be most common variety.  But did you know kale comes in over 150 varieties?  After I tried Tuscan kale, my outlook on this leafy cabbage cousin got greener. (Sorry Grandpa’s dad jokes are rubbing off on me). Tuscan kale, also known as lacinato or dinosaur kale, has  leaves  that are long and  deep green and sometimes blueish with a crinkly texture. The flavor is earthy and is milder and less bitter than curly kale.

    Ingredients

    • 1 cup mayonnaise- high quality- I use Hellman’s
    • 2 garlic cloves- grated
    • 1 Tbs fish sauce
    • 2 Tbs lemon juice- freshy squeezed.
    • 2 teaspoon Dijon mustard
    • 2 teaspoon Worcestershire sauce
    • ½ cup grated parmesan plus more for serving
    • ¼ teaspoon cracked black pepper
    • 2 bunches of Tuscan kale
    • croutons
    dishes of mayonnaise, parmesan cheese, black pepper, dijon mustard, fish sauce, lemon juice, garlic, kale and croutons

    How to Make Tuscan Kale Caesar

    Time needed: 10 minutes

    1. For the dressing

      Place all ingredients for the dressing in a small bowl and mix well.creamy caesar salad dressing in a glass bowl with spoon with lemon and grated cheese in the background

    2. Add kale

      Cut kale leaves into ribbons as thick or as thin as you like. Discard any tough stems.
      Tuscan kale leaves cut into ribbons

    3. Toss

      Toss the kale with dressing until evenly coated. Sprinkle with grated parmesan cheese and crushed croutons.overhead view of Tuscan kale caesar salad on a plate with grated parmesan cheese and croutons

    What to Serve with Tuscan Kale Caesar

    It is a perfect side dish for lasagna, Italian pasta or grilled chicken, beef, or fish. Of course this hearty salad can be a meal on its own or with added protein like, shrimp, sliced chicken breast strips or steak.

    Looking for more healthy salads?

    You might like these:

    Strawberry Goat Cheese Salad

    Harvest Salad

    Kale Caesar Salad on a wooden plate with grated parmesan cheese and croutons and a bunch of tuscan kale on the side

    Tuscan Kale Caesar

    Tuscan Kale Caesar is a twist on a classic! Tuscan kale is tossed with homemade Caesar dressing made with mayonnaise, lemon, garlic ,and fish sauce as the secret ingredient!
    Print Recipe Pin Recipe
    Nutrition Facts
    Tuscan Kale Caesar
    Amount per Serving
    Calories
    392
    % Daily Value*
    Fat
     
    38
    g
    58
    %
    Saturated Fat
     
    7
    g
    44
    %
    Trans Fat
     
    0.1
    g
    Polyunsaturated Fat
     
    21
    g
    Monounsaturated Fat
     
    8
    g
    Cholesterol
     
    28
    mg
    9
    %
    Sodium
     
    853
    mg
    37
    %
    Potassium
     
    447
    mg
    13
    %
    Carbohydrates
     
    8
    g
    3
    %
    Fiber
     
    5
    g
    21
    %
    Sugar
     
    2
    g
    2
    %
    Protein
     
    7
    g
    14
    %
    Vitamin A
     
    10909
    IU
    218
    %
    Vitamin C
     
    104
    mg
    126
    %
    Calcium
     
    374
    mg
    37
    %
    Iron
     
    2
    mg
    11
    %
    * Percent Daily Values are based on a 2000 calorie diet.
    Prep Time 10 minutes mins
    Total Time 10 minutes mins
    Course Salad
    Cuisine American, Italian
    Servings 5 Servings
    Calories 392 kcal

    Equipment

    • 1 salad bowl
    • 1 wooden spoon
    • 1 measuring cups
    • 1 measuring spoons

    Ingredients
      

    Dressing

    • 1 cup mayonnaise I use Hellman's
    • 2 cloves grated garlic
    • 1 Tbs fish sauce
    • 2 Tbs lemon juice freshly squeezed
    • 2 teaspoon Dijon mustard
    • 2 teaspoon Worcestershire sauce
    • ½ cup grated parmesan cheese plus more for serving
    • ⅛ teaspoon cracked black pepper

    Salad

    • 2 bunches Tuscan kale also known as lacinato, black or dinosaur kale
    • croutons

    Instructions
     

    • Place all ingredients for the dressing in a small bowl and mix well.
    • Wash and dry the kale. Cut kale leaves into ribbons as thick or as thin as you like. Discard any tough stems.
    • Toss the kale with dressing until evenly coated. Sprinkle with grated parmesan cheese and crushed croutons.

    Notes

    You can use any variety of kale, but Tuscan kale is recommended.
    Tuscan kale is also known as lacinato, black kale or dinosaur kale. The leaves are long and  deep green and sometimes blueish with a crinkly texture. The flavor is earthy, mild   and less bitter than curly kale.

    Nutrition

    Calories: 392kcalCarbohydrates: 8gProtein: 7gFat: 38gSaturated Fat: 7gPolyunsaturated Fat: 21gMonounsaturated Fat: 8gTrans Fat: 0.1gCholesterol: 28mgSodium: 853mgPotassium: 447mgFiber: 5gSugar: 2gVitamin A: 10909IUVitamin C: 104mgCalcium: 374mgIron: 2mg
    Keyword caesar salad, Tuscan kale
    Tried this recipe?Let us know how it was!
    Click here to add your own private notes.

    Fluffy Buttermilk Biscuits

    January 28, 2024 by Yao Leave a Comment

    buttermilk biscuits in a basket with a checkered napkin
    buttermilk biscuits in a basket with a checkered napkin

    Look at my big biscuits! Gotcha! If that line didn’t catch your attention, take a look at these homemade Fluffy Buttermilk Biscuits. They are bake up really high and are easier to make than you think. Frozen grated butter, cold buttermilk and proper folding of the dough are the key for baking up a perfect batch.  After years of making biscuits the wrong way, I finally learned the secret for making the best buttermilk biscuits.  Spoiler alert, you just can’t mix all the ingredients together willy nilly, shape them in a ball and throw them in the oven.

    six buttermilk biscuits on a baking sheet

    This recipe was inspired by the latest season of Fargo on Hulu (Season 5). I’ve been spending my cold January nights binge watching this series. If you are looking for a story that keeps you wanting more, I highly recommend it.  The main character Dorothy played by Juno Temple whips up some buttermilk biscuits made with Bisquick and tells Ole Munch the cure is to eat something made with love and joy.

    This recipe is almost as easy as Bisquick biscuits, but they taste even better! You just need to know some not so secret secrets and follow the steps in this recipe.

    The Secret to Making Fluffy Buttermilk Biscuits

    -Use frozen grated butter and cold buttermilk. Really cold butter and buttermilk help create light and flaky biscuits.

    -Do not overmix the dough. Your biscuits will turn out tough, dense, and flat if you do. Once the dough comes together, it is time to stop mixing.

    -Folding the dough. Do not skip this step. Folding the dough creates flaky layers. This process will help your biscuits bake up tall.

    buttermilk biscuits in a basket with a checkered napkin and butter in the background

    Ingredients

    • 2 ½ cups flour
    • 4 teaspoon aluminum free baking powder
    • 1 teaspoon baking soda
    • 1 teaspoon salt
    • ½ cup frozen grated butter- salted
    • 1 ¼ cup low fat buttermilk
    • 1 large egg- slightly beaten
    • 4 Tablespoons melted butter for brushing
    buttermilk biscuits with butter and honey

    How to Make Fluffy Buttermilk Biscuits

    Time needed: 33 minutes

    Preheat oven to 425F

    1. Prepare Butter

      Freeze a stick (½ cup) of butter. You want to make sure the butter is as cold as possible. Place it in the freezer at least 1 to 2 hours before starting the recipe.
      Use the large hole grater and grate the butter. Place the butter back in the freezer until ready to use.

    2. Dry ingredients

      In a large mixing bowl, combine flour, baking powder, baking soda and salt. I use a whisk to mix it all together.

    3. Cut in butter

      Add the grated butter to flour mixer. Use a pastry cutter to cut the butter in with the flour until it resembles very coarse crumbs.frozen grated butter and butter and butter cut into flour mixture

    4. Wet ingredients

      Wet ingredients. Add the buttermilk and the beaten egg. Use a spatula to mix until a ball of dough forms. It does not have to be perfect.a mixing bowl with flour egg and buttermilk

    5. Roll

      Now use your hands to take the dough out of the bowl and place it on a lightly floured surface. I tape parchment paper to my countertop and dust it with flour for easy cleanup.  Form the dough into a ball and then flatten it out into an oblong oval or rectangle, about 1 inch thick. I use my hands to do this, but you can use a rolling pin to get it more uniform.dough shaped in a long oval

    6. Fold left side

      Now fold the left side towards the middle so that it is folded in half.dough folded from the left

    7. Flatten

      Next flatten the dough until it is an inch thick.

    8. Fold right side and flatten

      After that you will fold the right side towards the middle and flatten it again. folded biscuit dough and flattened biscuit dough

    9. Cut out

      Use a 3-inch biscuit cutter to cut out dough into 8 pieces. If needed, piece together scraps of dough to reform a ball and repeat the previous step so that you do not have any waste. If you are like me and don’t have a biscuit cutter, just use a glass but flour or spray the rim with cooking spray first. If you want square biscuits, shape the dough into a rectangle and use a pastry cutter to cut squares.dough cut out into biscuits

    10. Brush

      Place biscuits on a parchment line baking sheet spaced 2 inches apart. Brush tops of biscuits with melted butter.unbaked biscuits brushed with melted butter

    11. Bake

      Bake at 425 degrees for 17-18 minutes until golden brown.buttermilk biscuits on a baking sheet

    Serving Suggestions

    These are delicious plain, but you can’t go wrong serving them with butter and honey or your favorite jam. I love it with raspberry. You can even make your own homemade breakfast sandwiches using these biscuits.

    biscuits with honey and butter

    How to Store Biscuits

    It is best to eat biscuits immediately while they are still warm but if you have leftovers, store them in an airtight container or sealed plastic bag. They will keep fresh at room temperature for one to two days.

    Reheating

    Reheat individual biscuits by microwaving on high for 10 seconds.

    Looking for more recipes to use up that buttermilk?

    Try these:

    Buttermilk Pumpkin Bread

    Easy Pumpkin Pancakes

    buttermilk biscuits in a basket with a checkered napkin

    Fluffy Buttermilk Biscuits

    These Fluffy Buttermilk Biscuits are almost as easy to make as Bisquick biscuits but taste so much better! The secrets for making tall and fluffy buttermilk biscuits are right in this recipe.
    Print Recipe Pin Recipe
    Nutrition Facts
    Fluffy Buttermilk Biscuits
    Serving Size
     
    1 biscuit
    Amount per Serving
    Calories
    318
    % Daily Value*
    Fat
     
    18
    g
    28
    %
    Saturated Fat
     
    11
    g
    69
    %
    Trans Fat
     
    1
    g
    Polyunsaturated Fat
     
    1
    g
    Monounsaturated Fat
     
    5
    g
    Cholesterol
     
    68
    mg
    23
    %
    Sodium
     
    840
    mg
    37
    %
    Potassium
     
    112
    mg
    3
    %
    Carbohydrates
     
    32
    g
    11
    %
    Fiber
     
    1
    g
    4
    %
    Sugar
     
    2
    g
    2
    %
    Protein
     
    6
    g
    12
    %
    Vitamin A
     
    577
    IU
    12
    %
    Vitamin C
     
    0.4
    mg
    0
    %
    Calcium
     
    175
    mg
    18
    %
    Iron
     
    2
    mg
    11
    %
    * Percent Daily Values are based on a 2000 calorie diet.
    Prep Time 15 minutes mins
    Cook Time 18 minutes mins
    Total Time 33 minutes mins
    Course Baking
    Cuisine American
    Servings 8 biscuits
    Calories 318 kcal

    Equipment

    • 1 baking sheet
    • 1 spatula
    • 1 mixing bowl
    • ł measuring cups
    • parchment paper
    • box grater
    • biscuit cutter optional
    • Rolling Pin
    • pastry cutter

    Ingredients
      

    • 2½ cups flour unbleached, all-purpose
    • 4 teaspoon baking powder aluminum free
    • 1 teaspoon baking soda
    • 1 teaspoon salt
    • ½ cup frozen grated butter salted or unsalted
    • 1¼ cup low fat buttermilk
    • 1 large egg slightly beaten
    • 4 Tbs melted butter for brushing

    Instructions
     

    Prepare butter

    • Freeze a stick (½ cup) of butter. You want to make sure the butter is as cold as possible. Place it in the freezer at least 1to 2 hours before starting the recipe.
      Use the large hole grater and grate the butter. Place the butter back in the freezer until ready to use.

    Dry ingredients

    • In a large mixing bowl, combine flour, baking powder, baking soda and salt. I use a whisk to mix it all together.

    Cut in butter

    • Add the grated butter to flour mixer. Use a pastry cutter to cut the butter in with the flour until it resembles very coarse crumbs.

    Wet ingredients

    • Add the buttermilk and the beaten egg. Use aspatula to mix until a ball of dough forms. It does not have to be perfect.

    Roll

    • Now use your hands to take the dough out of the bowl and place it on a lightly floured surface. I tape parchment paper to my countertop and dust it with flour for easy cleanup.  Form the dough into a ball and then flatten it out or roll it into an oblong oval or rectangle, about 1 inch thick. I use my hands to do this, but you can use a rolling pin to get it more uniform.

    Fold left side

    • Now fold the left side towards the middle so that it is folded in half.

    Flatten

    • Next flatten the dough until it is an inch thick.

    Fold right side and flatten

    • After that you will fold the right side towards the middle and flatten it again.

    Cut out

    • Use a 3-inch biscuit cutter to cutout dough into 8 pieces. If needed, piece together scraps of dough to reform a ball and repeat the previous step so that you do not have any waste. If you are like me and don’t have a biscuit cutter, just use a glass but flour or spray the rim with cooking spray first. If you want square biscuits, shape the dough into a rectangle and use a pastry cutter to cut squares.

    Brush

    • Place biscuits on a parchment line baking sheet spaced 2 inches apart. Brush top of biscuits with melted butter.

    Bake

    • Bake at 425 degrees for 17-18minutes until golden brown.

    Notes

    -Use frozen grated butter and cold buttermilk. Really cold butter and buttermilk help create light and flaky biscuits.
    -Do not overmix the dough. Your biscuits will turn out tough, dense, and flat if you do. Once the dough comes together, it is time to stop mixing.
    -Folding the dough. Do not skip this step. Folding the dough creates flaky layers. This process will help your biscuits bake up tall.

    Nutrition

    Serving: 1biscuitCalories: 318kcalCarbohydrates: 32gProtein: 6gFat: 18gSaturated Fat: 11gPolyunsaturated Fat: 1gMonounsaturated Fat: 5gTrans Fat: 1gCholesterol: 68mgSodium: 840mgPotassium: 112mgFiber: 1gSugar: 2gVitamin A: 577IUVitamin C: 0.4mgCalcium: 175mgIron: 2mg
    Keyword buttermilk biscuits
    Tried this recipe?Let us know how it was!
    Click here to add your own private notes.

    Sausage and Kale Pasta with Crispy Breadcrumbs

    January 22, 2024 by Yao Leave a Comment

    a bowl of sausage and kale pasta and a fork resting on a green cloth napkin
    a bowl of sausage and kale pasta and a fork resting on a green cloth napkin

    Baby, it’s still cold outside! This is my least favorite time of the year when the holidays are over and true winter sets in. When it's January cold, I crave hearty meals that don’t take a lot of effort to make like Sausage and Kale Pasta with Crispy Breadcrumbs. This recipe is perfect for busy weeknights as well as weekends because it comes together in just 30 minutes. This dish not only satisfies your tastebuds but also provides you with a healthy dose of greens and protein. Your favorite pasta shape gets tossed with savory Italian sausage and healthy Tuscan kale. To make it a little more special, finish it off with toasted parmesan breadcrumbs!

    a bowl of sausage and kale pasta and a fork

    Key Ingredients

    Pasta-Choose your favorite noodle. I’ve made this recipe using penne and gemelli but just about any shape will work. Farfalle, orecchiette, and rigatoni would be equally delicious.

    Sausage-I use spicy Italian sausage without the casing for this recipe because I like a little heat and you can get a nice crispy crumbly texture when browning. You can use mild or spicy sausage and if you want a reduced fat version, chicken or turkey sausage will also work.

    browned crumbled Italian sausage with minced garlic

    Kale-Tuscan Kale also known as Lacinato, or dinosaur kale is recommended. However, curly kale, red kale or spinach are good substitutions. Remove the tough stems and cut or tear the leaves into small pieces.

    a bowl of raw tuscan kale torn into pieces

    What’s the difference between Tuscan Kale and Curly Kale?

    Tuscan kale has long, thin dark green leaves with a crinkly texture. It cooks quicker and is more tender than curly kale. Curly kale has obviously curlier leaves, tend to have tougher stems and is slightly more bitter.

    Crispy breadcrumbs- This finishing touch adds a nice texture. Panko breadcrumbs, grated parmesan (the kind you find in a cylindrical can), and olive oil is all you need to add an extra special touch.

    Ingredients

    • 10 ounces dry pasta
    • 1 pound Italian sausage without casing
    •  ¼ cup olive oil
    • 5 cloves garlic- minced
    • ½ teaspoon crushed red pepper flakes
    • Tuscan kale- 4 cups, tough stems removed and roughly chopped
    • ½ cup pasta water
    • 1 cup Panko breadcrumbs
    • ¼ cup grated parmesan cheese
    uncooked Italian sausage, dried pasta, fresh tuscan kale, garlic cloves, bread crumbs and parmesan cheese

    How to Make Sausage and Kale Pasta with Crispy Breadcrumbs

    Time needed: 30 minutes

    1. Boil noodles

      Cook pasta according to package directions. Reserve 1 cup of pasta water before draining. Set aside.

    2. Sausage and kale

      Brown sausage in a large skillet over medium heat, breaking it into small crumbly pieces and stirring often. When sausage is half cooked, add 2 Tbs of the olive oil (save the rest for later), garlic, and red pepper flakes. Continue to cook until sausage is no longer pink, stirring often. Next add the kale. Cook and stir until kale is wilted. sauteed kale and sausage

    3. Stir in pasta

      Add pasta and half cup of pasta water. Stir and cook until noodles become glossy.
      You may need to add more pasta water if it looks too dry. Turn off heat.a skillet containing penne pasta, kale and ground sausage and a wooden spoon

    4. Toast breadcrumbs

      In a medium skillet- Heat the rest of the olive oil over medium low heat. Stir in breadcrumbs and parmesan cheese. Cook and stir until golden brown.a skillet containing toasted breadcrumbs and parmesan

    5. Serve

      Plate the pasta and top with breadcrumbs and more parmesan cheese if desired.sausage and kale pasta with toasted breadcrumbs

    How to Store Leftovers

    Store in an airtight container and refrigerate for up to 4 days.

    Looking for more easy pasta recipes for quick and dinners?  Try these:

    Penne with Tomatoes, Basil and Sausage

    Shrimp with Peas and Pesto Pasta

    Tuna with Crispy Eggplant Pasta

    a bowl of sausage and kale pasta and a fork resting on a green cloth napkin

    Sausage and Kale Pasta with Crispy Breadcrumbs

    Sausage and Kale Pasta with Crispy Breadcrumbs is perfect for busy weeknights, satisfies your tastebuds and provides you with a healthy dose of greens and protein.
    Print Recipe Pin Recipe
    Nutrition Facts
    Sausage and Kale Pasta with Crispy Breadcrumbs
    Amount per Serving
    Calories
    697
    % Daily Value*
    Fat
     
    41
    g
    63
    %
    Saturated Fat
     
    13
    g
    81
    %
    Polyunsaturated Fat
     
    6
    g
    Monounsaturated Fat
     
    20
    g
    Cholesterol
     
    73
    mg
    24
    %
    Sodium
     
    862
    mg
    37
    %
    Potassium
     
    463
    mg
    13
    %
    Carbohydrates
     
    56
    g
    19
    %
    Fiber
     
    3
    g
    13
    %
    Sugar
     
    2
    g
    2
    %
    Protein
     
    24
    g
    48
    %
    Vitamin A
     
    1781
    IU
    36
    %
    Vitamin C
     
    18
    mg
    22
    %
    Calcium
     
    144
    mg
    14
    %
    Iron
     
    3
    mg
    17
    %
    * Percent Daily Values are based on a 2000 calorie diet.
    Prep Time 10 minutes mins
    Cook Time 20 minutes mins
    Total Time 30 minutes mins
    Course Main Course
    Cuisine American, Fusion, Italian
    Servings 5 servings
    Calories 697 kcal

    Equipment

    • 1 large pot
    • 1 large skillet
    • 1 medium skillet
    • 1 colander
    • 1 wooden spoon

    Ingredients
      

    • 10 ounces dry pasta
    • 1 pound Italian sausage without casing
    • ¼ cup olive oil
    • 5 cloves garlic minced
    • ½ teaspoon red pepper flakes
    • 4 cups Tuscan kale tough stems removed and chopped
    • ¼ cup pasta water
    • 1 cup Panko breadcrumbs
    • ¼ cup grated parmesan cheese the kind you find in a green cylindrical can

    Instructions
     

    Boil noodles

    • Cook pasta according to package directions. Reserve 1 cup of pasta water before draining. Set aside.

    Sausage and kale

    • Brown sausage in a large skillet over medium heat, breaking it into small crumbly pieces and stirring often. When sausage is half cooked, add 2 Tbs of the olive oil (save the rest for later), garlic, and red pepper flakes. Continue to cook until sausage is no pink, stirring often. Next add the kale, pasta, and half cup of pasta water. Stir and cook until kale is wilted, and noodles become glossy.
      You may need to add more pasta water if it looks too dry. Turnoff heat.

    Toast breadcrumbs

    • In a medium skillet- Heat the rest of the olive oil over medium low heat. Stir in breadcrumbs and parmesan cheese. Cook and stir until golden brown.

    Serve

    • Plate the pasta and top with breadcrumbs and more parmesan cheese if desired.

    Notes

    Pasta-Choose your favorite noodle. I’ve made this recipe using penne and gemelli but just about any shape will work. Farfalle, orecchiette, and rigatoni would be equally delicious.
    Sausage-I use spicy Italian sausage without the casing for this recipe because I like a little heat and you can get a nice crispy crumbly texture when browning. You can use mild or spicy sausage and if you want a reduced fat version, chicken or turkey sausage will also work.
    Kale-Tuscan Kale also known as Lacinato, or dinosaur kale is recommended. However, curly kale, red kale or spinach are good substitutions. Remove the tough stems and cut or tear the leaves into small pieces. 

    Nutrition

    Calories: 697kcalCarbohydrates: 56gProtein: 24gFat: 41gSaturated Fat: 13gPolyunsaturated Fat: 6gMonounsaturated Fat: 20gCholesterol: 73mgSodium: 862mgPotassium: 463mgFiber: 3gSugar: 2gVitamin A: 1781IUVitamin C: 18mgCalcium: 144mgIron: 3mg
    Keyword easy pasta recipes, sausage and kale pasta, Tuscan kale
    Tried this recipe?Let us know how it was!
    Click here to add your own private notes.
    • 1
    • 2
    • 3
    • 4
    • Next Page »

    Thanks for stopping by!

    Delicious Detour (DD) is your path to discovering exciting new recipes that are easy to make so you don't have to eat boring food! Here you will find fusion and classic recipes plus food centered travel tips!

    More about DD

    Popular

    • a plate of apple crisp with a fork and apples and a skillet near by
      Easy Autumn Apple Crisp
    • Bowl of Thai chicken coconut curry soup with herbs and lime wedges.
      ThaI Chicken Khao Soi (Khao Soi Gai)
    • Three glasses of Brazilian limeade garnished with lime slices
      Easy Brazilian Limeade
    • Almond flour chocolate olive oil cake topped with raspberries
      Almond Flour Chocolate Olive Oil Cake

    Seasonal

    • Kilauea prior to erupting at Volcanoes National Park
      The Big Island of Hawaii: Where to Eat, What to See and Insider Travel Tips
    • Rialto Bridge early morning
      Three Days in Venice
    • huli huli chicken with pineapple and dipping sauce
      Huli Huli Chicken
    • Delicious Detour easy lemon and pistachio olive oil cake
      Lemon and Pistachio Olive Oil Cake

    Footer

    ↑ back to top

    About

    • Privacy Policy
    • Terms & Conditions
    • Nutrition Disclaimer

    Newsletter

    • Sign Up emails via Substack for recipes, food forward travel tips and fun finds. Delicious Detour News delivered to your inbox!

    Contact

    • Contact

    Copyright © 2024 Delicious Detour